20 Baby Bottle Organization Ideas for 2026
I’ve found that organizing baby bottles before bedtime can make nighttime feeds much easier. When bottles, nipples, lids, and feeding supplies have a dedicated place, I spend less time searching through drawers and more time focusing on my baby. A simple setup can work just as well as an expensive organizer, whether I have a large kitchen, a small apartment, or a nursery upstairs.
In this guide, I’m sharing 18 baby bottle storage ideas that help keep feeding essentials organized and easy to reach. From rolling bottle stations and countertop prep hubs to labeled cabinets and portable baskets, these setups suit different spaces and routines. I’ll also cover practical ways to organize small parts, manage drying areas, and keep clean feeding equipment protected.
Key Takeaways
- I can save time during night feeds by keeping everyday feeding supplies in one dedicated place.
- Rolling carts, drawer organizers, and stackable bins help make the most of limited space.
- Clear containers and simple labels make it easier to find bottles, nipples, lids, and pump parts.
- I should store feeding equipment only after it has dried properly and keep clean items protected from dust.
- I can keep two or three bottles ready for convenience, provided I follow safe milk storage and preparation guidelines.
Rolling Bottle Station
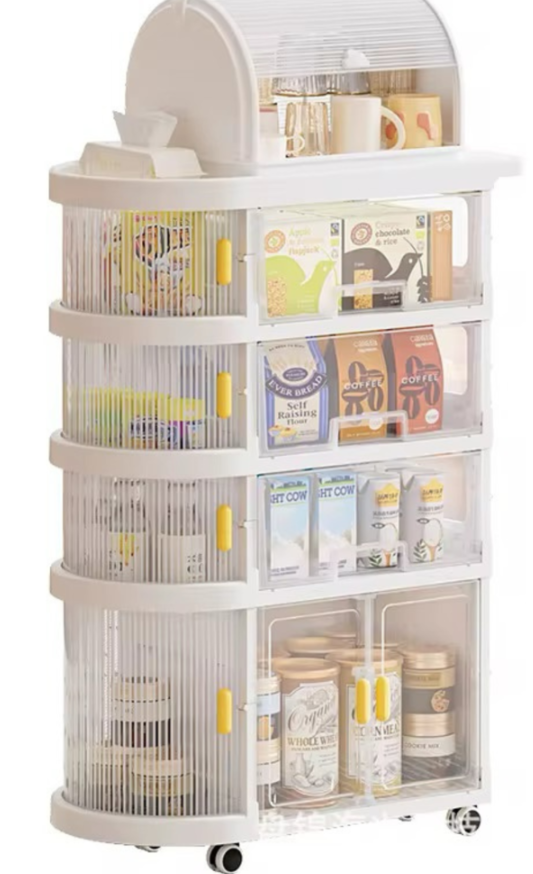
I like the idea of a rolling bottle station because it lets me keep feeding essentials close without making the bedroom feel cluttered. I can move the cart beside the bed during a night feed and roll it back to a convenient corner in the morning.
I would use the top shelf for clean, ready-to-use feeding equipment and wipes, the middle shelves for formula containers and extra accessories, and the bottom shelf for backup supplies stored in clean bins. Keeping each category separate makes everything easier to find.
A small bedside lamp can provide enough light to locate supplies without switching on bright overhead lights. However, I would keep prepared milk or formula within the recommended temperature and storage limits rather than leaving it on the cart overnight.
Countertop Prep Hub
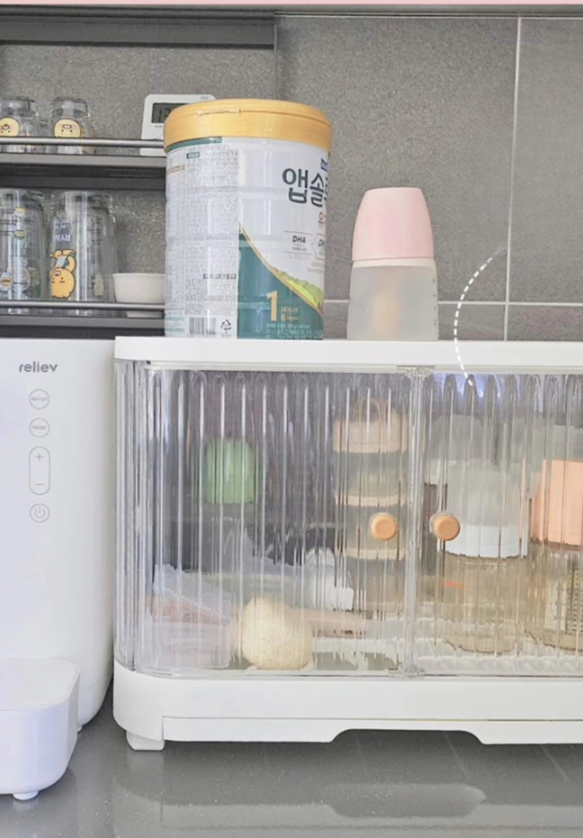
When I prepare bottles in the kitchen, I find it helpful to keep everything together near the sterilizer or bottle-preparation area. A compact countertop organizer can hold clean, completely dry bottles while keeping nipples, rings, and lids in separate compartments.
I would choose a covered storage box with enough room for daily-use supplies without taking over the entire counter. Placing formula nearby can make preparation more convenient, but I would keep the powder sealed in its original container and follow the manufacturer’s storage instructions.
Good kitchen lighting also makes it easier to check measurements and prepare feeds carefully. With one dedicated prep area, I can avoid walking between several cabinets whenever I need another item.
Drying Cart Corner
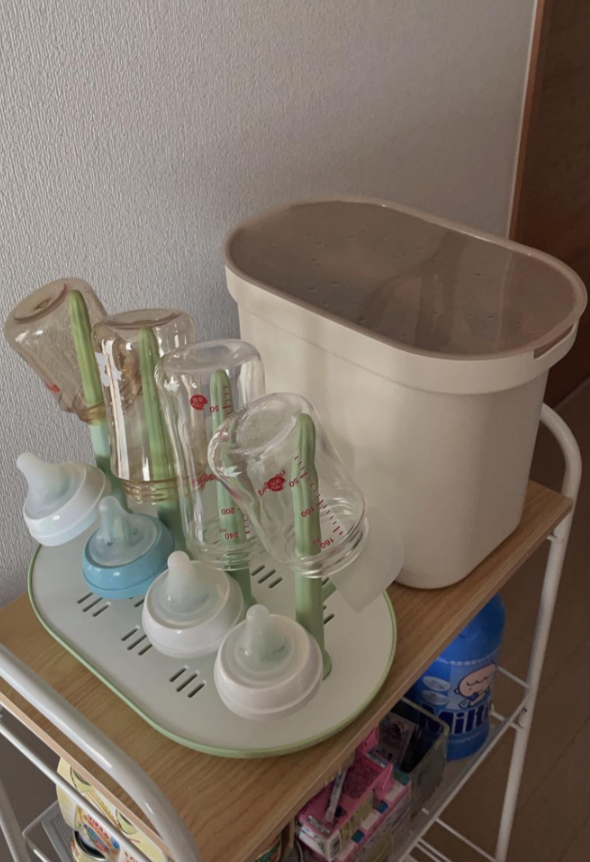
I can turn an unused hallway corner or a small area near the nursery into a practical bottle-drying station. A narrow cart provides room for a proper drying rack on top, with cleaning brushes and other accessories stored separately on the lower shelves.
After washing, I would place bottle components on the rack according to the manufacturer’s instructions and allow them to air-dry completely. I would avoid stacking wet parts in a covered container because trapped moisture can encourage microbial growth.
Once everything is fully dry, I would transfer the feeding equipment into a clean, protected storage area. Keeping the washing and feeding supplies organized in separate zones makes the daily routine easier to manage.
Drawer-Style Organizer
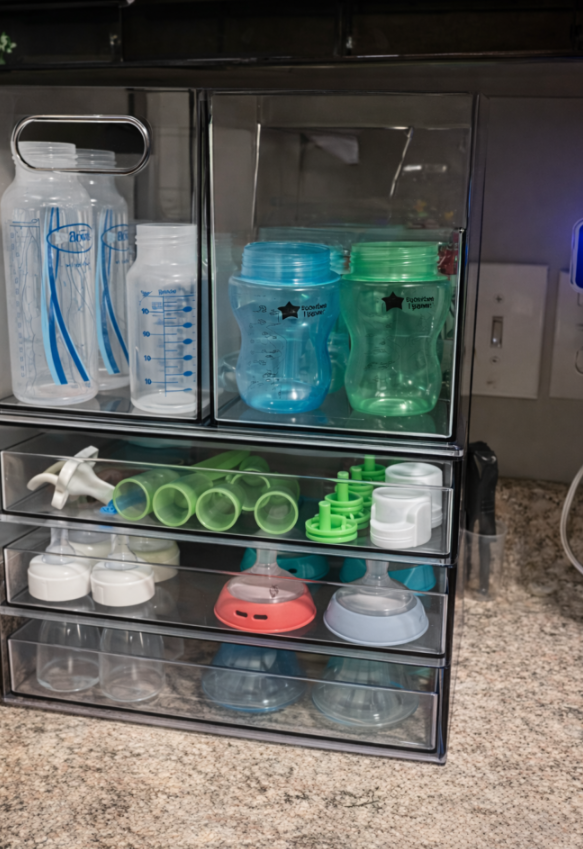
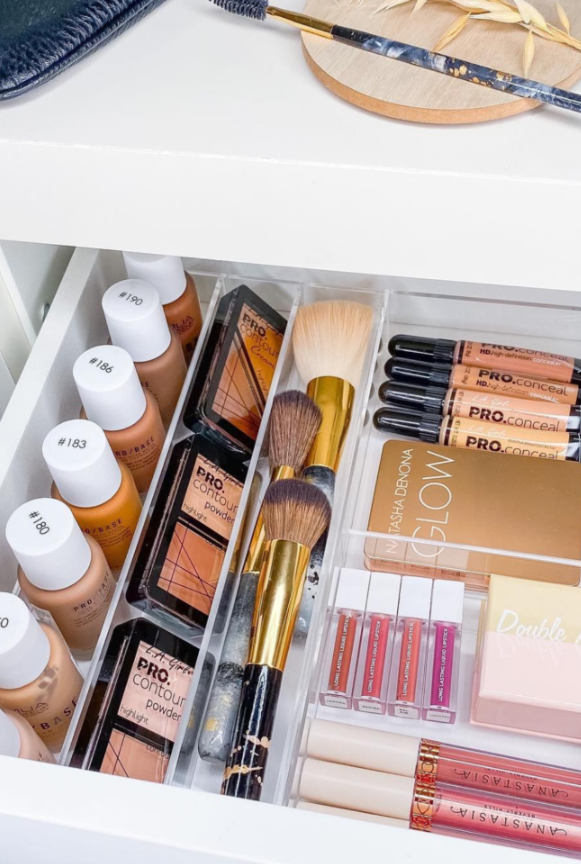
I prefer clear compartments when I need to organize lots of small bottle parts. A drawer-style organizer lets me separate bottle bodies, nipples, rings, valves, and lids instead of leaving everything mixed together in one container.
I would dedicate each compartment to a particular item and keep compatible parts together. This arrangement is especially useful when I have several bottle types or different nipple flow rates to manage.
The organizer can sit on a kitchen counter or fit inside a deep drawer, depending on the available space. A small nightlight nearby can also help me find what I need without turning on every light in the room.
Vertical Wall Rack

When counter space is limited, I look for ways to use the wall or the inside of a cabinet. A vertical rack can free up valuable workspace while giving bottle accessories a permanent place.
I would use separate hooks or compartments for compatible rings, measuring spoons, and other small accessories. Clean bottles can be stored on suitable shelves once they are completely dry, provided the rack is designed to support them securely.
Before mounting anything, I would check the weight limit and make sure the rack cannot fall or become accessible to a child. Positioning it near the preparation area also reduces unnecessary steps during busy feeding times.
Clear Stack Bins

I find clear stackable bins useful because I can see what I have without opening every container. They work well inside kitchen cabinets, on deep shelves, or in a dedicated bottle-storage cupboard.
I would use larger bins for clean, dry bottles and smaller containers for nipples, lids, and other accessories. Keeping the smaller pieces separated makes it easier to find matching parts and notice when supplies are running low.
Before stacking the bins, I would check that they sit securely and that the upper containers are easy to reach. A small cabinet light can improve visibility, especially when I need supplies during an overnight feed.
Minimal Drying Rack
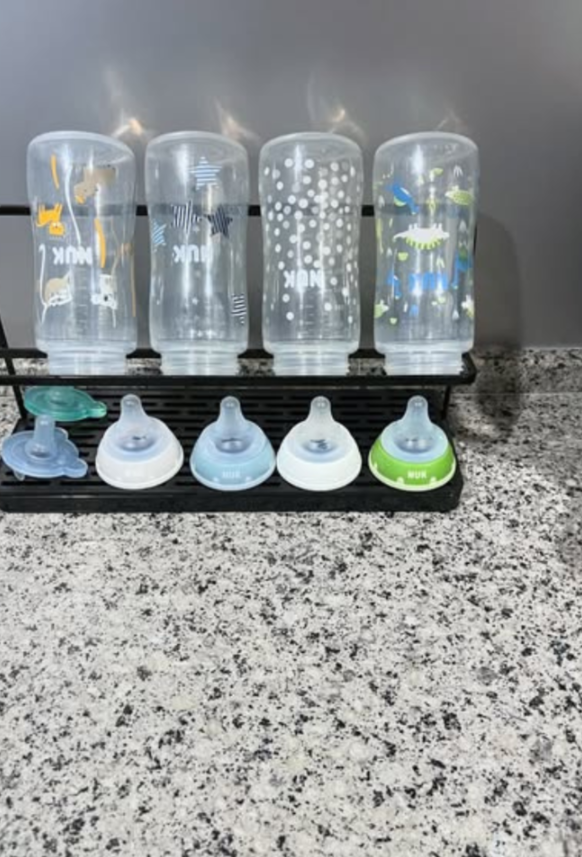
I don’t always need a large drying tower to keep bottles organized. A slim drying rack beside the sink can provide enough space for the bottles and accessories I use most often without filling the entire counter.
I would position the rack away from splashes and place each washed component so air can circulate around it. Nipples, collars, and lids should have enough space to dry instead of being left wet inside a bowl or bottle.
To keep the area manageable, I would dry only the equipment that fits comfortably on the rack and store fully dry items elsewhere. A narrow setup also encourages me to clear away unused accessories instead of letting them accumulate.
Compact Drawer Tower
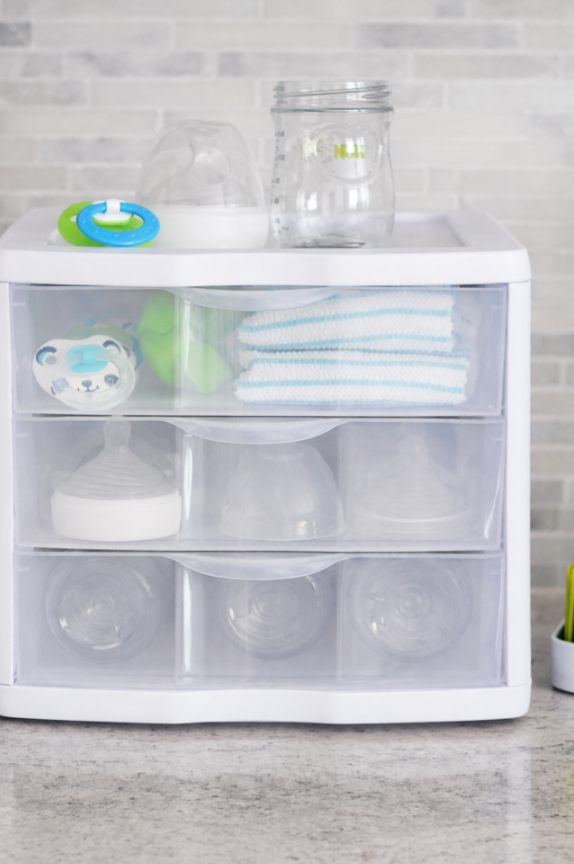
A compact drawer tower can be a useful choice when my kitchen has limited counter space. Instead of spreading feeding supplies across several surfaces, I can store them vertically in a small footprint.
I would keep clean burp cloths in the top drawer, small bottle parts in a divided middle drawer, and clean, dry bottles in a lower section. Each drawer would have a clear purpose so I can put everything back quickly after washing or feeding.
I would place the tower near the drying rack or preparation area, making sure it stays stable and away from heat and water splashes. This simple arrangement helps me keep feeding essentials organized without adding bulky furniture.
Full Bottle Station

When I have enough space, I would set up a complete bottle station that combines storage, preparation supplies, and cleaning accessories in one place. The goal is to make each step easy to follow without mixing clean equipment with items that still need washing.
I would use drawers for clean, dry bottle bodies and accessories, with separate compartments for rings, lids, and nipples. A nearby shelf could hold other feeding essentials, while the station itself stays clear enough for safe preparation.
Placing the setup near the sink or the appropriate preparation equipment reduces unnecessary movement. I would also keep the work surface clean and follow the correct instructions for preparing breast milk or formula rather than relying on organization alone to make feeding safe.
Labeled Dual Cabinets

When I need to organize bottles for twins or more than one child, separate storage zones can prevent mix-ups. Two small cabinets or divided storage units give each child a clearly marked place for their bottles and accessories.
I would label the doors or bins with each child’s name and keep their feeding equipment separated. Within each cabinet, I could use one section for clean, dry bottles and another for compatible nipples, rings, and lids.
This approach is also helpful in shared homes where more than one caregiver prepares feeds. I would position the cabinets somewhere stable and accessible while keeping small parts and cleaning products out of children’s reach.
Cabinet Side Stack

I often look for unused gaps beside kitchen cabinets because they can provide extra storage without reducing the main work surface. A slim stacked organizer can fit into one of these spaces and create a dedicated area for feeding supplies.
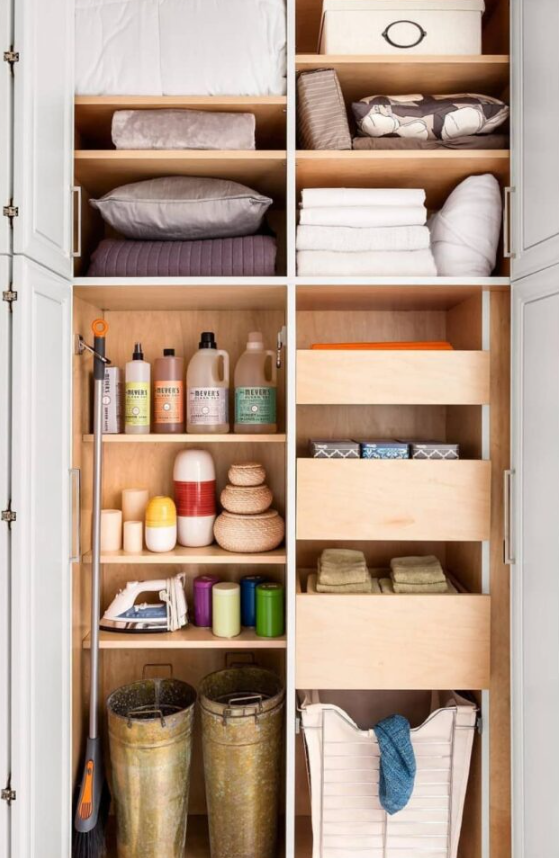
I would use the lower compartments for clean, dry bottles and the upper sections for small accessories kept in separate containers. Clear bins make it easier to identify the contents without pulling everything out.
Before choosing an organizer, I would measure the available width and height to ensure it fits safely. Using this overlooked space can help me keep the kitchen counter free for everyday cooking and bottle preparation.
Flow-Labeled Shelf
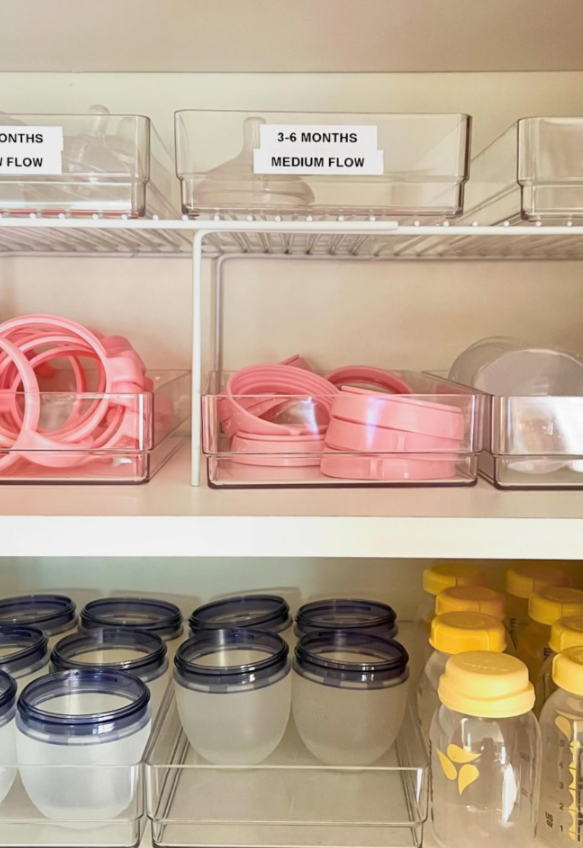
As my baby grows, keeping track of different nipple flow rates can become another small task during feeding. I would use labeled bins to separate nipples according to their manufacturer’s flow designation instead of relying on memory.
Clear containers make it easier to check which sizes I have available. I would also store matching rings and other compatible components together so I can assemble the correct bottle without searching through several drawers.
I would follow the bottle manufacturer’s guidance and my baby’s feeding needs when choosing a nipple rather than automatically moving to a faster flow with age. A small cabinet light can make the labels easier to read during nighttime preparation.
Labeled Cabinet Zones
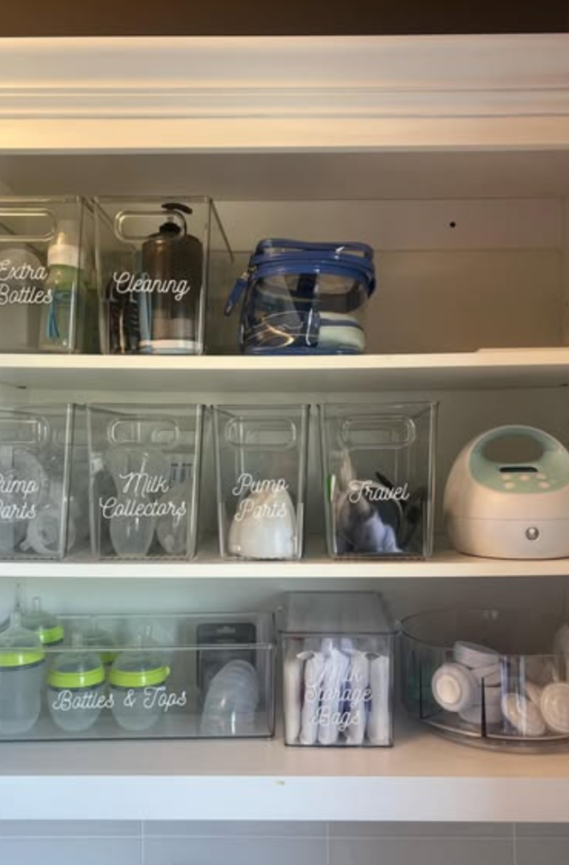
I find that a cabinet becomes much easier to manage when every shelf or bin has a specific purpose. This setup is particularly helpful if I use bottles, breast-pump parts, milk storage bags, and travel accessories throughout the day.
I would assign separate labeled containers to each category and keep everyday bottles in an easy-to-reach location. Pump parts and milk storage supplies would have their own sections, while cleaning brushes and other washable accessories would be stored separately.
I would make sure clean feeding equipment stays separate from used pump parts and items waiting to be washed. With a consistent layout, other caregivers can also find what they need without having to ask where everything belongs.
Covered Counter Case
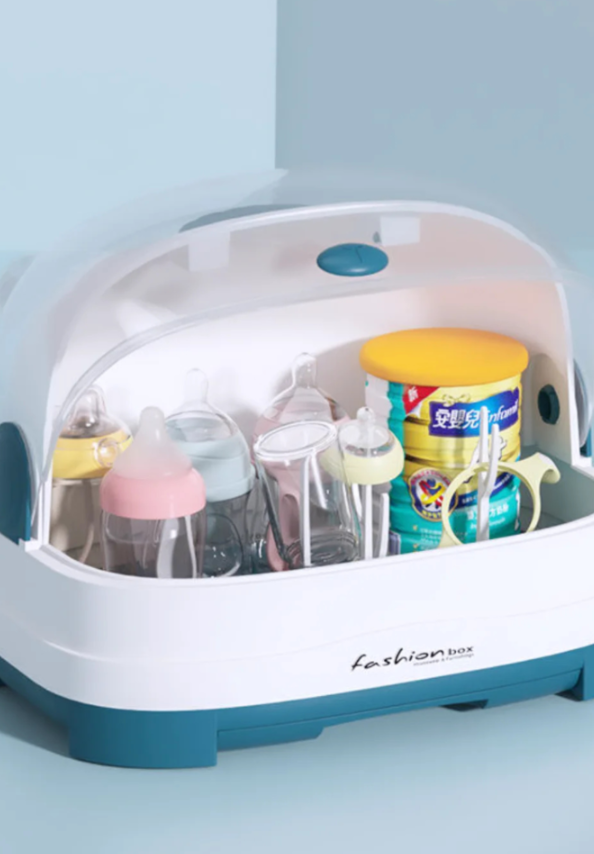
A covered countertop case can help protect clean, dry bottles from household dust and cooking residue. I would place it near my preparation area so I can move equipment from drying to storage without carrying it across the kitchen.
Inside the case, I would arrange fully dry bottles upright and keep compatible small parts in a separate clean compartment. A clear cover makes it easier to see what is available without opening the container repeatedly.
I would not use a closed case to store bottles that are still damp or treat an ordinary storage box as a substitute for proper sterilization. The container should remain clean, dry, and suitable for storing feeding equipment.
Open Air Rack
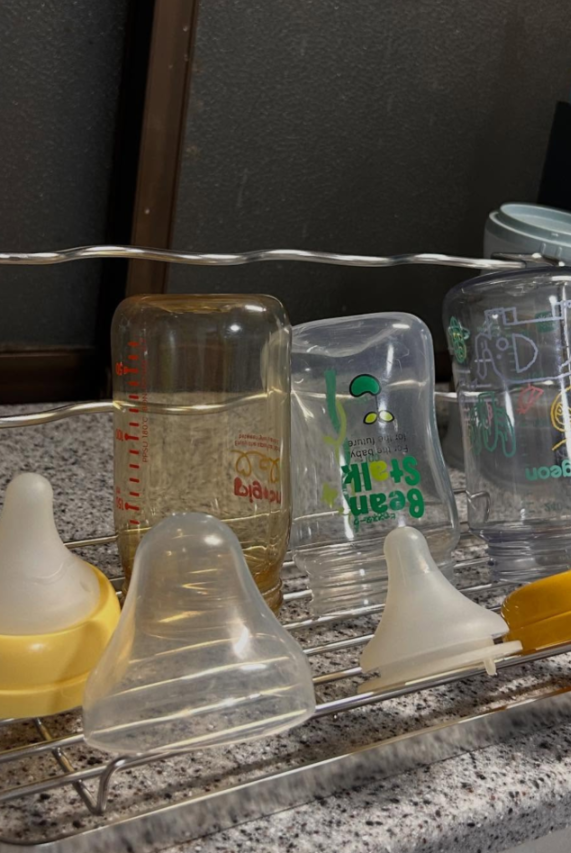
Sometimes a simple open rack is all I need to organize washed bottles. A basic rack near the sink allows water to drain while leaving enough space for air to circulate around the separate components.
I would keep the rack away from dirty dishes, sink splashes, and other sources of contamination. Bottle bodies, nipples, collars, and lids should be positioned according to the manufacturer’s instructions so every part can dry properly.
I would also clean the rack regularly and avoid overcrowding it. Once the equipment is completely dry, I would transfer it to a clean storage container or cabinet rather than leaving it exposed indefinitely.
Nursery Drying Tray

For homes with an upstairs nursery, a small drying tray can reduce the need to carry feeding equipment between floors. I would place it on a stable, easy-to-clean surface away from the edge of a dresser or changing table.
The tray should provide enough room for washed bottle components to air-dry without touching dirty items. I would keep it away from diapers, used clothing, and other nursery supplies that could contaminate the clean equipment.
Once the parts are fully dry, I would move them into a clean, covered container. This arrangement can make daily organization more convenient, but I would still follow the proper washing and sanitizing guidance for my baby’s age and needs.
Grab-and-Go Basket
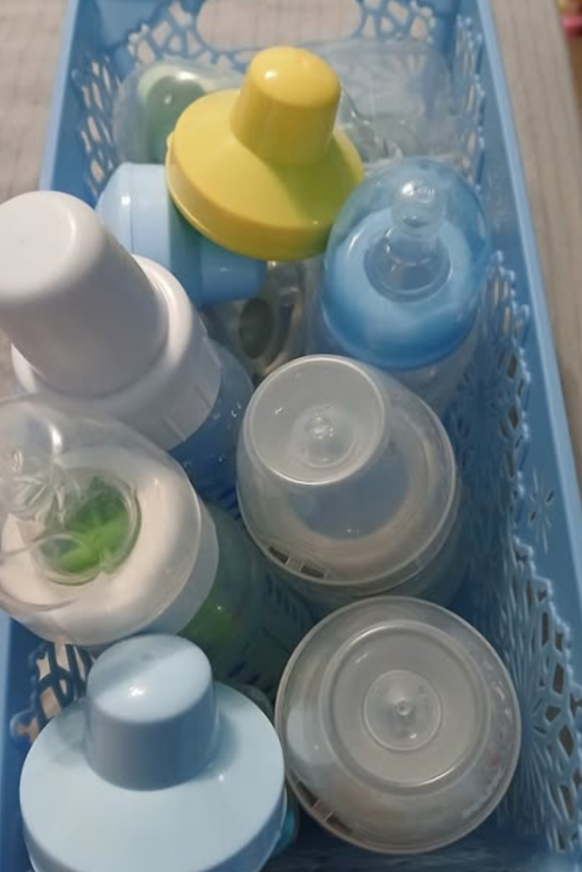
I like a grab-and-go basket for keeping a small number of everyday feeding supplies together. A lightweight basket can sit on a shelf or inside a suitable storage unit, making it easy to move clean, dry equipment when needed.
I would use it for fully dry bottles and accessories that are ready for use, rather than storing prepared milk or formula at room temperature. Keeping the basket small also helps me avoid collecting more supplies than I actually need.
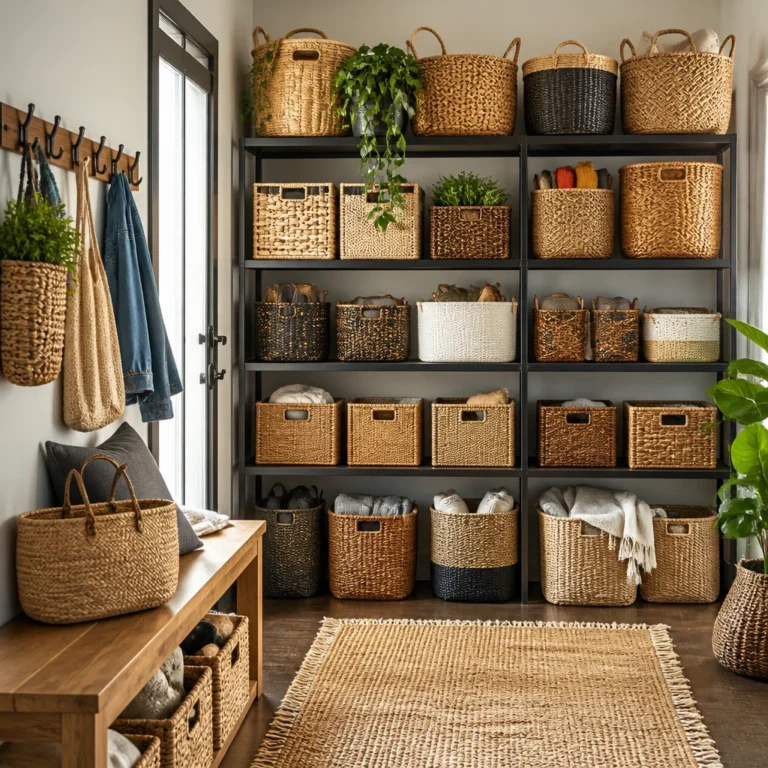
I would choose a washable basket or a container with a smooth, easy-to-clean interior. If I use an open basket, I would store it in a clean location away from dust, pets, and other possible sources of contamination.
Portable Bottle Box

When feeding supplies need to move between rooms, a portable bottle box can make organization easier. I would choose one with a secure lid, a sturdy handle, and separate compartments for clean, dry bottles and smaller accessories.
The box can be kept on a stable shelf during the day and carried to another room when needed. Before moving it, I would check that the lid is secure and that the contents cannot tip or mix together.
For outings, I would keep prepared breast milk or formula separate from dry equipment and follow the appropriate temperature and storage recommendations. A portable box is useful for carrying supplies, but it does not replace a proper insulated cooler when temperature control is needed.
Simple Shelf System
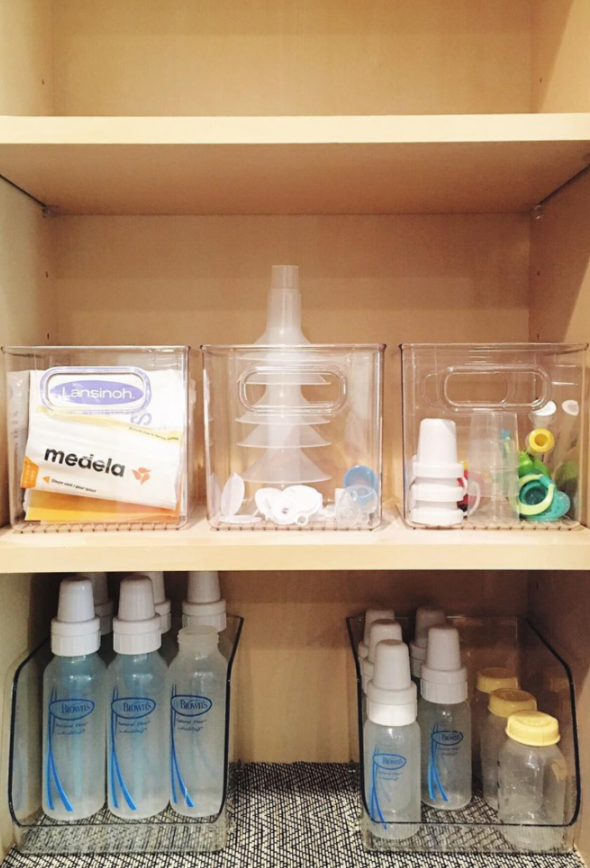
I don’t need expensive organizers to create a useful bottle-storage system. A basic shelf with a few clear bins can keep feeding equipment grouped and easy to find.
I would use one bin for clean, dry bottles, another for compatible small parts, and a separate container for breast-pump accessories or milk storage supplies. Deep bins can help keep bottles upright, while a washable shelf liner makes routine cleaning easier.
I would label each container and leave enough room to remove it without disturbing the others. This setup is affordable, easy to adjust as feeding needs change, and simple for other caregivers to follow.
Organized Prep Drawer

A deep kitchen drawer with dividers is a practical option when I want to keep bottle supplies out of sight. It works particularly well near the sink or the area where I prepare feeds.
I would create separate sections for clean, dry bottles, nipples, rings, lids, and other compatible accessories. If I also store pump parts or measuring tools nearby, I would keep them in clearly defined sections and make sure everything is clean before putting it away.
I would avoid cramming the drawer so tightly that parts become difficult to remove or moisture gets trapped. A simple layout makes it easier to maintain the system and return each item to its proper place after use.
FAQs
How many bottles should you keep ready for night feeds?
I would start with two or three clean, fully dry bottles if that number suits my baby’s feeding routine. This gives me a small supply to work with without filling the bedside area with unnecessary equipment.
The important distinction is between storing clean, empty bottles and preparing bottles containing milk or formula. Clean equipment can be stored in a suitable protected place, while prepared feeds must follow the relevant preparation, refrigeration, and discard guidelines.
For formula-fed babies, I would follow the product instructions and current infant-feeding safety guidance. For expressed breast milk, I would follow recommended breast milk storage limits.
Can you store clean bottles in the bedroom safely?
Yes, I can store clean, completely dry bottles in a clean, covered container or a clean, enclosed drawer, provided the storage area stays dry and away from contamination. I would avoid leaving bottles exposed to dust, pets, or used feeding equipment.
If I sterilize bottles, I would follow the sterilizer manufacturer’s instructions for storage and handling because some methods keep equipment protected only while the container remains closed.
I would not leave prepared formula or breast milk beside the bed overnight. Instead, I would refrigerate prepared feeds as required and follow the applicable time and temperature limits before feeding my baby.
What is the best way to organize bottle nipples and lids?
I would use small, divided containers to keep nipples, lids, rings, and valves separate. If I use different bottle brands or nipple flow rates, I would label each section and keep compatible parts together.
This reduces the chance of mixing components and saves time during feeds. I would also make sure every part is clean and completely dry before putting it into storage.
Should I store wet bottles in a covered container?
No. I would let washed bottle components air-dry thoroughly before placing them in a closed storage container. Trapped moisture can create conditions that support microbial growth.
I would use a clean drying rack first, then transfer the fully dry parts to a clean, protected storage area. If the manufacturer’s instructions specify a different storage procedure after sterilization, I would follow those directions.
How can I organize baby bottles in a small kitchen?
I would start by using vertical space, deep drawers, narrow carts, or stackable bins instead of spreading supplies across the counter. A single designated feeding zone near the washing and preparation area can make the routine easier.
I would keep only everyday supplies within easy reach and store backup items elsewhere. Clear containers and simple labels help me maintain the setup without needing a large kitchen or expensive storage furniture.
Final Thoughts
I believe the best baby bottle storage system is the one that fits my home and makes everyday feeding easier. A rolling cart may work well for nighttime feeds, while a divided drawer or compact countertop station may be a better fit for a small kitchen.
I would start with one dedicated area, separate clean equipment from used items, and make sure bottles are fully dry before storing them. I would also keep prepared milk and formula separate from ordinary storage supplies and follow the relevant safety guidelines. A few thoughtful changes can make bottle preparation more organized without adding extra work to an already busy day.