18 Travel Makeup Organization Ideas for 2026
Traveling with makeup is much easier when every product has its own place. I find that the best way to organize a travel makeup bag is to separate liquids, powders, brushes, and everyday essentials instead of packing everything together. The right makeup organizer can protect delicate compacts, reduce spills, and help me get ready without unpacking my entire bag.
In this article, I cover 15 makeup organization ideas for travel, including clear double pouches, layered zip cases, divider bags, hanging organizers, and simple ways to sort products before packing. I also share practical tips for keeping brushes clean, preventing products from moving around, and separating skincare from makeup. These ideas work for weekend getaways, longer vacations, and carry-on travel.
Key Takeaways
- Separate makeup, skincare, and tools to keep your bag clean and easy to manage.
- Use clear pouches when you want to see products without opening every compartment.
- Keep powders and compacts protected from pressure during travel.
- Store brushes in dedicated holders to protect their bristles.
- Pack daily essentials near the zipper for quick access.
- Remove products you will not use to save space and avoid an overcrowded bag.
Is There a System to Arrange Makeup So I Can Find Everything Quickly While Traveling?
Yes. I recommend organizing makeup by category and frequency of use rather than simply putting everything into one large cosmetic bag. When products have designated places, I can find what I need without moving bottles, palettes, and brushes around.
I start by separating liquids and creams from powders and tools. Foundations, concealers, and skincare liquids go into a leak-resistant pouch, while compacts and palettes stay flat in a protected section. Brushes, sponges, and pencils belong in their own compartments so they do not rub against other products.
For extra protection, I place a clean cotton pad inside powder compacts when the product design allows it. I also secure bottle caps and keep liquid products upright whenever possible. Before leaving, I remove anything I do not expect to use and place my everyday essentials where I can reach them quickly.
This simple system makes a travel makeup bag easier to unpack, use, and repack. I spend less time searching for products and have a better chance of keeping everything clean and organized.
Layered Zip Case
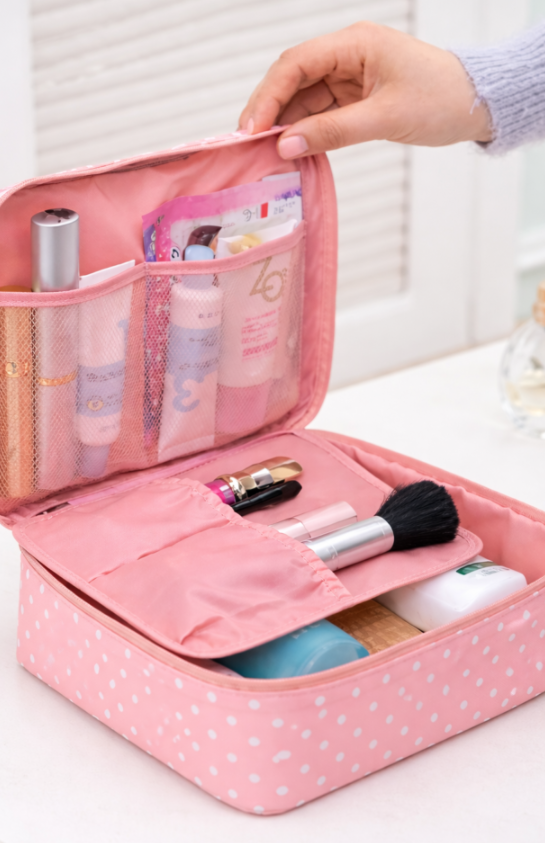
A layered zip case is useful when I need to pack several types of makeup in a small space. Its separate levels allow me to organize taller products, flat palettes, and smaller everyday items without piling everything into one compartment.
I use the upper section for foundations, tubes, and other products that are easy to identify at a glance. The middle layer can hold mascara, pencils, and frequently used brushes, while the base is suitable for flat compacts and palettes that need a stable place.
When packing, I check that the layers close without putting pressure on delicate products. I also keep heavier items near the bottom to make the case easier to carry.
This makeup organizer works well for weekend trips and carry-on packing because each section has a clear purpose. Instead of emptying the whole bag, I can open the layer I need and find my products quickly.
Clear Double Pouch

A clear double pouch is a practical choice when I want to see my makeup before opening every compartment. The transparent material makes it easier to check what I packed and spot products that may need refilling before leaving home.
I would use the upper pouch for securely closed liquid products and the lower section for flat items such as palettes and powder compacts. Keeping these categories apart helps prevent a leaking foundation or moisturizer from reaching delicate powders.
I also avoid filling either section so tightly that the zippers press against the contents. A little room makes it easier to remove products without disturbing everything else.
This setup is particularly useful for carry-on travel because I can identify the products I need quickly. However, a clear pouch does not automatically meet airport liquid rules, so I always check the requirements for my airline and departure airport before flying.
Structured Divider Bag

A structured divider bag helps me organize a larger makeup collection without allowing every product to mix together. Its built-in sections provide separate spaces for bottles, compacts, and makeup tools.
I would place brushes and pencils in a central compartment or dedicated holder, keeping them away from creams and liquid products. Smaller compacts can sit upright in elastic pockets, while the main section holds securely closed bottles and tubes.
For longer trips, I find it helpful to group products by purpose. Face makeup can occupy one side, tools can stay in the middle, and skincare can go into a separate compartment or pouch.
The main benefit is that the bag keeps its shape and makes products easier to locate. Before buying one, I check the compartment sizes against my tallest bottle and widest palette to make sure my essentials will fit.
Hanging Compartment System
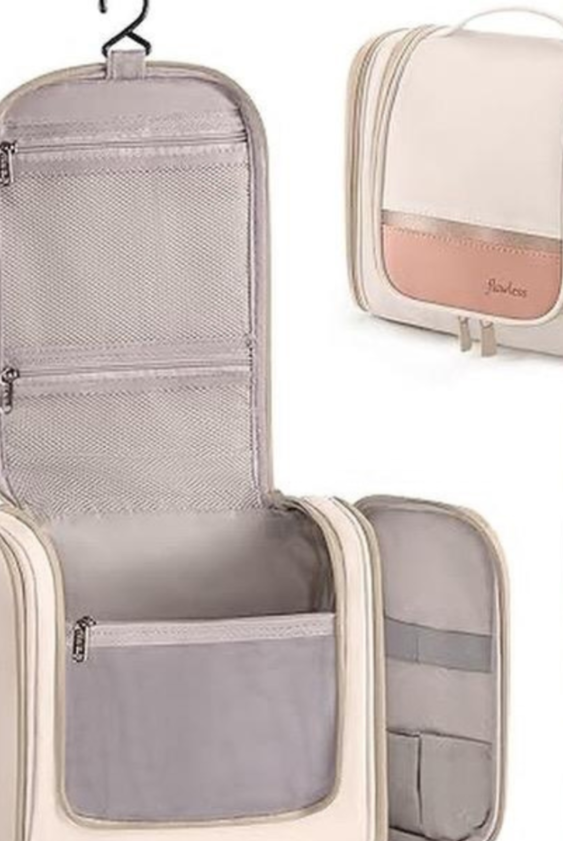
A hanging makeup organizer is helpful when hotel bathroom counters or dressing tables have limited space. Instead of spreading products across the counter, I can hang the organizer from a suitable hook and access several compartments at once.
I would use the smaller upper pockets for mascara, brow pencils, and other lightweight essentials. Dedicated brush slots can keep tools separated, while a larger compartment can hold palettes, skincare, and securely closed bottles.
I keep heavier items in supported lower compartments and make sure the organizer’s hook can safely carry its weight. Before hanging it, I also check that the pockets close properly and that bottles will not fall out when the bag moves.
This arrangement works well for road trips, family vacations, and longer hotel stays. It gives each product a defined place and makes it easier to pack everything away when I leave.
Custom Grid Layout
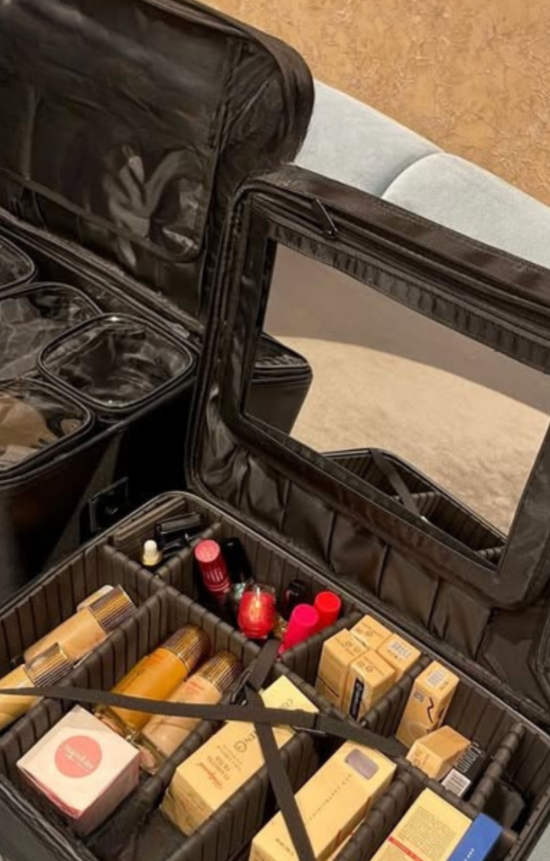
A custom grid layout is useful when I travel with a full makeup routine. Adjustable dividers create individual sections for foundations, lipsticks, concealers, skincare bottles, and other products that might otherwise shift around.
I would make smaller compartments for lip products and concealers, then leave wider spaces for palettes and setting sprays. Products should fit comfortably rather than being squeezed into sections that are too narrow.
I also arrange the bag so frequently used items are easy to reach. Heavier products should sit securely near the base, while delicate compacts need enough protection to avoid pressure from surrounding items.
This setup is a good option for longer vacations or professional travel when I need more than a few essentials. The adjustable layout is especially useful if my collection includes products of different shapes and sizes.
Upright Open Access

An upright open-access makeup bag makes it easier to see products without lifting several items first. It is a good choice for short trips when I want my everyday cosmetics ready to use.
I arrange taller products, such as setting sprays and moisturizer bottles, toward the back. Medium-sized tubes go in the middle, while smaller jars and compacts sit near the front. This arrangement improves visibility and makes the most-used products easier to grab.
A side sleeve or separate holder is useful for brushes because it keeps the bristles away from creams and powders. I also make sure bottles are closed securely and fit snugly enough that they will not tip over.
For weekend getaways or gym visits, this setup offers a simple balance between storage and quick access. I can open the bag, check my supplies, and start getting ready without unpacking everything.
Brush Lid Storage
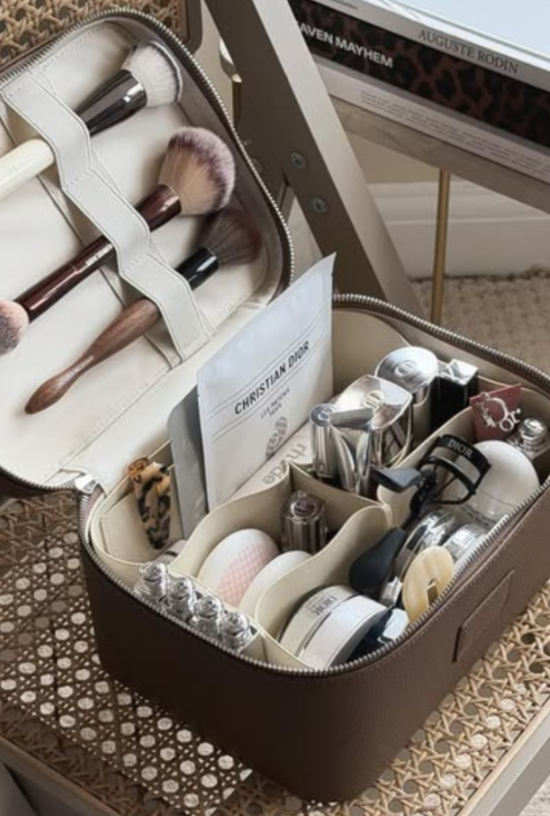
Brush lid storage is worth considering if I travel with several makeup brushes. Instead of letting brushes roll around beside bottles and palettes, this type of case provides dedicated slots in the lid or upper panel.
I place larger face brushes in wider loops and smaller eye brushes in narrower slots. Keeping brushes separate helps protect their shape and reduces contact between bristles and other products.
Before packing, I make sure the brushes are clean and completely dry. I also check that the lid closes without pressing too firmly against the bristles, especially when the case contains larger brushes.
The lower section can hold compacts, tubes, and other cosmetics, provided they fit securely. This layout is useful for longer stays when I want to carry a more complete makeup routine without sacrificing brush protection.
Category Cluster Packing
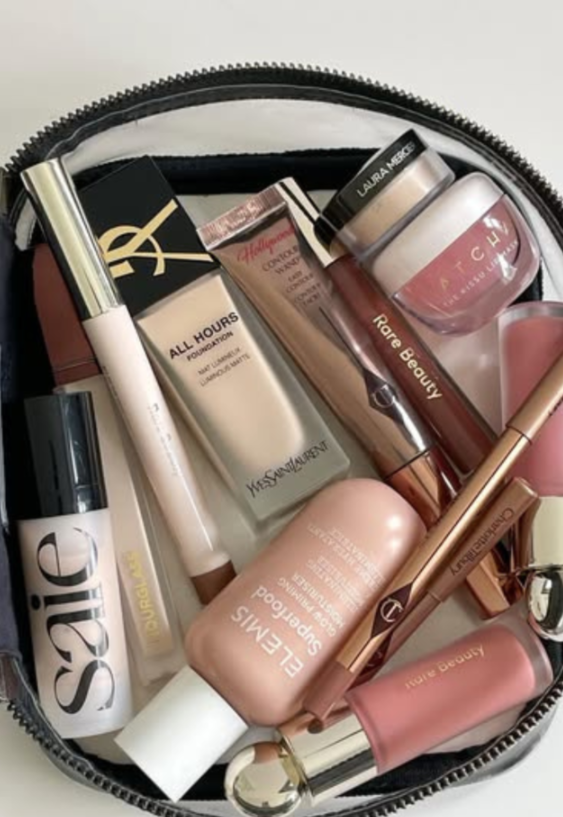
Category cluster packing is one of the simplest makeup organization ideas because it does not require a special organizer. I group similar products together inside one bag so I know where to reach for each item.
I keep foundation, primer, and concealer together, then group blush, bronzer, and highlighter in another section. Lipsticks and lip liners can sit in a small pouch or along one side, while brushes and sponges remain separate.
I arrange taller tubes around the edges and smaller products toward the center, making sure nothing is loose enough to roll around. If my bag has no dividers, a few small zip pouches can create separate zones without taking up much extra room.
This method works particularly well for short trips and minimal makeup routines. Once I learn where each category belongs, I can find products quickly without needing a complicated storage system.
Elastic Slot Layout

An elastic slot layout keeps makeup products in individual fabric pockets instead of allowing them to move freely inside the bag. I find this arrangement useful for tubes, foundations, lipsticks, and other items that are easy to knock over.
I place taller products in deeper pockets and use smaller slots for lipsticks and mini jars. Brush loops along the side can hold tool handles securely, while a mesh compartment provides space for small accessories or items I use less often.
I check the fit before packing because elastic pockets should hold products securely without stretching excessively. If a bottle is too heavy or too wide for a slot, I move it to the main compartment instead.
This layout is suitable for medium-length trips when I want a little more structure than a basic pouch offers. It also makes it easier to notice when a product is missing or needs replacing.
Lid Pocket Setup
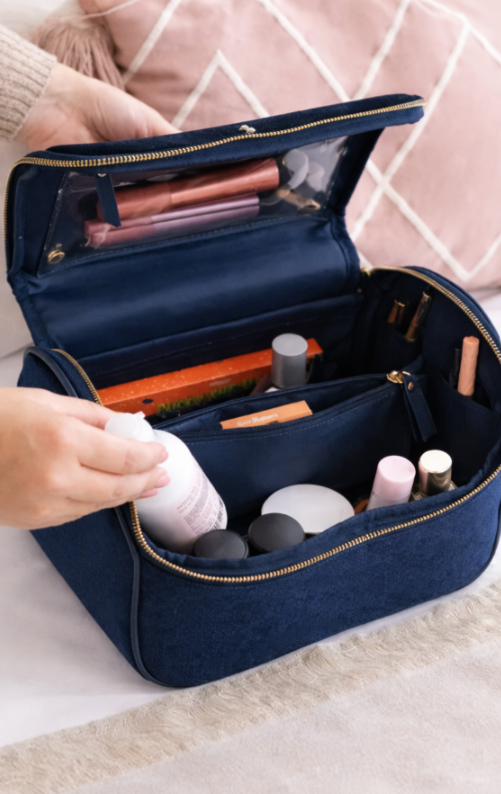
A lid pocket setup makes small, frequently used products easy to find as soon as I open my makeup bag. The upper compartment is particularly helpful for items that are easy to lose among larger bottles and palettes.
I use the lid pocket for lip liners, mascara, brow pencils, and other slim products. The main compartment holds bottles and jars, while a center divider can protect flat compacts and palettes from being pressed against heavier items.
I arrange taller products near the back and shorter ones toward the front. Daily essentials stay closest to the opening so I can reach them without moving the rest of my makeup.
This setup works well for weekend trips and short stays. It provides quick access to small tools while leaving the main compartment free for larger products.
Dual Bag Split
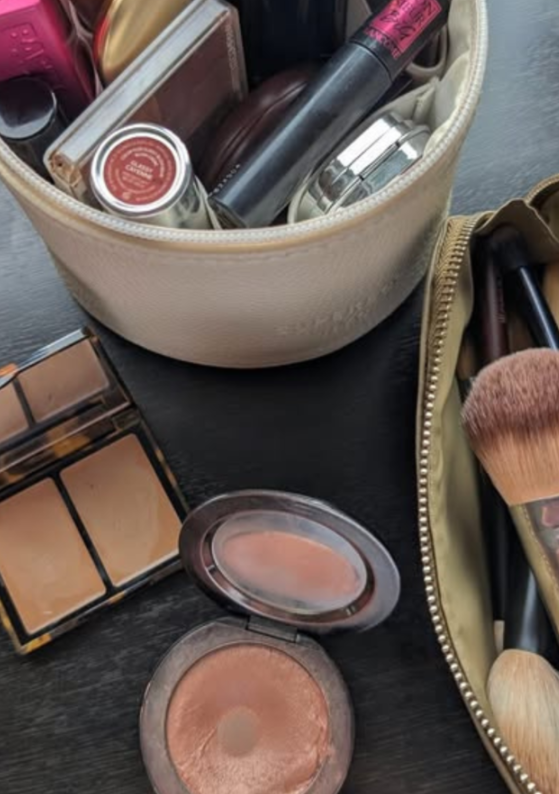
Splitting makeup between two smaller bags can be more practical than carrying one overcrowded pouch. I use this method to keep cosmetics separate from brushes and tools, making both bags easier to manage.
One pouch can hold foundation, concealer, blush, and other face products. The second can store brushes, sponges, pencils, and accessories. If I carry palettes, I place them in a flat, protected section rather than wedging them underneath heavy bottles.
I also choose bags that fit comfortably inside my suitcase or travel tote. Keeping the two pouches separate makes it easier to take only the products I need for a quick touch-up.
This arrangement is especially useful for short trips when I want to keep my makeup collection compact. It also helps prevent brush bristles from rubbing against creams and powders.
Triple Zip Visibility
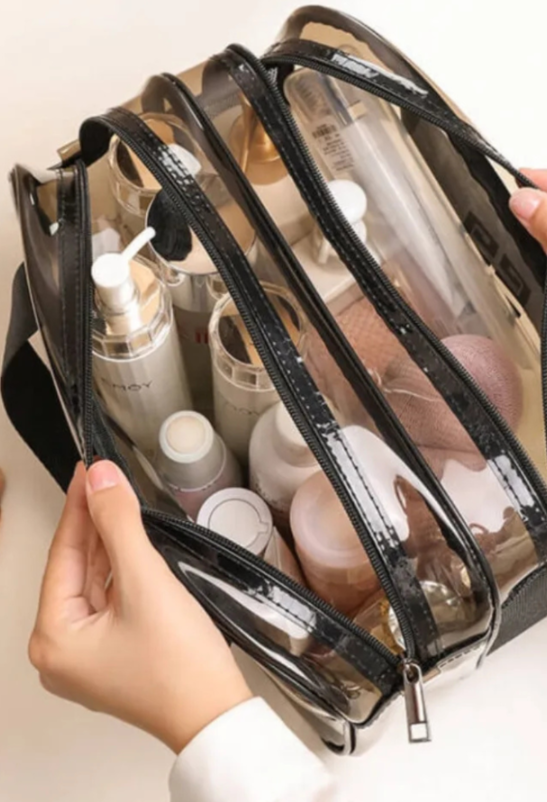
A triple-zip cosmetic case provides three separate compartments for organizing makeup by product type. I would use this design when I want liquids, creams, and small tools kept apart but still easy to see.
The first section can hold securely closed liquid products such as foundation and setting spray. The middle compartment can store creams and small jars, while the final section can hold sponges, pencils, and other accessories.
I keep the compartments organized by function rather than filling every space simply because it is available. Each section should close easily, and liquid products should be protected against leaks.
Clear panels make it easier to check the contents before leaving the hotel or packing for the next destination. For flights, I still verify current airport liquid restrictions because a transparent bag alone does not guarantee compliance.
Center Divider Balance
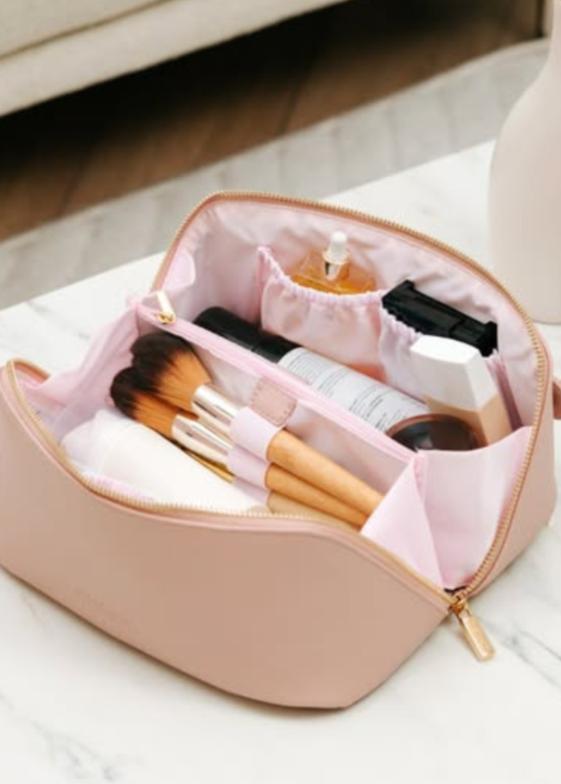
A center-divider makeup bag creates two main zones, making it easier to separate tools from cosmetics. I find this useful when I want the convenience of one bag without everything sharing the same open space.
I would place brushes and pencils on one side and securely closed bottles, creams, and powders on the other. Larger products can sit toward the back, while smaller everyday items remain near the opening.
A soft inner pocket can hold lightweight accessories, such as small mirrors or travel-size products. I keep heavier items close to the base so the bag remains stable when carried.
This layout is a good option for weekend trips when I need a little extra organization but do not want multiple bags. The divider gives me a clear packing system and makes it easier to put products back where they belong.
Sectioned Luxury Layout
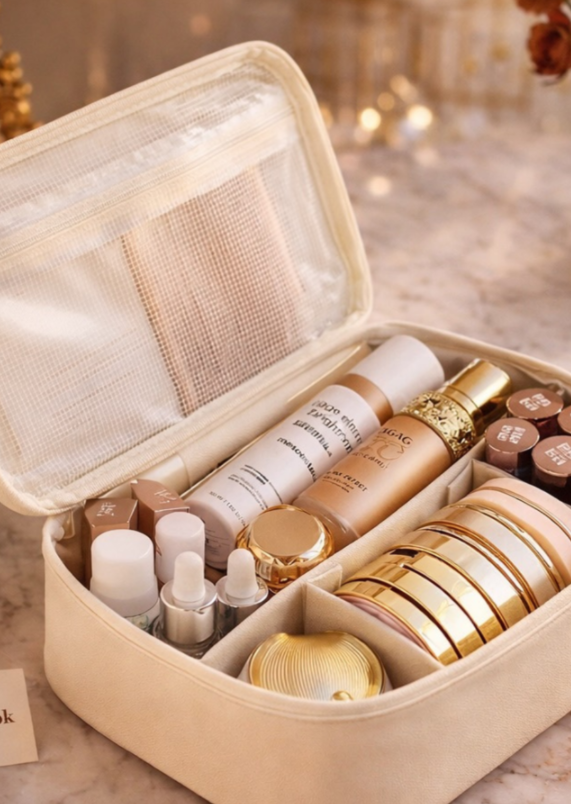
A fully sectioned makeup organizer is useful when I carry several palettes, bottles, and delicate cosmetics. Individual compartments help keep products separated and reduce the chance of items knocking against each other during travel.
I place palettes and powder compacts in flat sections, small bottles in snug compartments, and taller foundations or setting sprays in longer spaces. Narrow slots can hold lip products and other small items that might otherwise disappear at the bottom of the bag.
I also use any mesh pocket in the lid for lightweight items such as blotting papers or thin palettes, provided they fit without bending. Heavy glass bottles should be secured carefully so they do not move into neighboring products.
This layout is suited to longer stays or trips when I need both skincare and makeup. Before packing, I check that each compartment suits the product size and that the case closes without putting pressure on fragile items.
Raised Center Row

A raised center row creates a middle section where I can arrange daily essentials for quick access. Rather than stacking everything flat, I place products so their labels and shapes are easier to recognize.
I use the center area for frequently used compacts and jars, while side elastic pockets hold lipsticks and smaller tubes. Longer bottles can sit securely along the base if the bag is designed to accommodate them.
I avoid placing fragile products beneath heavy items. The center row should make products easier to see, not create a tight stack that puts pressure on powders or packaging.
This setup works well when I travel with both skincare and makeup but still want a compact organizer. The middle section keeps my main routine visible, while the side compartments provide space for smaller essentials.
Stackable Clear Layers
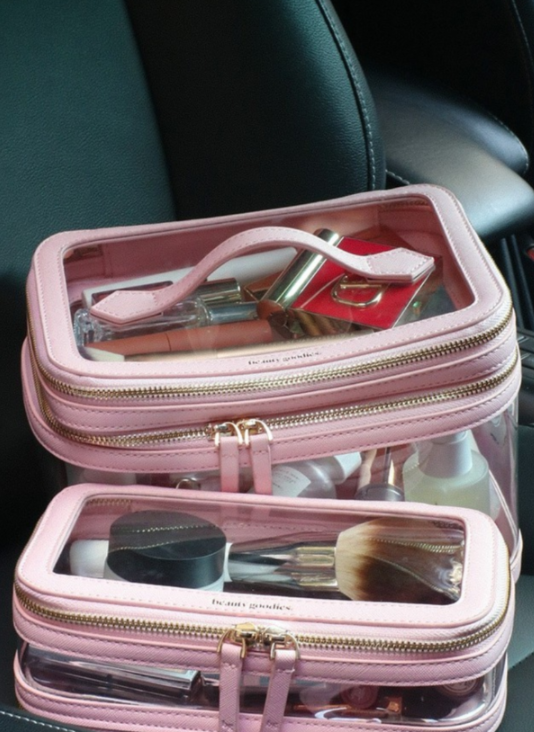
Stackable clear makeup cases are useful when I want to separate my routine into two levels. They allow me to carry different product groups together while keeping each section easy to identify.
I would use the top case for lipsticks, liners, and small touch-up products that I reach for regularly. The lower case can hold foundation, skincare, and other base products, arranged securely according to the container design.
I place heavier items in the lower section to improve stability and keep lighter products above them. Before stacking the cases, I check that both lids close securely and that the cases will not slide apart inside my luggage.
This arrangement works well for longer vacations or flights when I want to remove one group of products without unpacking the rest. Transparent sides also make it easier to check what I have packed before leaving home.
Pre-Sort Before Packing

Pre-sorting makeup is one of the easiest ways to avoid an overcrowded travel bag. Before packing, I lay out everything I might take and decide which products I will realistically use during the trip.
I group base makeup together, line up lip products, and separate brushes from liquids and creams. Then I remove duplicates, full-size backups, and anything I can comfortably leave at home.
Once I have narrowed down the collection, I place everyday essentials in the most accessible section. Compacts go in a protected space, tubes are secured in suitable compartments, and brushes are stored separately.
This method works for almost any type of cosmetic bag because it does not depend on special dividers. By sorting first, I can make better use of the available space and avoid packing products simply out of habit.
Tool Wall Layout
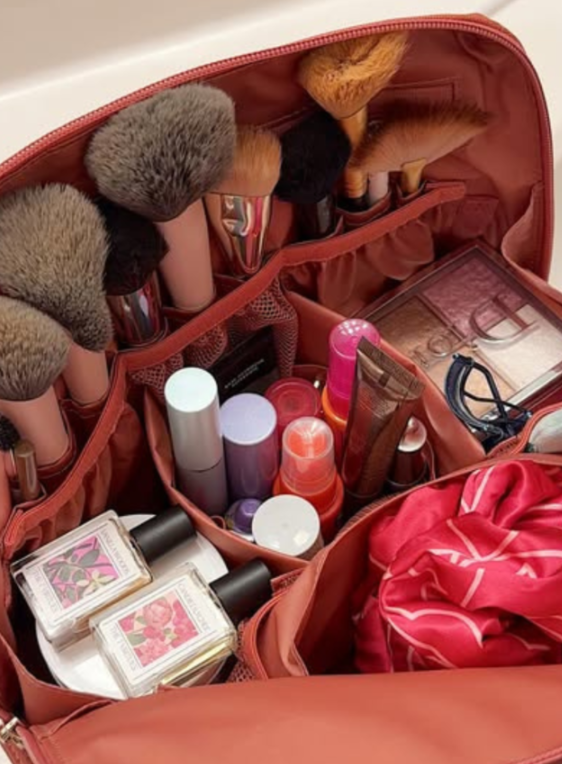
A tool wall layout gives makeup brushes and slim tools their own dedicated panel. I find it useful when I want to protect brush bristles and keep tools from mixing with bottles and cosmetics.
I place larger face brushes in deeper slots and smaller eye brushes in individual loops. Pencils and other slim tools can occupy narrow holders, while the central compartment stores securely closed makeup products.
Flat mesh pockets can hold lightweight accessories such as a compact mirror or blotting papers. I avoid stacking heavy products against the brush panel because pressure can bend bristles or make the case difficult to close.
This setup works well for longer trips when I carry a variety of makeup tools. It keeps the brushes in one place and makes the rest of the bag easier to organize.
FAQs
How Do I Stop My Makeup From Moving Around in My Bag?
Makeup usually shifts when there is too much empty space around the products. I prevent this by choosing a bag that fits my collection and using dividers, elastic pockets, or smaller pouches to keep items in place.
I arrange heavier bottles near the base and secure them in compartments that suit their shape. Palettes and powder compacts need a flat, protected space, while loose pencils and lipsticks can go into smaller holders.
I avoid forcing extra products into a bag that is already full. If an item can roll freely or press against something fragile, I give it a separate space or remove it from my travel collection.
Before closing the bag, I gently check whether anything moves excessively. A well-fitted organizer helps reduce movement, although fragile items may still need extra padding for longer journeys.
Should I Separate Skincare and Makeup While Traveling?
Yes, I recommend keeping skincare and makeup in separate compartments or pouches whenever possible. Skincare often includes heavier bottles and liquid products, while makeup may contain delicate powders, palettes, and brushes that need different kinds of protection.
I keep skincare liquids together in a leak-resistant pouch and place color cosmetics in a separate section. Brushes and sponges stay in their own clean, dry holders so they do not come into contact with leaking products.
This arrangement makes it easier to find what I need and reduces the risk of a spill affecting the rest of my collection. If I carry only a few products, separate inner pouches can work just as well as two complete cosmetic bags.
For air travel, I also check the current liquid restrictions for my route and pack products accordingly. A little preparation at home can make unpacking and getting ready much easier once I reach my destination.