22 School Organization Ideas for 2026
Staying organized at school does not require expensive supplies or a perfectly arranged desk. I find that simple habits, such as putting papers in labeled folders, preparing school materials the night before, and keeping track of assignments, can make everyday schoolwork easier to manage.
In this guide, I’m sharing practical student organization ideas for classrooms, homeschool spaces, and study areas at home. From monthly paper bins and rolling carts to book storage and weekly files, these ideas help keep supplies in order and make it easier to find what you need.
Key Takeaways
- Give every school supply a specific place so it is easy to find and put away.
- Use labeled folders, bins, and drawers to separate papers by subject, date, or activity.
- Keep a weekly planner visible to track assignments, tests, and school events.
- Prepare supplies ahead of time to make mornings and study sessions less stressful.
- Choose affordable organizers that fit your available space and daily routine.
Monthly Bins
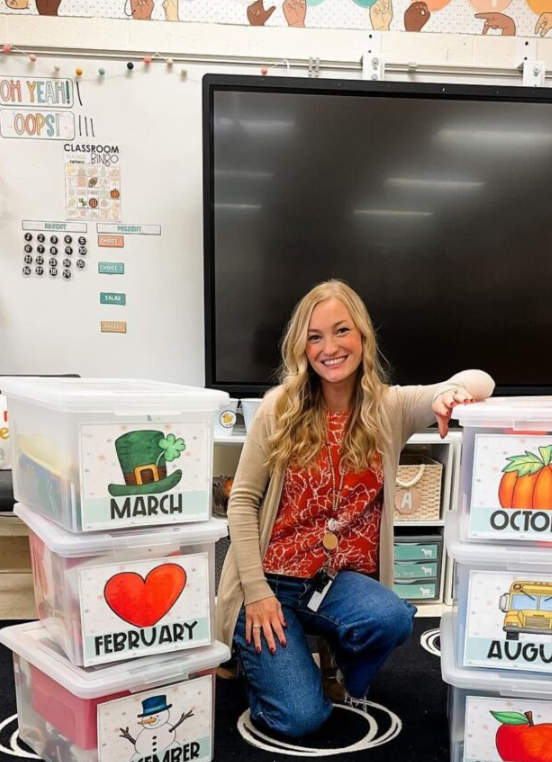
School papers can pile up quickly when I keep every worksheet, drawing, and completed assignment in one place. Monthly bins offer a simple way to sort these materials by the time of year.
I would use large plastic containers with clear labels such as January, February, and March. This makes it easier to store completed assignments, classroom projects, and important school documents without mixing everything together.
Clear bins are especially useful because I can see what is inside before opening them. Teachers can use this system for finished classwork, while parents can keep children’s artwork and school records organized at home.
My tip: Label each bin clearly and review its contents at the end of the school year. Keep important records and memorable projects, and recycle papers you no longer need.
Shelf System
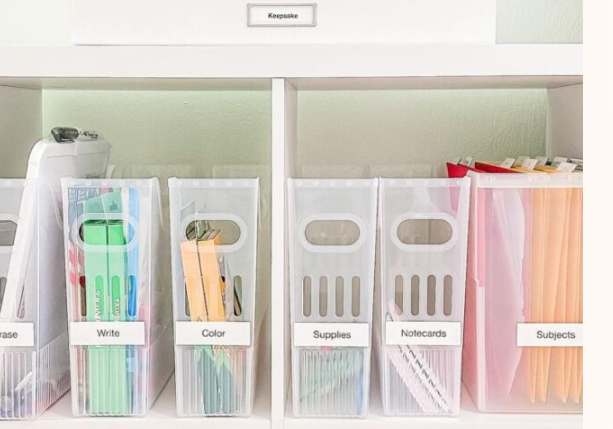
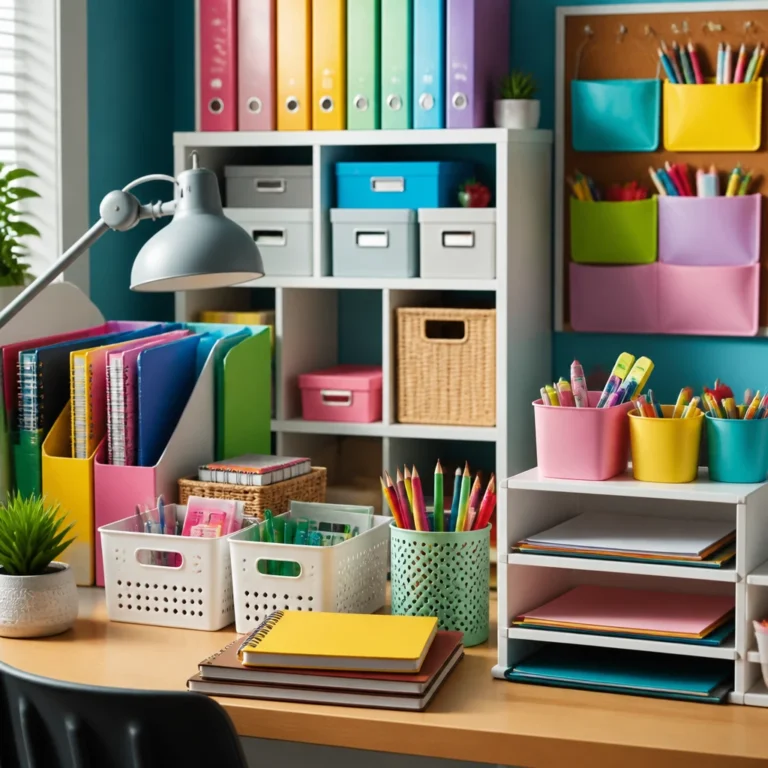
A shelf system works well when school supplies are scattered across desks, drawers, and countertops. I would group similar items together so notebooks, markers, folders, and paper each have a designated place.
Cube shelves with removable plastic bins are a practical option for small study areas and homeschool rooms. Labels make it easier for students to return supplies after using them instead of leaving everything on the desk.
I would also keep frequently used materials on the middle shelves, where they are easy to reach. Less frequently used items can go on higher shelves, provided they remain safe and accessible when needed.
My tip: Avoid filling every shelf with supplies. Leaving a little empty space makes it easier to put things away and keeps the area from feeling crowded.
Theme Boxes
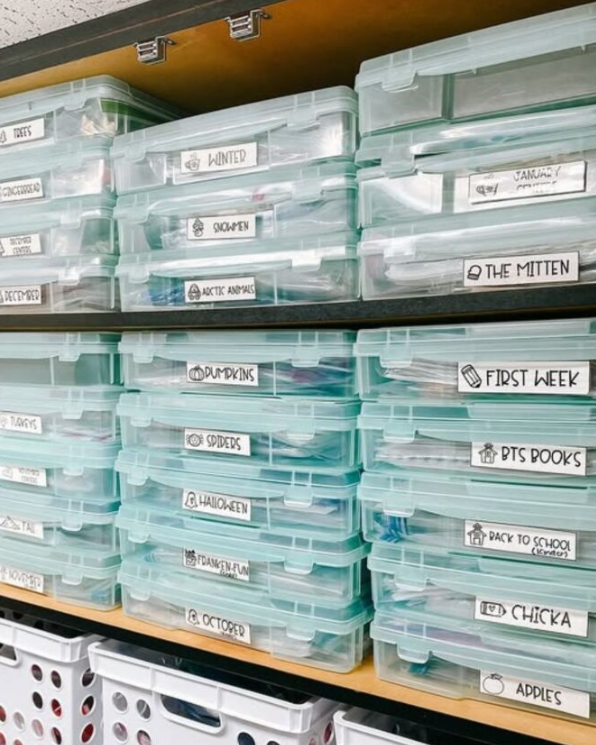
Classroom activities often use similar materials throughout the year. I find that storing supplies by theme makes it easier to prepare lessons without searching through several drawers.
For example, I would create separate boxes for winter activities, pumpkins, Halloween crafts, and back-to-school projects. Each box could contain the relevant worksheets, craft materials, activity cards, and decorations.
This approach is especially useful for teachers and homeschool families who repeat seasonal activities each year. Clear containers and simple labels make it easy to identify the right box when the activity comes around again.
My tip: Store small pieces in labeled bags inside each box. This keeps craft supplies together and prevents tiny items from getting lost at the bottom.
Wall Planner
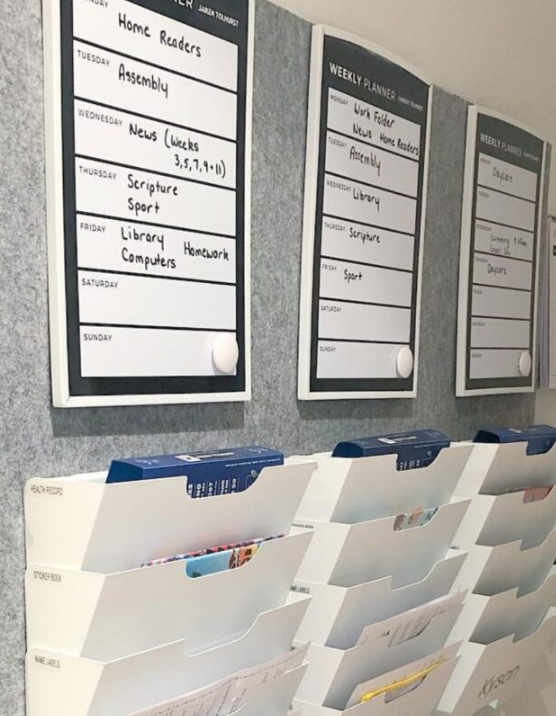
A wall planner gives students a clear view of their upcoming schoolwork and activities. Instead of relying on memory, I would write down homework deadlines, tests, reading goals, and important school dates where they can be checked every day.
A dry-erase board works well because the schedule can be updated each week. Families can also use a printable calendar if they prefer a simple, low-cost option.
I would place labeled file holders beneath the planner for permission slips, homework sheets, reading logs, and other papers that need attention. This keeps the schedule and important documents together.
My tip: Check the planner every evening and prepare the materials needed for the following day. A quick review can help students spot unfinished assignments before bedtime.
Drawer Dividers
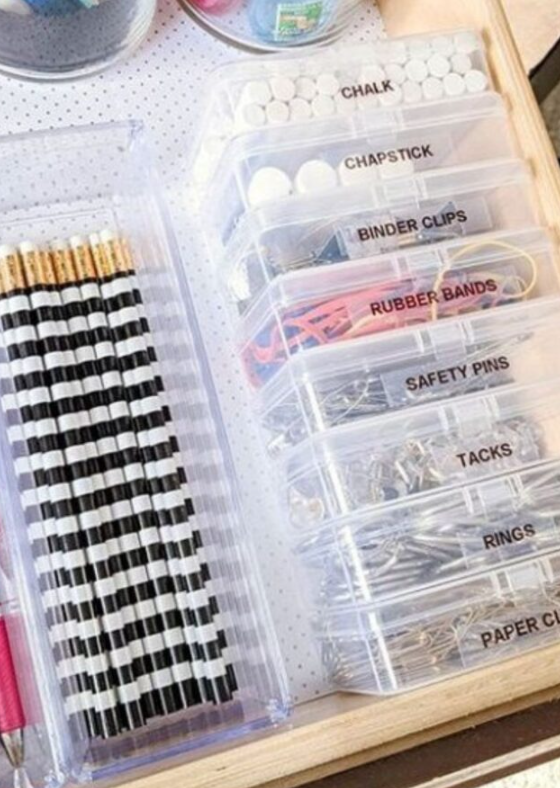
Small supplies are easy to lose when pencils, erasers, pens, and paper clips share one crowded drawer. Drawer dividers create separate sections, making each item easier to find and return.
I would use inexpensive plastic trays or small boxes that fit inside the drawer. One section could hold writing tools, another could hold erasers and sharpeners, and a smaller compartment could store clips and other accessories.
This setup works well for student desks, homework stations, and classroom supply cabinets. It also makes tidying up easier because every item has an obvious place.
My tip: Measure the drawer before buying organizers. Even simple cardboard boxes can work if they fit properly and keep supplies separated.
Color Drawers
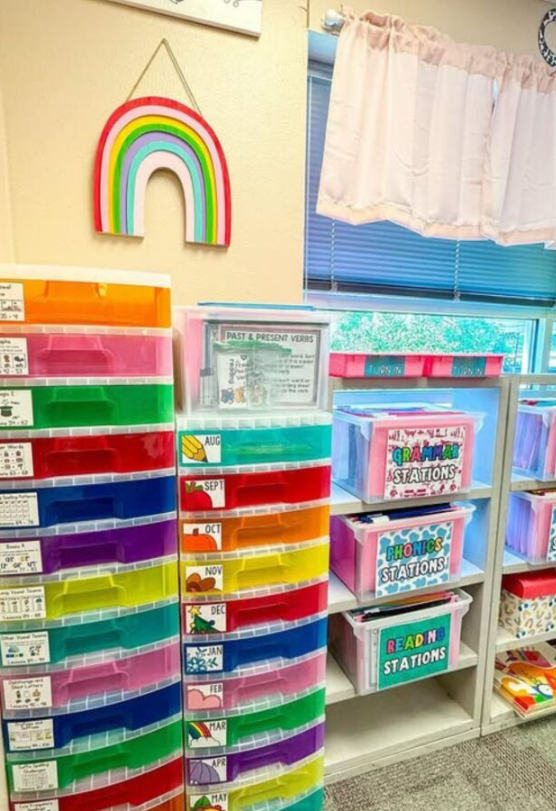
Colorful drawers can make paper organization easier for younger students who are still learning to manage their schoolwork. I would assign each drawer a subject, activity, or type of worksheet so papers do not end up in one large pile.
For example, one drawer could hold math practice, another could store reading worksheets, and a third could contain writing activities. Teachers can also use separate drawers for upcoming lessons or completed work.
Labels are still important because colors alone may not clearly communicate what belongs where. A combination of simple words and distinct colors makes the system easier to follow.
My tip: Keep the drawer organizer near the desk or learning area where the papers are used. This reduces the temptation to leave worksheets lying around.
Color Sorting

Art supplies are easier to manage when similar colors are stored together. I would separate crayons, markers, and colored pencils into small containers so students can find the shades they need without searching through a mixed collection.
This method is useful for classroom art stations, craft tables, and home study areas. Small plastic bins or stackable drawers can hold each color group while keeping the workspace clear.
For larger collections, I would organize the supplies by color family rather than giving every individual shade its own container. This keeps the setup practical and avoids using more storage space than necessary.
My tip: Check markers and pens occasionally for dried-out or damaged items. Removing supplies that no longer work creates room for the ones students actually use.
Number Cubbies

Numbered cubbies give each student a personal place to store folders, notebooks, and classroom materials. I would assign every student a number and use matching labels on the cubby and any related folders.
This system is helpful in busy classrooms where several students need to hand in assignments or collect their belongings at the same time. Teachers can also use separate trays for papers that need to go home.
A cube shelf with number labels and small baskets is enough to create this arrangement. Students can learn the routine of checking their cubby when they arrive and before they leave.
My tip: Keep the most frequently used items within easy reach. A consistent place for homework folders and daily materials can make classroom transitions smoother.
Headphone Pockets
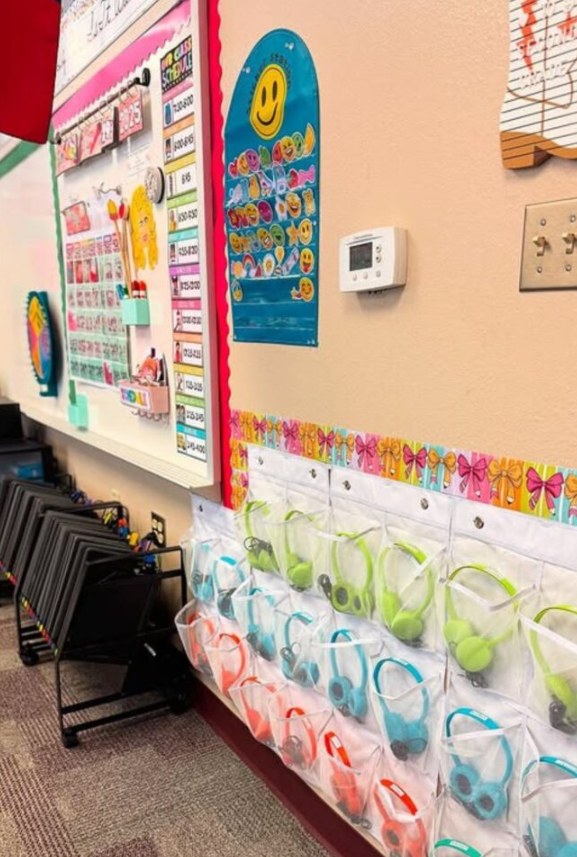
Headphones can become tangled or get mixed up when several pairs are stored in one basket. Individual pockets give each headset a separate space and make it easier to return equipment after use.
I would use a hanging pocket organizer near the classroom computer area. A clear design makes it easier to check which pockets are occupied, while labeled sections can help students identify their assigned headphones.
This idea also works in a home study space where children use headphones for online lessons, reading activities, or educational videos. Since the organizer hangs on a wall or door, it does not take up much desk space.
My tip: Label each pocket and wrap the cord loosely before storing the headphones. This helps prevent tangles and makes the equipment easier to use next time.
Entry Cubbies
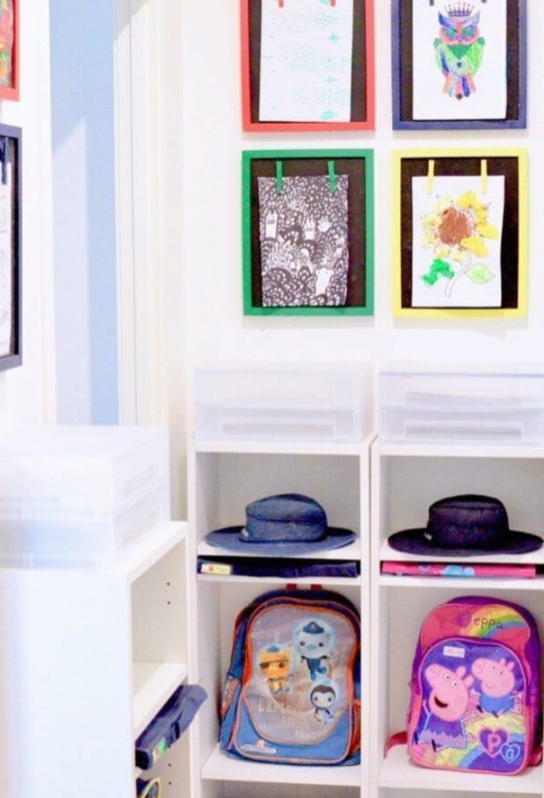
An entry cubby gives school bags, shoes, and everyday accessories a regular place to go after school. I would set up a small unit near the entrance so students can put their belongings away as soon as they arrive home.
The lower section can hold shoes, while the main compartment stores backpacks. A top shelf or small basket can be used for lunch bags, hats, and other lightweight items.
This arrangement is particularly helpful for families with children who tend to leave their belongings around the house. It also makes the next morning easier because school essentials are kept in one familiar spot.
My tip: Add a hook for jackets and a small tray for items that need to go back to school. Check the area each evening to make sure the backpack is ready for the next day.
Supply Cart
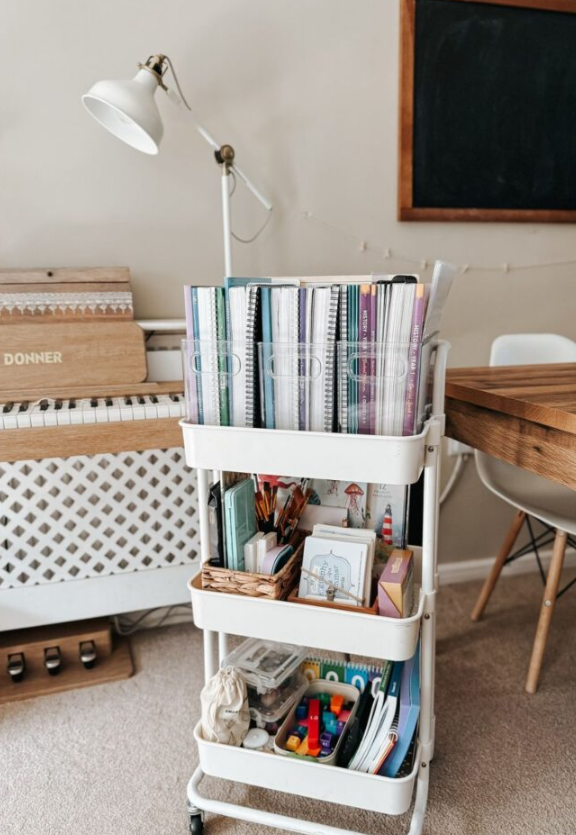
A rolling supply cart is useful when students study in different parts of the house or when a classroom needs portable materials. I would use the top tier for everyday supplies, the middle tier for notebooks and folders, and the bottom tier for larger or less frequently used items.
Small baskets can keep pencils, sticky notes, scissors, and other accessories from mixing together. Taller compartments can hold workbooks upright, helping prevent bent corners and messy stacks.
The biggest advantage is that the cart can move wherever the work takes place. It is a practical option for shared study spaces, homeschool rooms, and small rooms where permanent storage is limited.
My tip: Keep only the supplies needed for current schoolwork on the cart. Too many items can make it difficult to move and defeat the purpose of having portable storage.
Paper Stations

Paper stations help keep worksheets, forms, and spare paper separate. I would use labeled trays for different types of documents so students can quickly find what they need without sorting through a large stack.
For example, one tray could hold blank paper, another could contain worksheets to complete, and a third could store forms that need to be signed. Teachers can adapt the labels to match their classroom routines.
Stackable trays or shallow bins on a shelf are enough to create this system. It also works at home for homework sheets, permission slips, and school notices.
My tip: Include a separate tray for papers that need action, such as forms to sign or assignments to finish. Check it daily so important documents do not get overlooked.
Memory Files

Children often bring home drawings, certificates, report cards, and special school projects throughout the year. I would keep meaningful items in a memory file instead of mixing them with everyday worksheets.
A file box with labeled folders for preschool, kindergarten, and each school grade makes it easier to revisit these keepsakes later. Parents can add artwork, photographs, and notable achievements as the school year progresses.
This system keeps memories organized without requiring every item to be displayed or stored around the house. It can also help families find important school records when they need them.
My tip: Date the items when possible and choose a few meaningful pieces from each period. This keeps the collection manageable while preserving the memories that matter most.
Paint Organizer

Paint bottles, brushes, glue, and other craft supplies can quickly turn an art drawer into a mess. I would separate these items into trays or small containers so bottles stay upright and tools are easier to reach.
Clear drawers make it possible to see what is available without opening every container. Keeping similar materials together also helps students put supplies away after an art project.
This setup works well for classrooms, craft rooms, and homeschool spaces where painting and creative activities are part of the routine. Supplies used most often should be kept near the front.
My tip: Store paint according to the manufacturer’s instructions, and keep lids tightly closed. Put messy or leak-prone materials in a washable tray to protect the surrounding shelf.
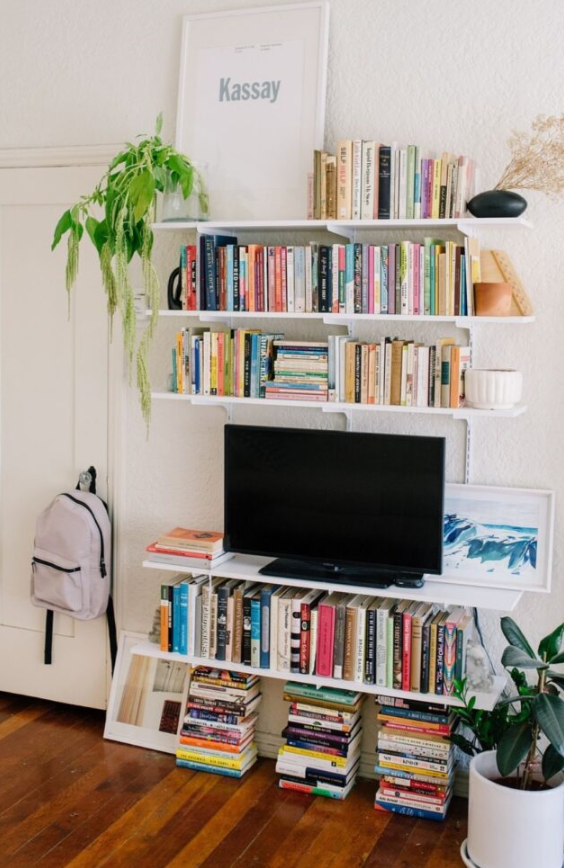
Book Bins

Books are easier for children to find when they are grouped into clear categories. I would organize them by reading level, subject, author, or series, depending on the collection and the age of the students.
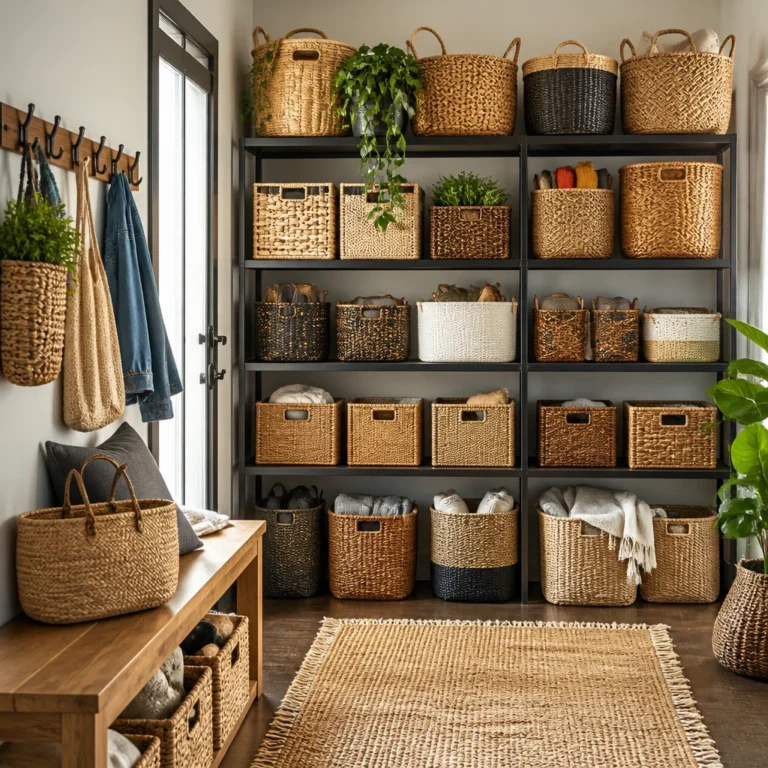
Open bins make it easy to take out one group of books without disturbing the rest of the shelf. Labels on the front help children return books to the correct place after reading.
For younger readers, displaying some books with their covers facing forward can make familiar titles easier to recognize. Lightweight baskets are a good option when a permanent bookshelf is not available.
My tip: Avoid packing the bins too tightly. Children should be able to remove and return books without bending covers or pulling out several books at once.
Station Cubes

Station cubes help keep learning activities separate, especially when students move between different tasks during a lesson. I would give each bin a specific purpose, such as math games, reading practice, writing materials, or hands-on learning tools.
Cube shelves with removable containers make it easy to prepare an activity before students begin. When one group finishes, the materials can be returned to the same bin before the next group uses them.
This arrangement is useful in classrooms and homeschool spaces where several subjects may be taught in one area. Clear labels help students understand which supplies belong to each activity.
My tip: Put all the materials needed for one activity in the same bin. This reduces interruptions caused by searching for missing pieces during a lesson.
Activity Kits
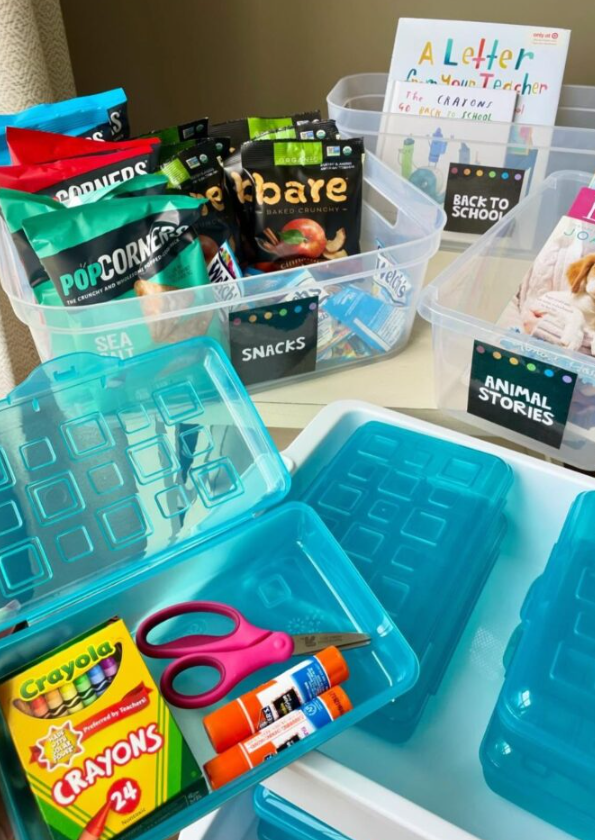
Activity kits make it easier to start a project without collecting supplies one item at a time. I would prepare small boxes with the materials needed for common tasks, such as drawing, cutting, gluing, or simple classroom projects.
Each kit can contain the appropriate pencils, crayons, scissors, glue sticks, and other supplies. Teachers can hand out a complete kit to a group, while families can keep separate kits for homework and creative activities.
This approach works best when the contents match a specific activity. It also makes cleanup easier because everything can be returned to one container when the work is finished.
My tip: Check kits after use and replace missing or empty supplies. For younger children, keep scissors and other potentially unsafe materials age-appropriate and supervised.
Weekly Files

Weekly files help teachers prepare classroom materials before the week becomes busy. I would use five folders or labeled sections, one for each school day, to organize worksheets, lesson materials, and activities in advance.
During planning time, the relevant papers can be placed in the correct folder. When Monday arrives, the day’s materials are already together, and the same routine can be followed throughout the week.
Students can use a similar method to separate assignments by due date or school day. A simple folder system is often enough, so a large drawer unit is not necessary.
My tip: Review the next week’s folders before the weekend ends. Move completed work out of the active files and add any new materials that will be needed.
Clear Containers
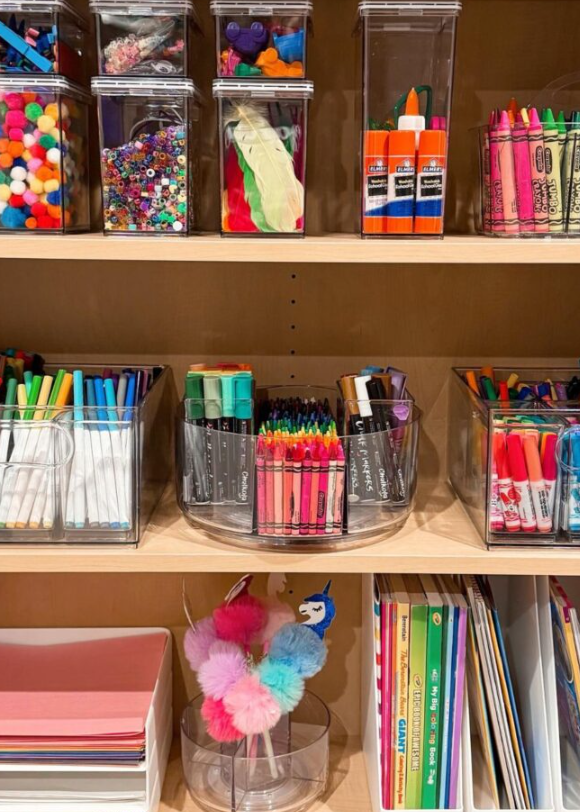
Clear containers make school and craft supplies easier to identify. I would use them for items such as markers, glue sticks, beads, erasers, and small project materials that are otherwise easy to lose.
Grouping similar supplies in separate containers makes both finding and cleaning up easier. Since the contents remain visible, students can check whether they have the right materials before starting a task.
These containers work on bookshelves, inside cupboards, or on a homework desk. A mix of sizes is useful because small items need different storage than notebooks or larger tools.
My tip: Use labels even when the containers are transparent. Labels help everyone return supplies to the correct place and keep the system consistent over time.
Supply Categories

Grouping supplies by category makes a shared study area easier to maintain. I would keep writing tools together, paper products in another section, and art materials in their own containers rather than mixing everything on one shelf.
Labeled baskets or bins make the categories clear to everyone using the space. This system can work in a classroom, family homework area, or homeschool cupboard without requiring expensive storage furniture.
The key is to create categories that match how students actually use their supplies. If a group of materials is rarely used together, there is no need to force them into the same container.
My tip: Keep daily essentials within easy reach and store occasional-use items elsewhere. Review the categories from time to time so the arrangement still fits your needs.
Group Files
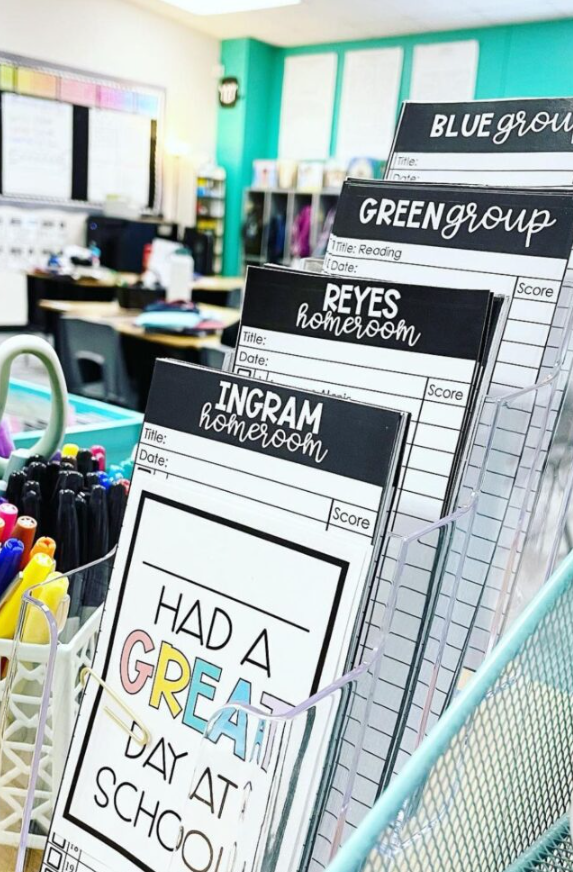
Teachers often manage worksheets, reading logs, and progress forms for several groups of students. Group files help keep these documents separate and make it easier to find the right paperwork during a lesson.
I would use labeled folders or vertical file holders for each class, group, or activity. This makes it easier to collect completed work and prepare materials for small-group instruction.
The same idea can be adapted for homeschool families who teach children at different levels. Each student can have a folder for assignments, feedback, and work that needs to be reviewed.
My tip: Store personal student information securely rather than leaving sensitive records in an open organizer. Keep everyday worksheets separate from confidential documents.
Supply Zones
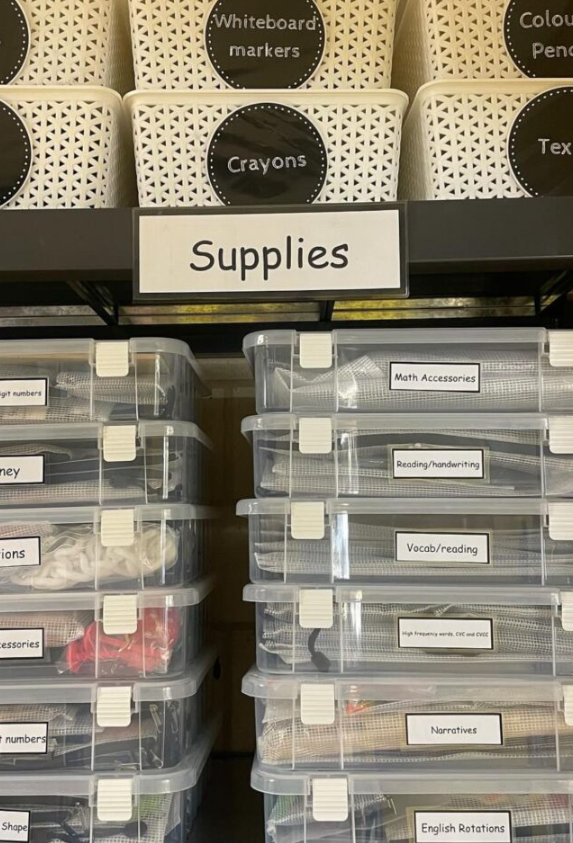
Supply zones divide a busy classroom or study room into areas with specific purposes. I would create one section for writing materials, another for art supplies, and separate areas for subject-based learning resources.
Frequently used items can go on a reachable shelf, while larger bins hold materials for particular lessons or group activities. Labels make it clear where each category belongs, even when several students share the same supplies.
This setup can turn a crowded shelf into a more practical workspace. It is also easy to adjust as students move to new subjects or activities throughout the school year.
My tip: Keep each zone focused on a small number of related items. If students have to search through several categories to find one supply, the layout may need simplifying.
Rolling Drawers
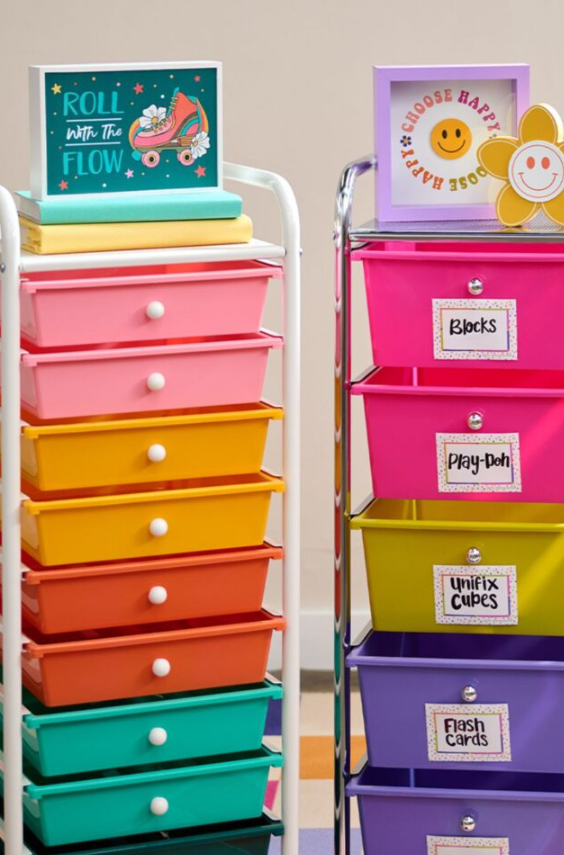
Rolling drawer carts are useful for storing learning materials that need to move between tables or activity areas. I would give each drawer a specific purpose, such as flashcards, building blocks, play dough, or math games.
The wheels make it easier to move supplies without carrying several separate boxes. Teachers can take the cart to a learning station and return it to its storage spot when the activity is finished.
This arrangement also works for homeschool families who use one room for several subjects. Labels on the drawers help students find and return materials independently.
My tip: Avoid overloading the cart, and keep heavier items in the lower drawers for better stability. Check that the wheels lock when the cart needs to stay in place.
FAQs
What is the easiest way to keep school supplies organized throughout the year?
I would start by sorting school supplies into a few simple categories, such as writing tools, notebooks, art materials, and worksheets. Give each category a labeled bin, drawer, or folder so students know where everything belongs.
At the end of each study session, spend a few minutes returning supplies to their assigned places. A short, consistent cleanup routine can help prevent clutter from building up over time.
How can students stay organized without buying expensive storage tools?
Students can stay organized with items they already have at home. Reuse small boxes for pencils and craft supplies, use folders to separate subjects, and turn an existing shelf into a simple storage area with paper labels.
I would also recommend using a planner or notebook to track homework and deadlines. The most useful system is one students can maintain every day, not one that requires buying lots of organizers.
How can students remember homework and assignment deadlines?
I recommend writing down each assignment as soon as it is given, including its due date. Students can use a paper planner, school diary, or digital calendar, depending on what they find easiest to check.
Reviewing the list at the end of each school day helps students identify unfinished work and prepare the right materials for the next morning.
How often should students organize their school supplies?
A quick tidy-up at the end of each day is a good starting point. Students can return supplies, file completed work, and prepare their bags before moving on to other activities.
A more thorough review once a week can help identify missing items, clear out unnecessary papers, and restock essentials. The goal is to keep the system manageable rather than spend too much time reorganizing.
Final Thoughts
I find that the best student organization systems are the ones that fit naturally into everyday routines. Start with one small change, such as a homework folder or a labeled supply bin, and build from there.
When students know where their materials belong and how to prepare for the next day, keeping schoolwork on track becomes much easier.