18 Creative Cork Board Ideas to Organize and Decorate Your Space
Cork boards are useful for keeping notes, photos, calendars, and reminders in one place, but they can also add personality to a room. A simple cork sheet can become something special with a decorative frame, patterned fabric, or a little paint.
In this article, I’m sharing 18 cork board ideas for different spaces, from floral-framed boards for bedrooms to large pin walls for home offices and playrooms. You’ll also find practical tips for choosing the right backing, covering cork with fabric, and preventing your finished board from warping.
Key Takeaways
- Decorative designs: Try floral frames, vintage frames, or fabric-covered cork boards.
- Organization: Use a planner vision board or calendar command center to keep reminders visible.
- Large spaces: Cork wall panels provide room for artwork, notes, and ongoing projects.
- Kids’ rooms: Create a dedicated display for drawings, school projects, and crafts.
- Durability: Choose a firm backing, apply adhesive evenly, and check that push pins reach the cork properly.
1. Floral Frame Cork Board
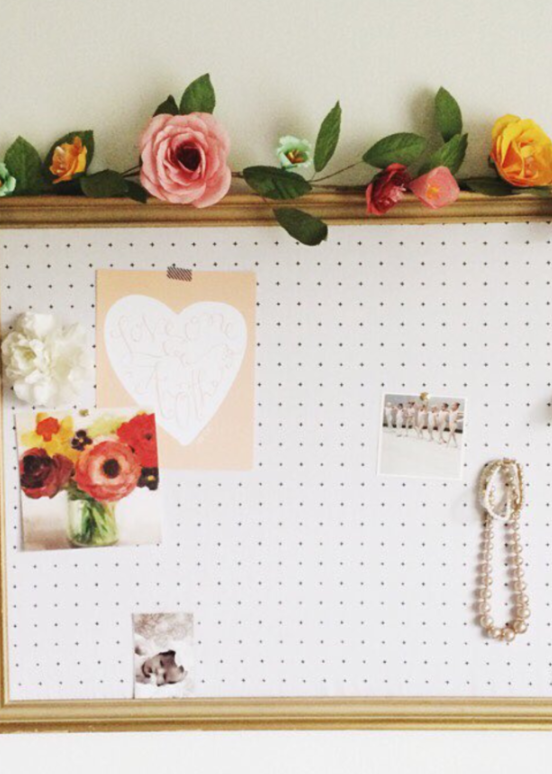
A plain cork board can look much prettier with a decorative frame and a few flowers. Start with an old picture frame, remove the glass, and cut a cork sheet to fit the opening.
Add a small cluster of faux flowers along one corner or across the top edge. Keeping the flowers in one area leaves more room for notes, photographs, and reminders.
This design works well above a bedroom desk, vanity, or craft table. Match the frame and flower colors to the room for a coordinated look.
2. Terrazzo Cork Board
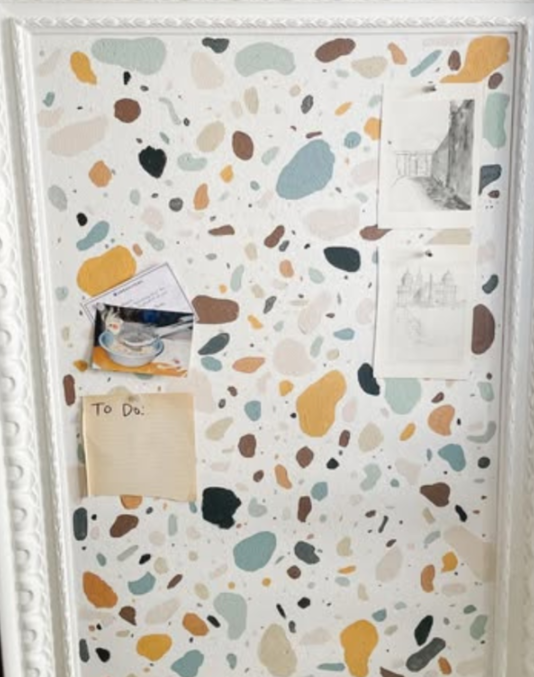
If you prefer a modern look, try covering your cork board with terrazzo-inspired adhesive paper. Choose a pattern with small colored flecks against a white, cream, or pale background.
Check that the material is thin enough for push pins to pass through easily. A simple wooden or white frame helps balance the pattern without making the design too busy.
This style works well in a home office, study area, or bedroom where a little color can brighten an otherwise simple wall.
3. Hexagon Cork Wall

Hexagon cork tiles are a good option if you do not want a traditional rectangular board. Arrange several tiles in a honeycomb pattern above a desk, beside a workspace, or along an empty wall.
You can keep every tile in its natural cork color or paint a few in muted green, terracotta, or cream.
One advantage of separate tiles is that you can expand the arrangement later. Make sure the tiles are securely attached and suitable for regular pinning if you plan to use them every day.
4. Large Cork Wall Panel
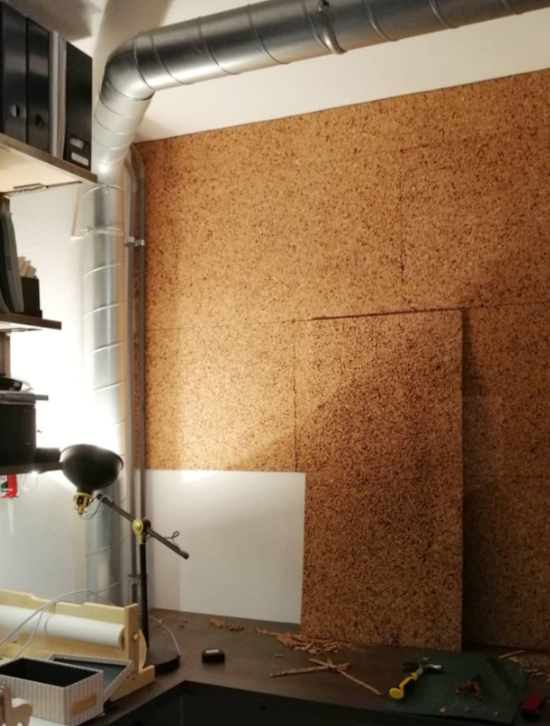
When a small board never seems to have enough room, a large cork wall panel can make everyday organization easier. It gives you space for calendars, project notes, photographs, sketches, and reference materials without filling your desk.
For a sturdy result, attach the cork to a rigid backing such as plywood or MDF before mounting the panel. Finish the edges with simple wood trim for a cleaner appearance.
This design works especially well in a home office, studio, or creative workspace where ideas and paperwork change regularly. Plan the mounting carefully, especially if the board is wide or will hold many items.
5. Vintage Frame Cork Board
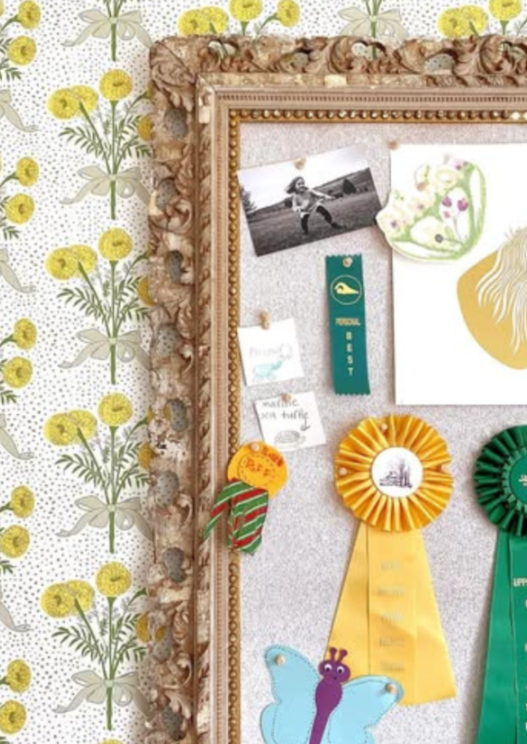
An old decorative frame can make a cork board feel more like a piece of wall art. Look for a secondhand frame with an interesting shape, remove the glass, and fit a piece of cork inside.
Pin postcards, photographs, concert tickets, small prints, and other lightweight keepsakes to the surface. The frame adds character, so you do not need to decorate the cork too much.
This idea suits bedrooms, hallways, and reading corners. If the frame is deep enough, you can also add a firm backing to help the cork stay flat.
6. Planner Vision Board
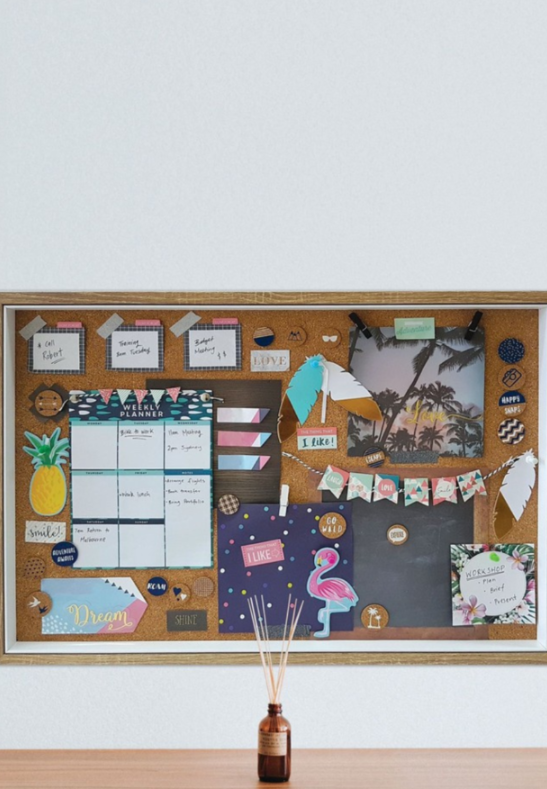
A planner vision board brings practical planning and personal inspiration together. Place a weekly planner or calendar near the center, then arrange goals, photographs, reminders, and notes around it.
Group related items instead of pinning everything wherever there is space. For example, keep appointments together, place personal goals in another section, and reserve one corner for inspiration.
Leave some cork uncovered so you can add new reminders throughout the week. This setup works particularly well above a desk where you can check it while planning your day.
7. Striped Fabric Cork Board

Striped fabric gives a basic cork board a softer, more finished appearance. Choose lightweight cotton or linen, cut it slightly larger than the board, and pull it tightly over the front.
Fold the extra material around the back and secure it before placing the board into its frame. Neutral stripes are a good choice because they add texture without competing with pinned photographs and papers.
Before covering the entire board, test a push pin through the fabric. Thick or tightly woven materials may make pinning difficult, so check that your chosen fabric still allows the board to work properly.
8. Kids’ Art Display Board
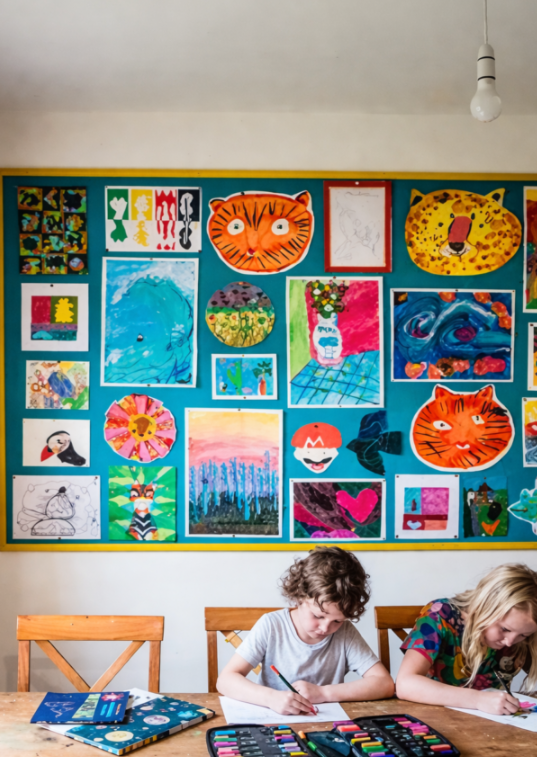
Children often bring home drawings, paintings, and school projects that deserve more than a crowded refrigerator door. A dedicated cork board gives them a place to display their latest creations.
Choose a board large enough to hold several pieces of artwork and paint the frame to match the playroom or homework area. Mount it at a reachable height so children can help change the display.
Rotate older drawings when new ones arrive to prevent the board from becoming overcrowded. For safety, secure the board firmly to the wall and use age-appropriate pins with adult supervision.
9. Calendar Command Center
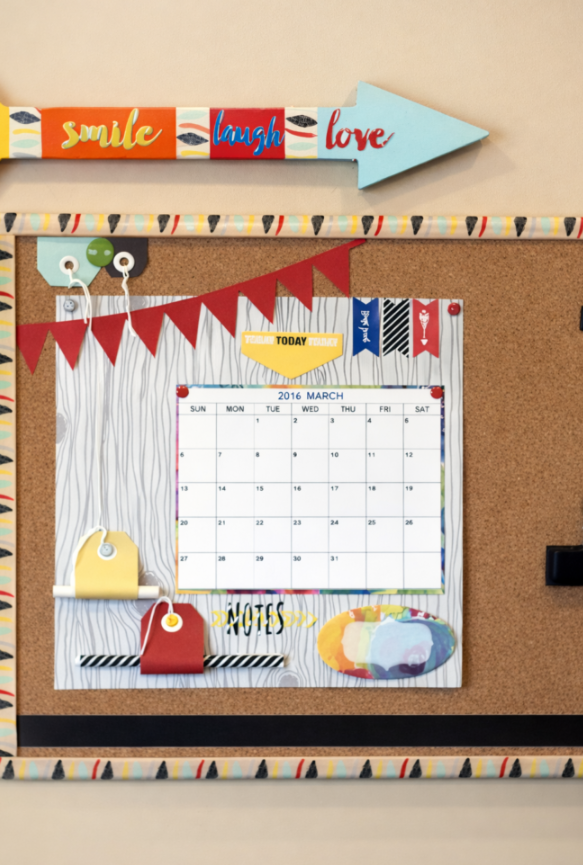
A cork board can serve as a simple family command center without requiring several separate organizers. Place a monthly calendar in the middle and use the surrounding space for appointment reminders, school notices, invitations, and shopping lists.
This arrangement is most useful somewhere the household naturally passes, such as a kitchen or entryway. Everyone can check upcoming plans without searching through drawers or messages.
Divide the board into sections using small labels or colored pins. Keep frequently updated information easy to reach and remove outdated notes regularly so important reminders remain visible.
10. Simple Cork Wall
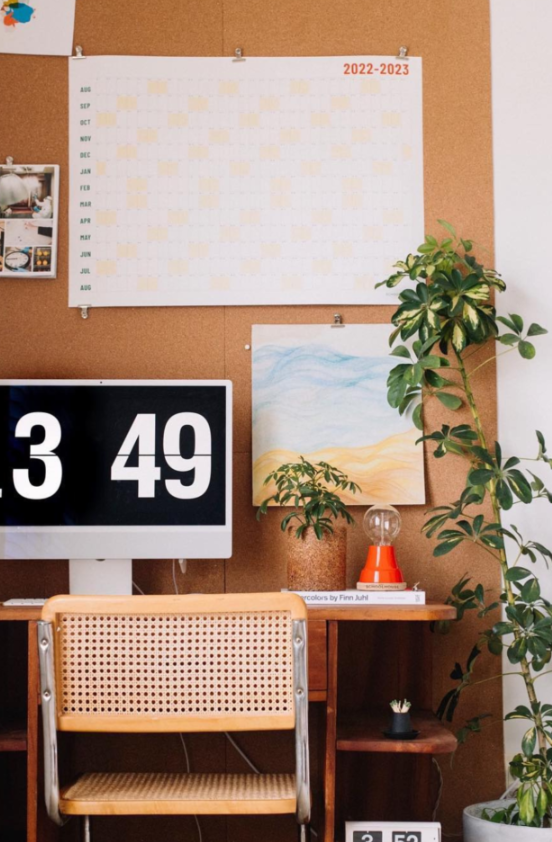
You do not need a complicated design to make a cork board useful. A large natural cork panel with a few carefully chosen photographs, prints, and current notes can look neat without much effort.
Start with the items you use most often and arrange them with enough space between each one. This makes individual papers easier to find and leaves room for new additions.
A simple cork wall works well in a home office, bedroom, or study nook. It is also easy to refresh because you can rearrange the contents without changing the board itself.
11. Natural Memory Board
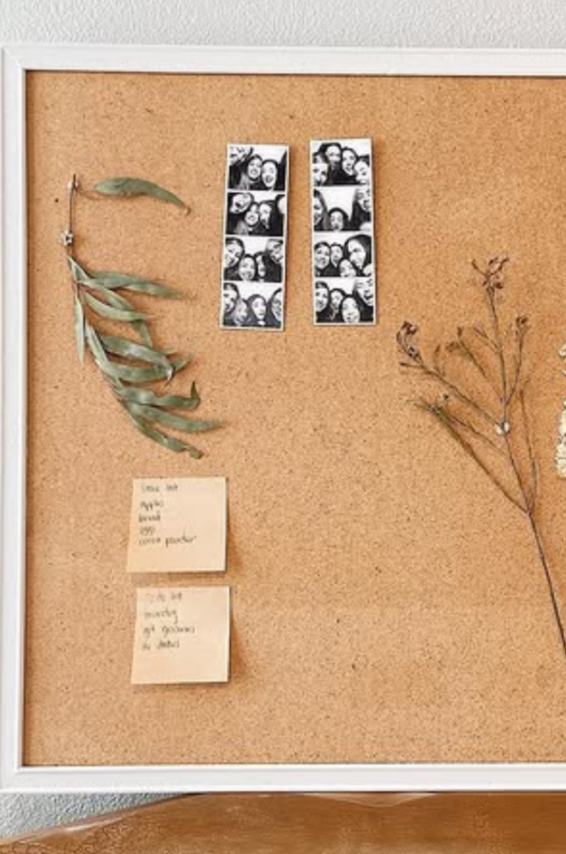
If you enjoy keeping small reminders of special moments, turn a cork board into a natural memory display. Combine photographs with postcards, pressed leaves, dried flowers, or paper keepsakes collected during trips and celebrations.
A plain wooden frame complements the warm cork surface and keeps the display from feeling overly decorative. Try grouping similar items together instead of filling every corner.
For delicate materials, use lightweight pins or small clips that will not tear the paper. This design is especially suited to a bedroom, reading corner, or personal workspace where you want meaningful items close by.
12. Corner Cork Wall
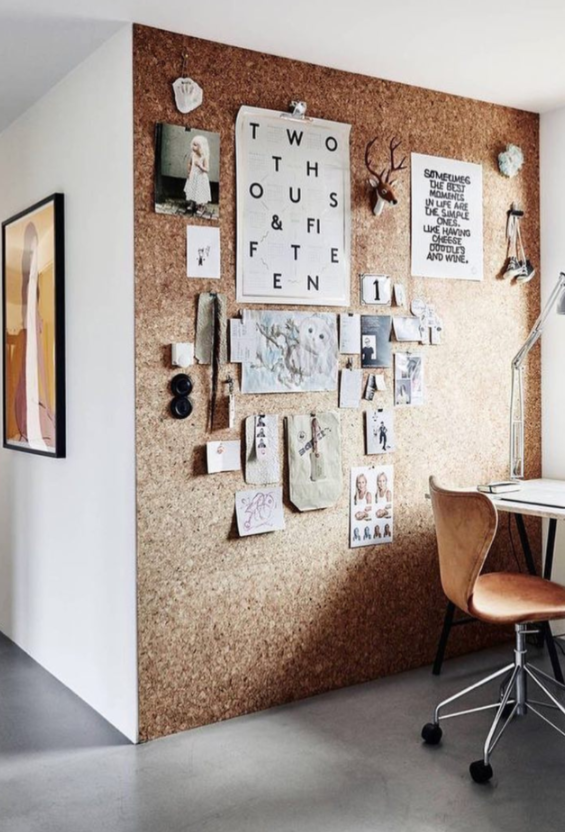
An unused corner can become a practical pinning area by extending cork panels across two adjoining walls. This gives you more display space without adding furniture or taking up valuable floor area.
Use the panels for sketches, reference photographs, project notes, and other materials that need to stay visible while you work. Keeping related items on each wall can make the arrangement easier to follow.
Before installing the panels, measure both walls and check the mounting surface. Larger boards need secure backing and suitable wall fixings, particularly if you plan to move pins around frequently.
13. Art Supply Organizer
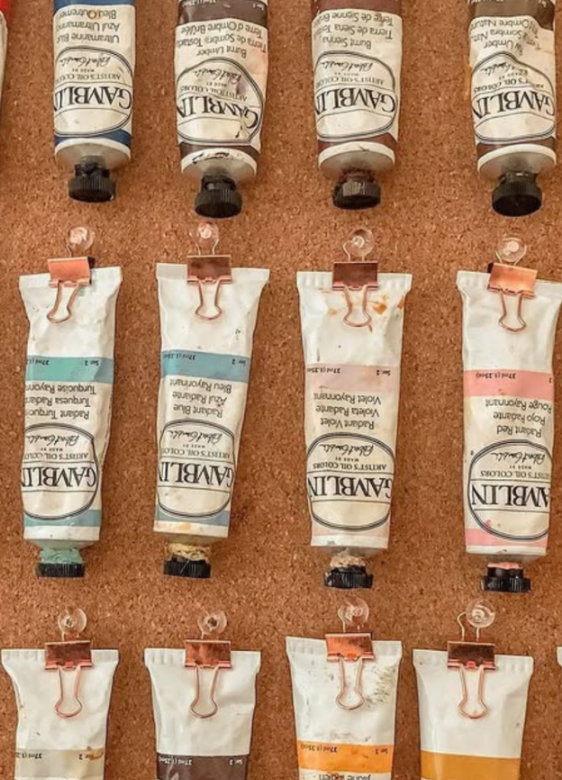
A cork board can help organize a craft area by keeping small, lightweight supplies within reach. Use clips, pinned holders, or suitable lightweight hooks for items such as fabric swatches, thread cards, color samples, and project notes.
Keep heavier tools, paint bottles, and bulky supplies on shelves or in drawers instead. Cork is better suited to lightweight items, and too much weight can pull at the board or its mounting hardware.
Arrange the supplies by project or type so you can find what you need quickly. Leave a section open for sketches, measurements, and ideas related to your current work.
14. Wine Cork Board
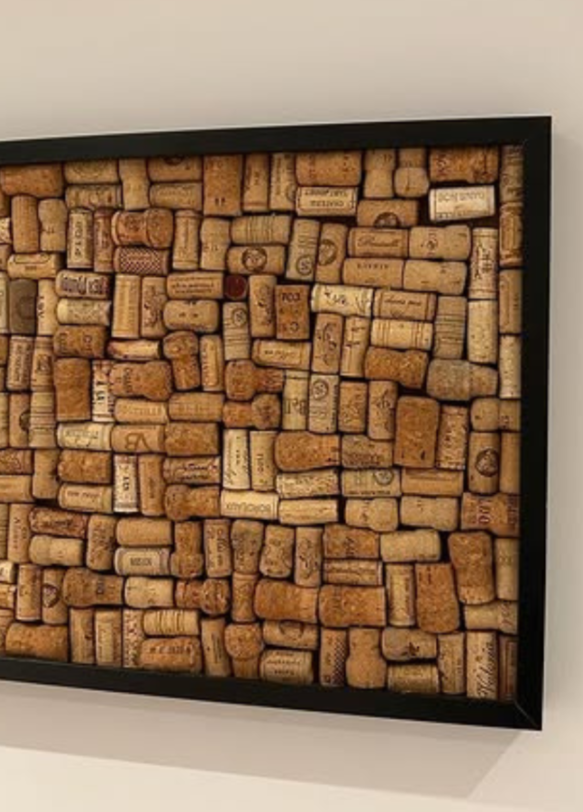
If you have saved wine corks from previous occasions, you can turn them into a decorative board. Arrange the corks inside a deep frame, then attach them closely to a firm backing using an adhesive suitable for the materials.
Line the corks up in the same direction for a simple finish or alternate their positions to create a more interesting pattern. A wooden frame complements the natural texture.
This project suits a kitchen, dining area, or home bar. Keep in mind that a wine cork board may not hold push pins as reliably as a traditional cork sheet, depending on how the corks are arranged and secured.
15. Oversized Playroom Cork Board
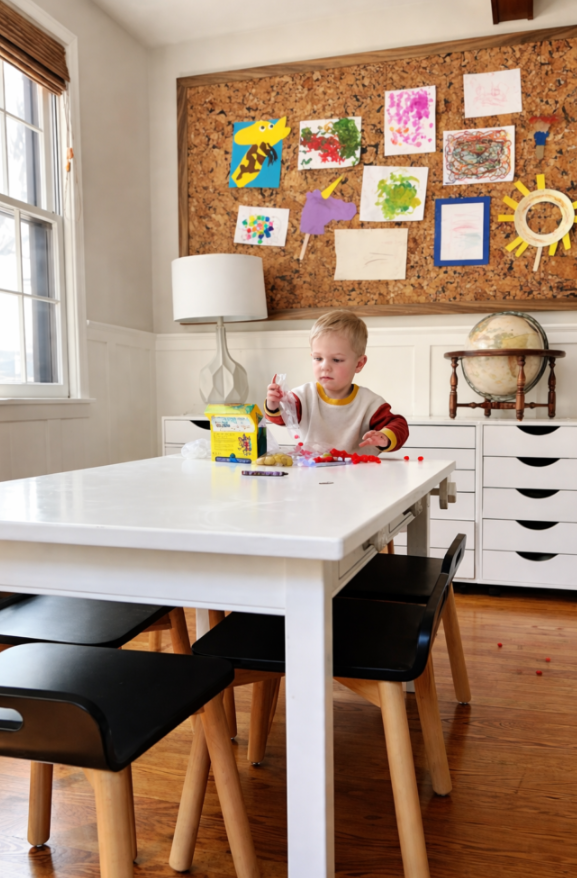
A wide cork board above a playroom table gives children plenty of room to display drawings, paintings, and school projects. It can also keep frequently used artwork off tables and other work surfaces.
Choose a rigid backing and finish the edges with simple wood trim. Position the board where children can comfortably see their artwork, but make sure the mounting is secure and the setup is appropriate for their age.
Rotate the display whenever new work comes home. Let children choose which pieces to keep on the board and store older favorites in a folder or artwork box.
16. Painted Cork Board
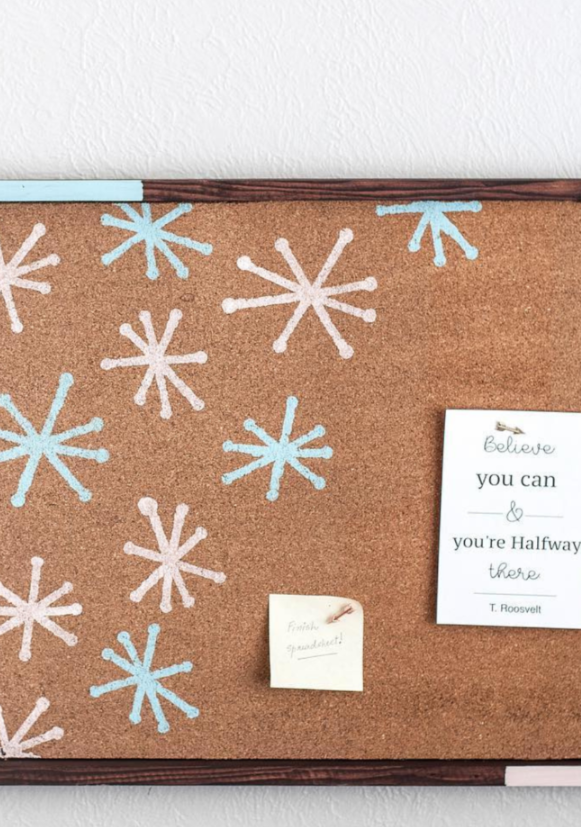
Painting is an easy way to give a plain cork board a new look without adding fabric or adhesive paper. You can use stripes, dots, geometric shapes, or a simple border to complement the room.
Choose two or three coordinating colors and leave some of the natural cork visible. This keeps the pattern from becoming too distracting when you add photographs, notes, or reminders.
Test the paint on a small area first and follow the product instructions. Avoid applying a thick coating that could make the surface harder to push pins into.
17. Fabric-Covered Cork Board
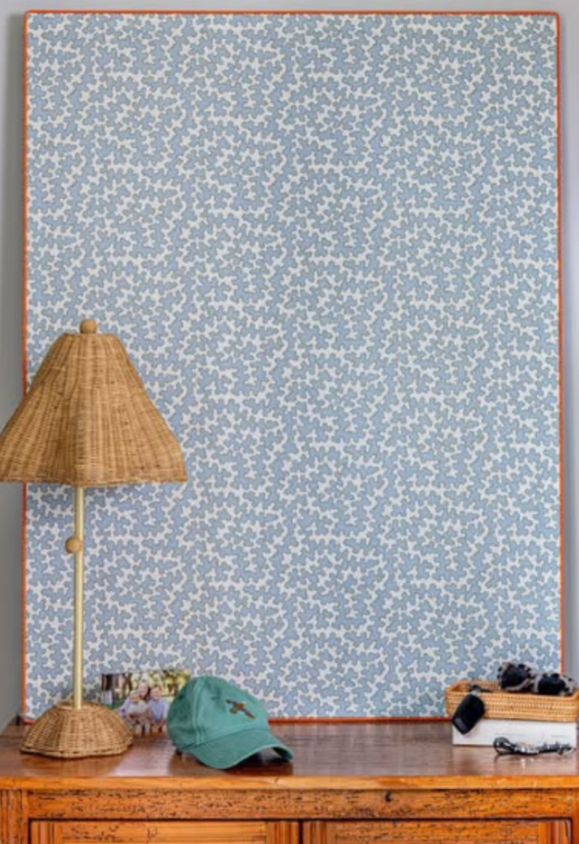
A fabric-covered cork board is a useful choice when you want to introduce a pattern or color that matches your room. Small floral prints, simple geometric designs, and muted colors can all work well.
Cut the fabric with enough extra material to wrap around the edges. Pull it evenly across the cork, secure it at the back, and fit the finished board into a frame if desired.
Before finishing, test whether push pins pass through the fabric and hold securely in the cork. If the fabric is too thick, choose a lighter material rather than making the board difficult to use.
18. Mood Board Wall
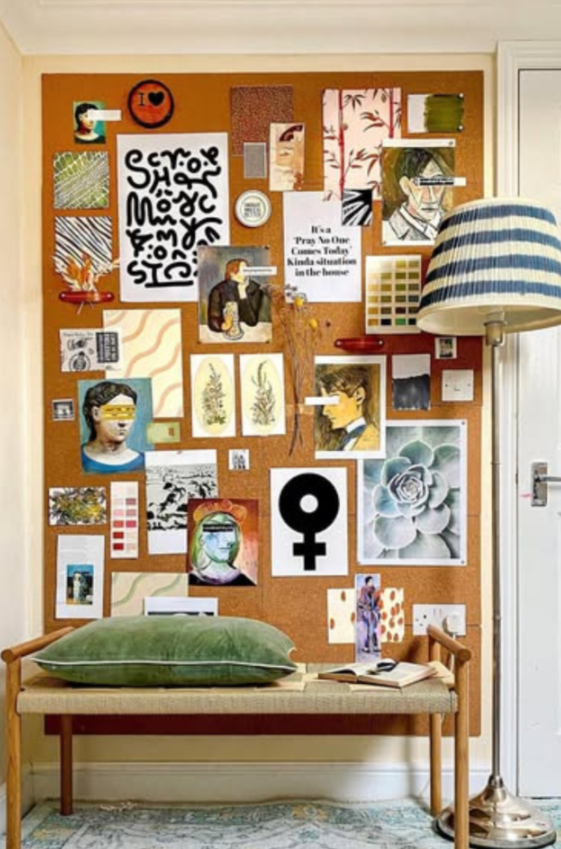
A mood board wall is useful when you collect ideas for decorating, crafts, photography, or other creative projects. Instead of keeping every reference in a folder, you can pin selected images and materials where you can see them together.
Start with a few photographs, magazine clippings, sketches, color samples, or fabric swatches. Add more as your project develops, and remove pieces that no longer fit your plans.
Group similar colors or ideas together while leaving space for changes. This makes the board easier to review and gives you room to experiment without needing to start over each time.
How to Stop a Cork Board From Warping
Cork boards can bend or curl when the material lacks support or when moisture and adhesive affect it unevenly. Choosing suitable materials before assembly can help reduce the chance of warping.
Here are a few practical steps to follow:
- Choose a rigid backing: Plywood or MDF can help support larger cork panels. Thin cardboard is less suitable for a board that will be used regularly.
- Spread adhesive evenly: Follow the adhesive manufacturer’s instructions and avoid soaking the cork with excessive glue.
- Allow materials to adjust: Let the cork and backing sit in the room before assembly when the product instructions allow it.
- Secure the panel properly: Larger boards need appropriate wall fixings and support rather than relying on the cork sheet alone.
- Check the surface before mounting: Let the adhesive cure fully as directed and make sure the panel remains flat before hanging it.
For a small framed board, a suitable backing may be enough. For a larger wall panel, the backing and mounting method become more important because they help the board stay stable during everyday use.
FAQs
What is the easiest way to stop a cork board from warping?
Use a firm backing such as suitable plywood or MDF, especially for larger boards. Apply adhesive in an even layer, follow the product’s drying instructions, and avoid excessive moisture during installation.
Can I cover cork with fabric or wallpaper and still use push pins?
Yes, provided the fabric or paper is thin enough for the pins to reach the cork and hold securely. Test the material before covering the entire board. Thick fabric, padding, or heavy wallpaper may make pinning difficult.
How thick should cork be for a pin board?
Choose cork thick enough for your push pins to grip without immediately reaching the hard backing. The right thickness depends on the pin length, backing, and intended use. If the cork is too thin, consider adding a suitable cork layer or choosing a thicker board.
What can I put on a cork board?
You can display photographs, calendars, reminders, artwork, postcards, recipes, school papers, project notes, color samples, and lightweight craft supplies. The best arrangement depends on whether you use the board for planning, decoration, or creative work.
A Few Things to Check Before You Start
Before buying materials, decide how you plan to use your cork board. A decorative board holding a few photographs has different needs from a busy workspace where you will move pins around every day.
Check the cork thickness, backing material, and frame size before cutting anything. Larger panels usually need more support, while smaller framed boards may be easier to assemble and mount.
If you are using glue, spread it evenly and follow the manufacturer’s instructions. Too much adhesive or uneven drying can contribute to curling, so avoid applying more than the product requires.
For fabric or paper coverings, test a small section with a push pin first. Make sure the pin reaches the cork and stays in place before covering the full surface.
Finally, check the wall and mounting hardware. A board holding several lightweight papers may need less support than a large panel carrying clips or small supplies. Taking these steps before assembly can help you create a cork board that looks good and works well for your everyday needs.