21 DIY Mirror Frame Ideas for 2026
A plain mirror can work perfectly well and still make a room look unfinished. I have found that the problem is often not the glass itself but the empty edge around it. Adding a frame gives the mirror a finished look and can also help it connect with the vanity, wall color, furniture, or other finishes in the room.
When I frame a mirror, I first decide how much change I actually want. A simple wood border can make a builder-grade bathroom mirror look custom, while rope, shells, tile, paint, or decorative trim can give a bedroom mirror a completely different style. The good news is that many of these ideas can be done without taking the mirror off the wall.
In this guide, I’m sharing 21 DIY mirror frame ideas, from quick renter-friendly updates to projects that require basic woodworking. I’ll also cover what I check before framing a mirror, including wall clips, moisture, adhesives, spacing, and finishing.
Key Takeaways
- I always measure the existing mirror and check its clips, brackets, lights, outlets, and surrounding wall before choosing a frame.
- Wood is one of the easiest options, but it needs proper sealing when used in a humid bathroom.
- A black, brass, or double-trim frame can give a basic mirror a more finished architectural look.
- For a temporary update, I prefer removable tape or a painted shape behind the mirror.
- The best frame is not necessarily the most detailed one. I choose a design that fits the room and does not make the mirror look out of place.
Before You Start Framing the Mirror
Before I buy any materials, I measure the mirror itself and inspect how it is mounted. I look for metal clips, brackets, outlets, vanity lights, faucets, backsplash tiles, and anything else that could interfere with a new frame.
If clips stick out from the wall, a wooden frame may need small notches or spacers at the back. I also check how much room I have around the mirror because a frame that is too wide can make a small bathroom feel more crowded.
For bathrooms, I pay extra attention to moisture. Solid wood can work well when it is properly sealed, but exposed cut ends need protection. MDF needs even more care in damp areas because moisture can cause it to swell.
I also never assume that one adhesive works for every mirror installation. If I am attaching something directly to or near glass, I use a product specifically rated for the materials and follow its application instructions.
My biggest time-saving tip is simple: finish the frame before putting it in place. I sand, paint or stain the pieces, let them cure properly, and then dry-fit everything around the mirror. Fixing a corner on the floor is much easier than fixing it above a sink.
1. Coastal Shell Mirror Frame
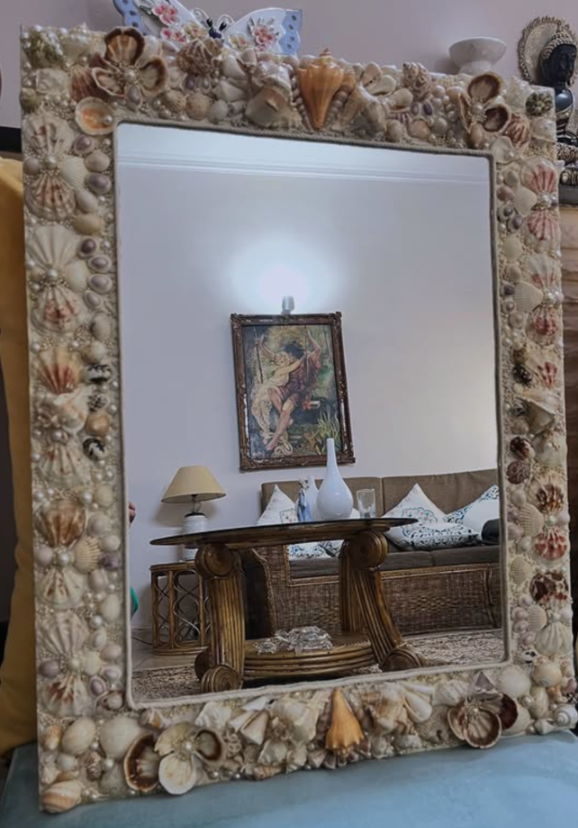
I like a shell-covered frame when I want a mirror to feel relaxed and slightly coastal. Rather than covering every inch with identical shells, I would mix several sizes and shapes around a simple base frame.
Before using adhesive, I lay the shells out around the entire mirror. This lets me balance larger pieces with smaller ones and avoid obvious gaps. Leaving a little of the base visible can actually make the texture look more natural.
This idea fits well in a beach-inspired bathroom, guest room, bedroom, or entryway. If I use real shells, I make sure they are clean and completely dry before attaching them.
2. Rustic Overlap Wood Frame
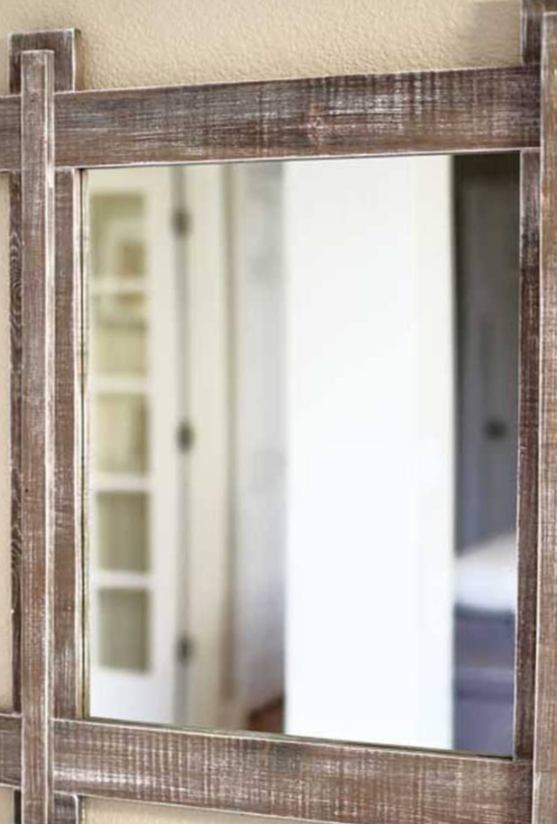
An overlap-style wood frame gives me a more casual handmade appearance than a perfectly mitered picture frame. The boards meet with visible overlap at the corners, which becomes part of the design.
I would choose boards with a little character in the grain and use a stain that works with the existing flooring or vanity. A lighter finish keeps the look casual, while a darker stain gives the mirror more visual weight.
I always place all four boards around the mirror before fastening anything. This makes it much easier to check the corner overlaps and overall proportions.
3. Clean Wood Edge
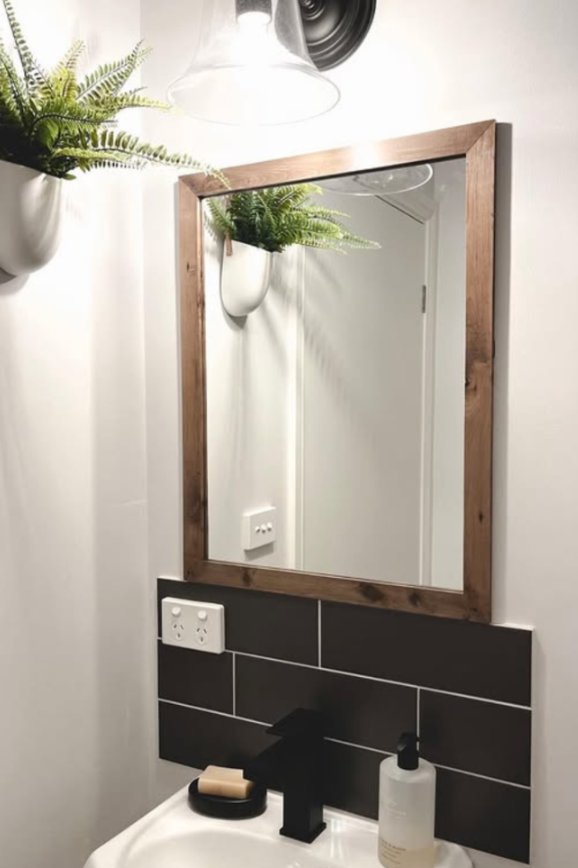
When the room already has patterned tile, decorative lighting, or colorful cabinetry, I prefer a simple wood edge. It gives the mirror a finished border without adding another strong design element.
Thin, straight boards are enough for this project. I sand the visible edges carefully and then choose clear sealer, stain, or paint depending on the room.
This is one of the safest choices for a bathroom because the design is simple and easy to coordinate. A narrow frame can make a basic mirror look intentional without taking attention away from the rest of the vanity.
4. Floral Accent Frame
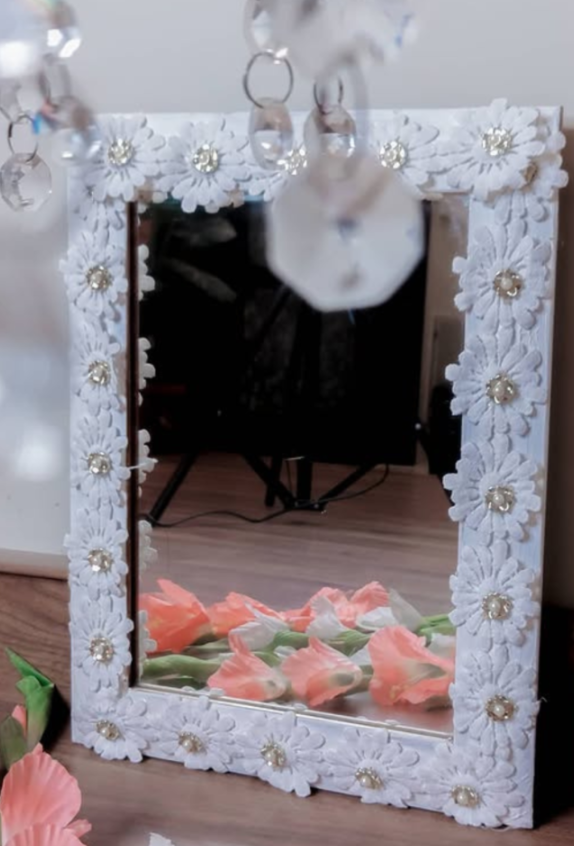
For a softer decorative look, I can add raised floral pieces to a basic frame. Wood, resin, or lightweight decorative appliqués can work as long as the material and adhesive are suitable for the project.
I prefer keeping the flowers concentrated around the corners or selected sections instead of covering the entire frame. That gives the design some breathing room.
Painting the frame and decorations in one color also helps. White, cream, muted green, dusty pink, or an understated metallic finish can create very different results without changing the basic construction.
5. Colorful Ring Mirror
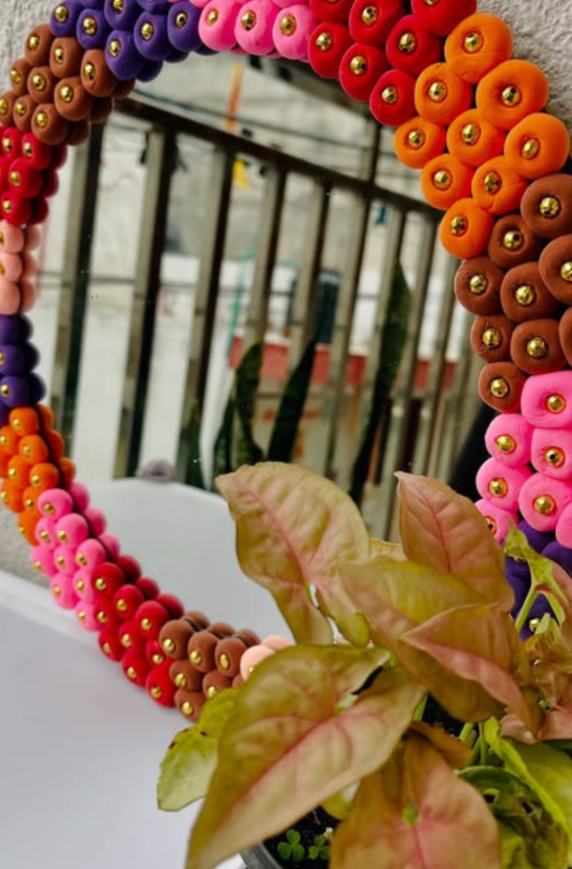
A round mirror gives me a great base for a playful frame made from repeated shapes. Small wooden rings, beads, discs, or similar craft pieces can be arranged around the outside edge.
I find that repetition is what keeps a colorful design looking organized. I can use several colors, but I keep the shapes and spacing consistent.
I would use this idea in a child’s bedroom, craft space, playroom, or colorful entryway rather than a formal bathroom. I always arrange the pieces first and take a photo before gluing them down so I can spot any areas that look unbalanced.
6. Black Grid Mirror
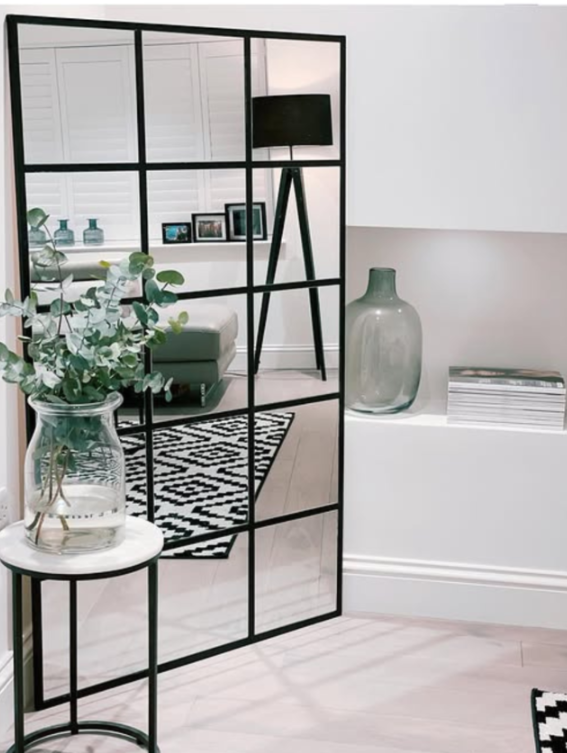
A black grid can make a large single mirror resemble a collection of individual glass panes. Instead of replacing the mirror, I can create the visual effect with thin strips and a dark finish.
The measurements need to be accurate because even small spacing differences can stand out on a grid. I measure the mirror several times and mark the strip positions before attaching anything.
This style suits modern, industrial, transitional, and minimalist interiors. I would keep the grid relatively thin in a bathroom so the mirror remains practical for everyday use.
7. Ornate Gold Mirror Frame
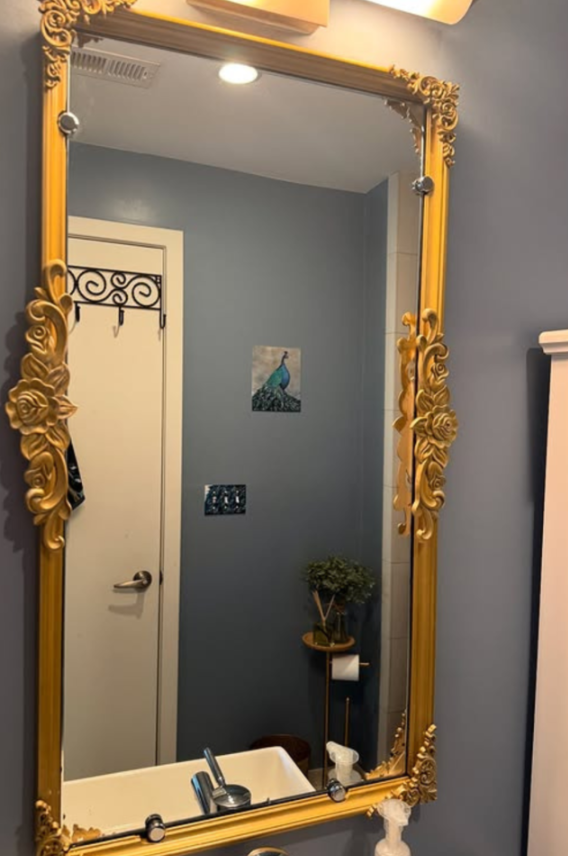
If I want a basic mirror to look more traditional, decorative molding and gold paint can make a noticeable difference. I can start with a simple frame and add ornamental pieces to the corners or selected sections.
I prefer painting the base and decorative pieces in the same finish because it makes the frame look like one designed object. Bright gold gives a more dramatic result, while antique gold or champagne tones tend to look softer.
The important part here is surface preparation. I make sure the frame is smooth and properly primed before applying metallic paint because imperfections can become very noticeable under a shiny finish.
8. Floral Vine Mirror
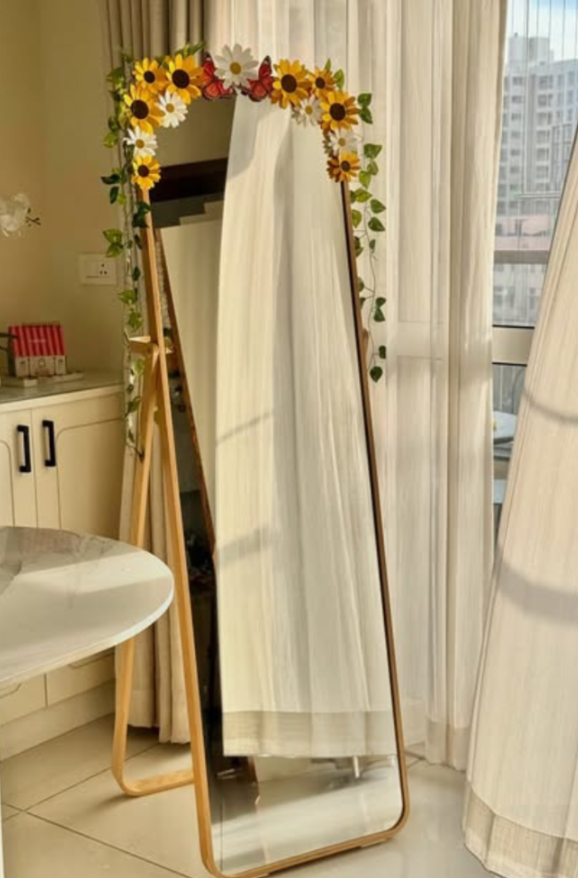
I do not always need to frame the entire mirror. A few artificial flowers and trailing leaves placed along one corner or across the top can create a decorative border while leaving most of the mirror exposed.
This is especially useful when I want something temporary because I can change the floral arrangement later without rebuilding the mirror.
I would use this approach in a bedroom, dressing area, reading corner, or other space where the mirror is part of the decoration. For a bathroom, I would keep moisture and splash exposure in mind when choosing the flowers and attachment method.
9. Bold Black Frame
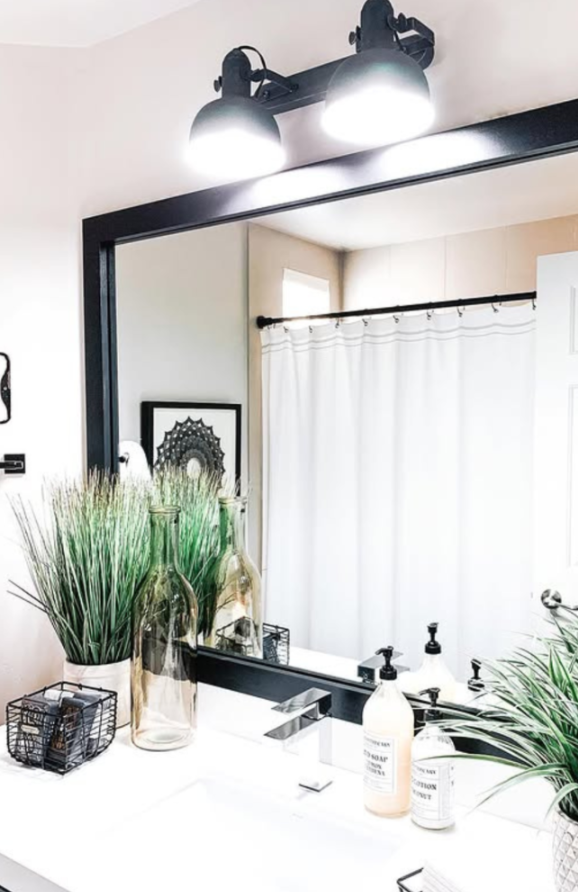
A black frame is one of my favorite ways to add contrast to an otherwise light bathroom. A basic timber frame can be enough because the color does most of the visual work.
I usually prefer a matte or satin finish when I want a modern appearance. It pairs particularly well with white tile, natural wood, brass hardware, or other black fixtures.
Before building a thick frame, I would test the look with painter’s tape around the mirror. Standing several feet away gives me a much better idea of whether the planned border is too heavy.
10. Mosaic Tile Mirror Frame
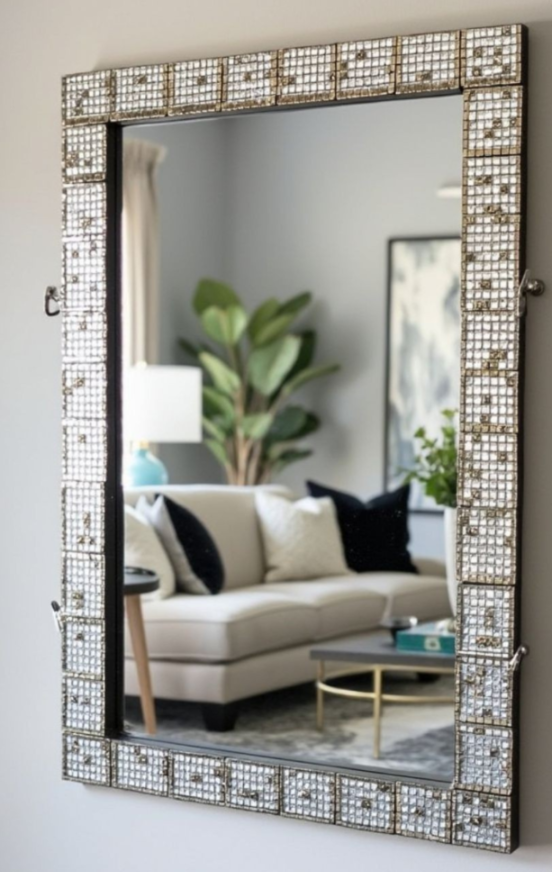
Mosaic tile gives me a way to add texture, color, and shine around a plain mirror. Glass, ceramic, stone, and metallic mosaic pieces can all produce different looks.
I start with a sturdy, flat border and plan the tile layout before applying adhesive. A narrow tile strip can keep the result subtle, while a wider border turns the mirror into a focal point.
For a bathroom project, I make sure the adhesive and grout are appropriate for a wet or humid environment. I also avoid treating a bathroom installation like a simple craft project because the materials need to handle the conditions of the room.
11. Double-Line Trim
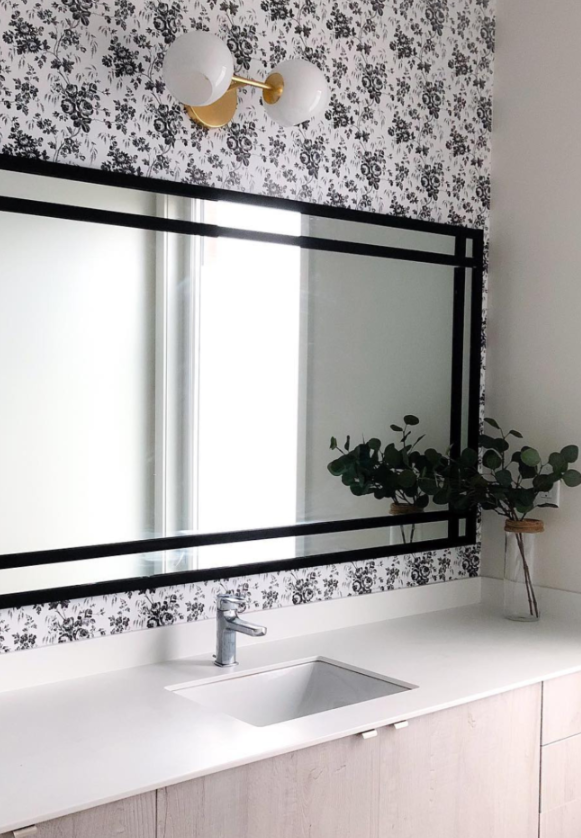
A double-line frame is useful when a single wide border feels too bulky. I can use one outer trim piece and one narrower strip closer to the mirror to create two clean lines.
Keeping both pieces the same color makes the result look architectural. Black, bronze, white, and dark wood can all work depending on the surrounding finishes.
I especially like this option when the wall already has wallpaper or patterned tile. The two narrow lines define the mirror without hiding too much of the background.
12. Painted Vanity Frame
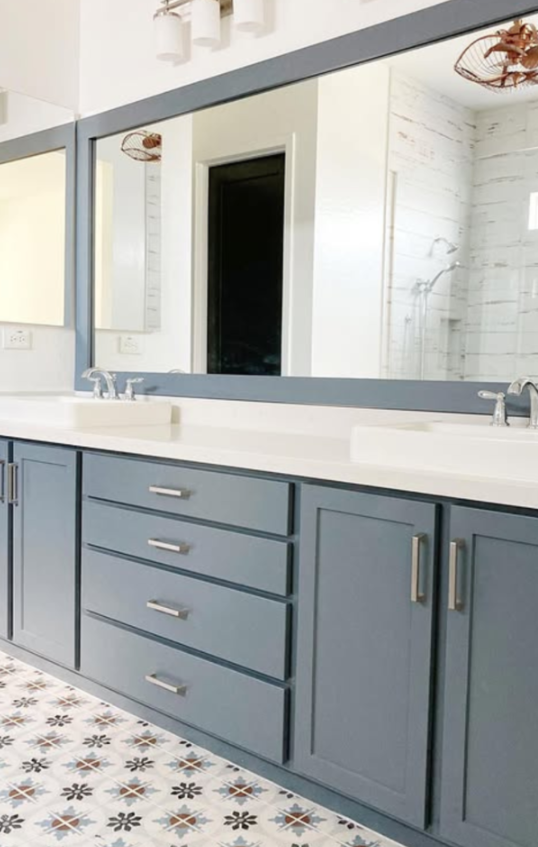
Matching the mirror frame to the vanity is a simple way to make the bathroom feel more coordinated. Instead of treating the mirror as a separate item, I make its frame relate directly to the cabinetry.
A flat wooden frame is enough. I can use the exact cabinet color or choose a slightly lighter or darker version for contrast.
This works particularly well with colors such as deep green, navy, charcoal, warm beige, and other painted cabinetry. I always paint and seal the frame before installing it because getting a clean finish next to the glass is much harder afterward.
13. Floral Vanity Light Frame
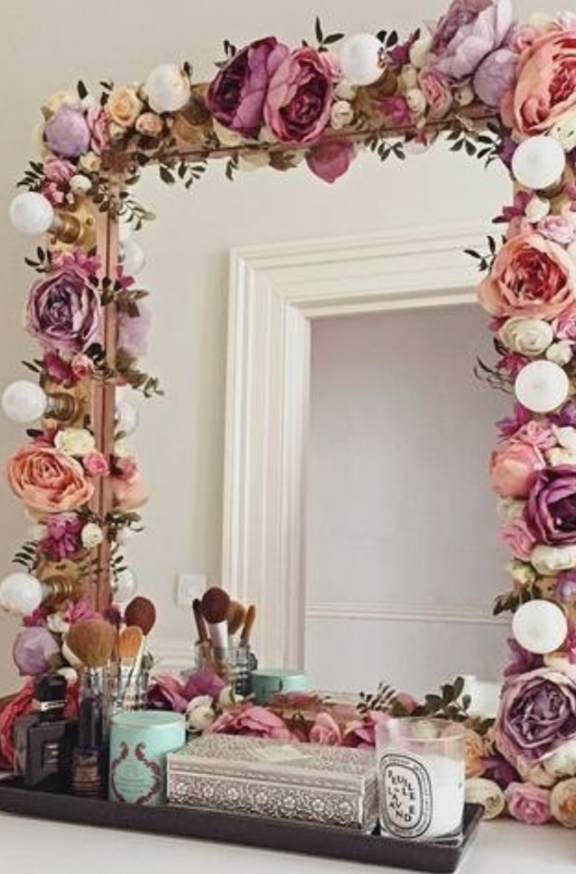
For a bedroom or makeup station, I can combine decorative flowers with soft lighting around a framed mirror. The result can make the mirror feel more like a dedicated vanity area.
I would keep the flowers concentrated in a few sections rather than wrapping the entire mirror. That leaves enough open space for the reflection and keeps the design from becoming visually crowded.
If I add decorative lights, I keep electrical components clear of fabric and other materials and follow the manufacturer’s installation instructions. I never cover ventilation areas, plugs, switches, or other components with decorations.
14. Sculpted Wave Frame
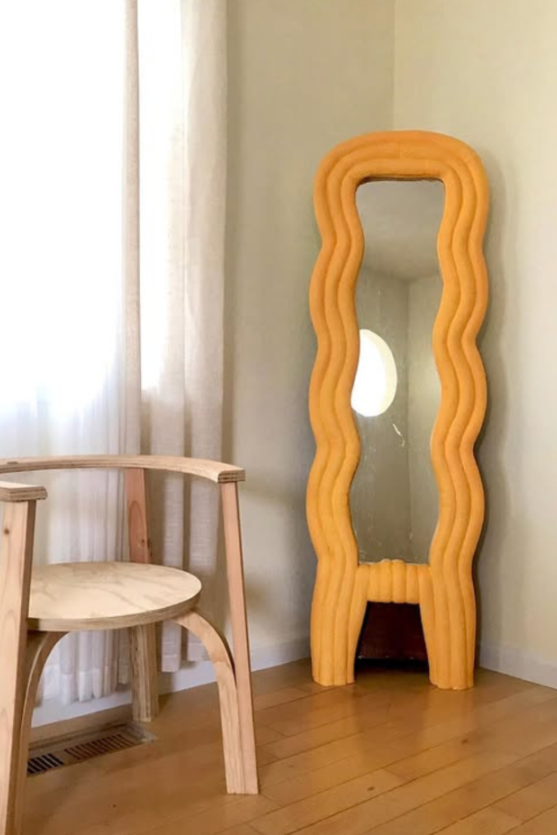
A wavy frame changes the silhouette of an ordinary mirror and can make it feel more like wall art. I can create the irregular outline with shaped wood, molding, or suitable lightweight craft materials.
Once the shape is complete, I prefer a single paint color because the unusual outline already provides plenty of visual interest.
Soft white, cream, muted blue, terracotta, and darker shades can all work. I would measure the wave pattern carefully because an uneven shape can look accidental rather than intentional.
15. Classic Wood Mirror Frame
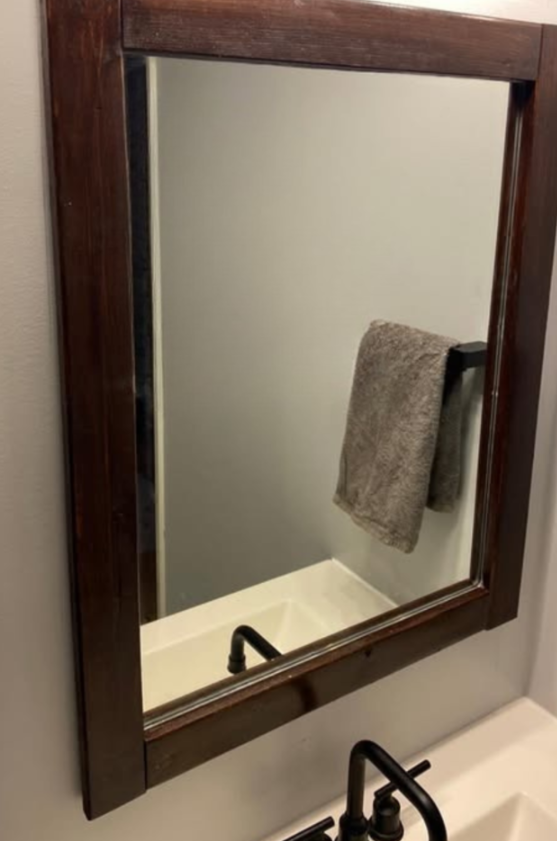
If I want a mirror frame that will still look good after trends change, I usually choose a classic four-sided wood design. It is simple, versatile, and works with almost any decorating style.
For a more traditional appearance, I can miter the corners. For a simpler DIY build, square joints are easier and can still look excellent when the cuts are clean.
Good preparation matters more here than fancy materials. Straight boards, accurate cuts, careful sanding, and an even finish can make inexpensive timber look surprisingly polished.
If I install it in a bathroom, I seal the wood before installation, paying particular attention to the cut ends and joints.
16. Rope-Wrapped Mirror
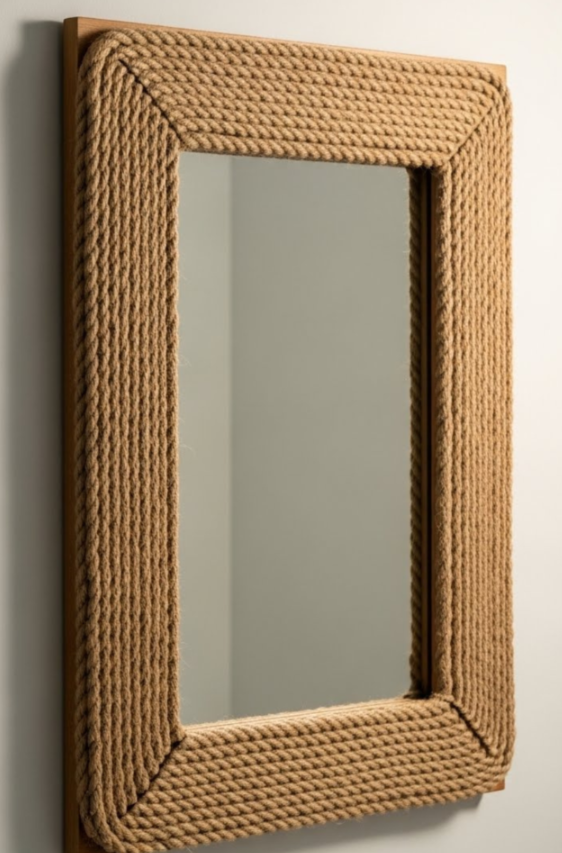
Rope is a good option when I want texture without doing much woodworking. It works especially well around round mirrors because the rope can follow the curve naturally.
I would build the border in neat, even rows and hide the starting and ending points as much as possible. Jute gives a rustic or coastal appearance, while cotton rope creates a softer look.
The main thing I would consider is moisture. I would not put ordinary rope or an unsuitable adhesive in an area that receives frequent splashing unless the materials are specifically suitable for that environment.
17. Leather Strap Detail
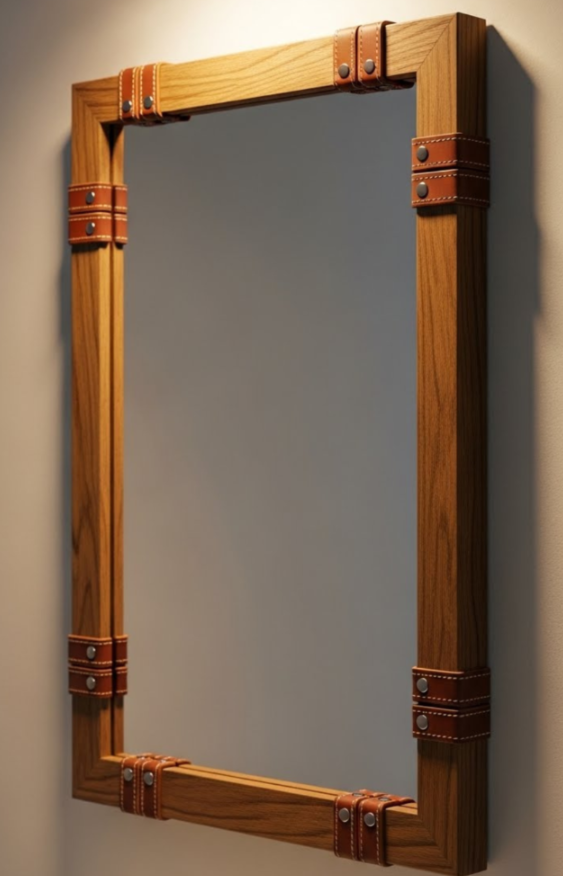
Leather does not have to cover the whole frame to make an impact. I can add small straps or corner details to a plain wooden frame for a more custom appearance.
Tan leather works nicely with light wood and natural materials, while dark brown or black leather can give the mirror a more industrial feel.
I keep each strap the same width and place them at matching positions. Consistency is important because random-looking straps can make the frame appear unfinished.
18. Thin Brass Border
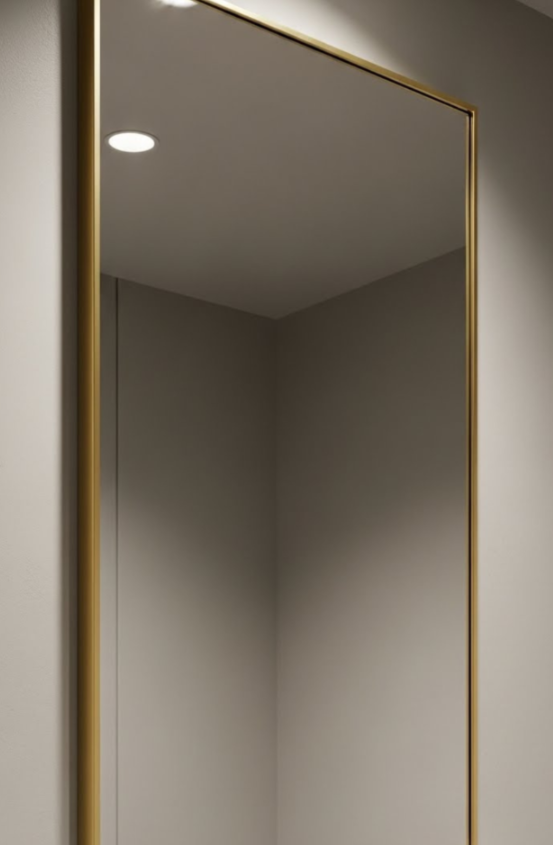
A thin brass-colored border is a good choice when I want some warmth without building a thick frame. The narrow metallic line adds definition while allowing most of the mirror and wall to remain visible.
This works especially well alongside white tile, stone surfaces, warm wood, or darker painted walls.
Because the trim is narrow, I take extra care with alignment. A thick rustic frame can hide small imperfections, but a thin metallic line tends to make uneven spacing much easier to see.
19. Washi Tape Mirror Border
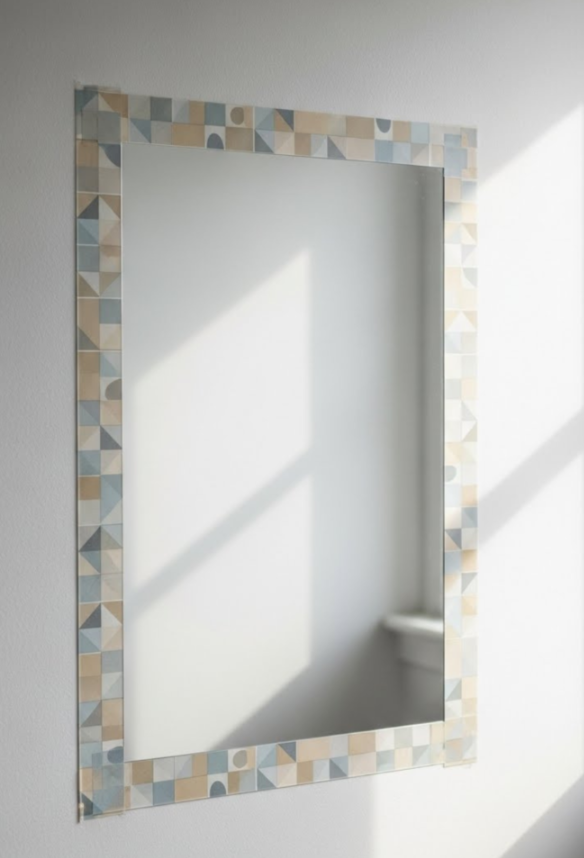
For a rental, dorm room, child’s room, or temporary makeover, I can create a decorative mirror border with washi tape or another removable decorative tape.
I choose one pattern or a small group of colors and keep the lines straight. The goal is not to make the tape look like a heavy wood frame but to create a quick visual border that can be changed later.
I would test the tape on an inconspicuous area first and follow the manufacturer’s removal instructions. Different surfaces and paints can react differently to adhesives.
20. Tile Edge Border
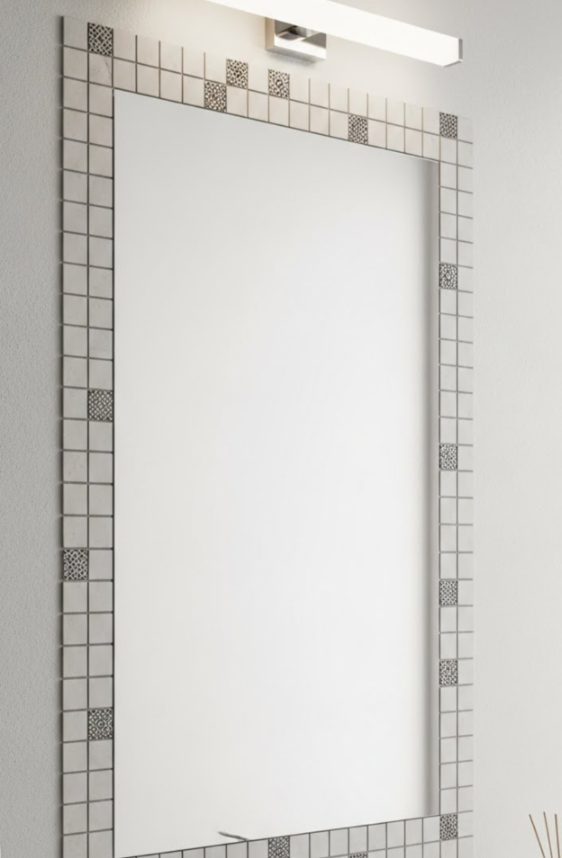
If my mirror sits above a tiled vanity or backsplash, extending the tile around its edge can make the entire wall feel more connected.
Using the same tile creates a built-in appearance, while a contrasting tile can make the mirror stand out as a feature.
I pay close attention to grout spacing because uneven joints are very noticeable around a mirror. I also make sure the wall and existing mirror installation can safely support any additional material before adding a tile border.
21. Painted Arch Around the Mirror
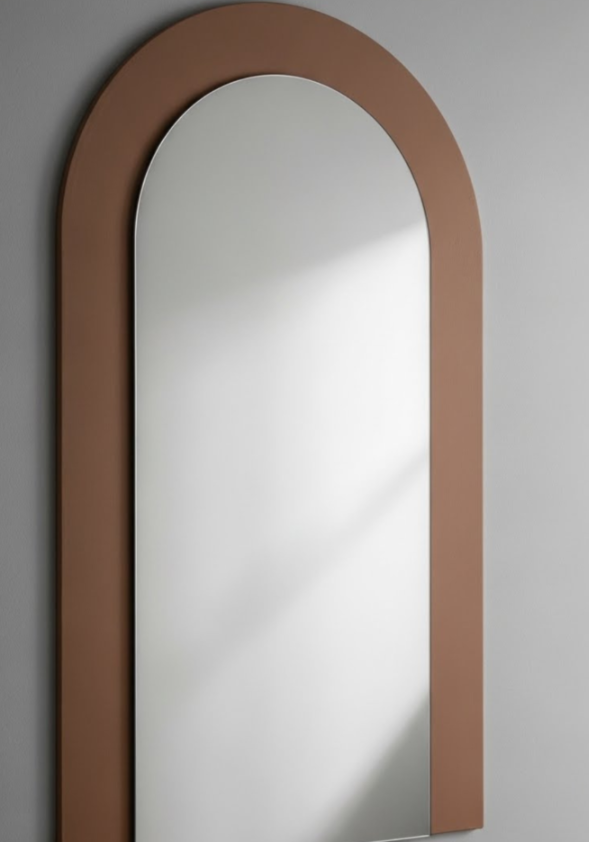
A painted shape can create the appearance of a frame without adding any physical trim. I can paint an arch, rectangle, circle, or softer organic shape directly onto the wall behind the mirror.
This is one of the easiest options when I want a visible change without adding weight to the mirror. Warm beige, sage, terracotta, dusty blue, and charcoal can all create very different moods.
The size matters more than the painting technique. I make the painted shape extend clearly beyond the mirror so it looks intentional rather than like an outline that is almost the same size.
This is also a useful approach for renters when the wall can be returned to its original condition with suitable paint and permission from the property owner.
Which DIY Mirror Frame Should You Choose?
I would choose the frame based on the mirror, the room, and how permanent I want the project to be rather than simply copying a style I like online.
For a large bathroom mirror, I would start with classic wood, a clean black frame, double trim, or a frame matched to the vanity. These options give a builder-grade mirror a finished appearance without adding too much decoration.
For a bedroom or dressing area, I have more freedom. Floral accents, sculpted waves, decorative lighting, colorful pieces, and leather details can make the mirror part of the room’s personality.
For a round mirror, rope, shells, mosaic tile, and repeated craft pieces are particularly easy to adapt because they naturally follow the curved edge.
For a rental or temporary makeover, I would consider washi tape or a painted wall shape first, provided the wall finish and rental rules allow it.
In my experience, the most successful DIY mirror frames are not necessarily the most complicated. A frame looks best when its proportions, finish, and materials make sense with everything around it. If the mirror feels like it belongs in the room, the project has done its job.
Conclusion
Framing a plain mirror does not have to be a major renovation project. I can make a noticeable difference with simple wood trim, paint, rope, tile, brass, or even a removable border, depending on the room and how permanent I want the update to be.
Before starting, I always check the mirror’s size, mounting hardware, surrounding fixtures, and the moisture level of the room. Good measurements and proper materials matter more than choosing an expensive or complicated design.
If I had to choose, I would start with a simple wood or black frame for a bathroom, a more decorative option for a bedroom, and paint or removable tape for a temporary makeover. The best DIY mirror frame is the one that fits the space, looks intentional, and gives the old mirror a finished look without making the project harder than it needs to be.