16 DIY Ring Holder Ideas for 2026
DIY Ring Holder Ideas
I’ve found that the best ring holder is not always the prettiest one—it’s the one I will actually use every day. I usually take my rings off while washing dishes, showering, sleeping, cooking, or working, and that is when they are easiest to misplace. A DIY ring holder gives me a dedicated place to put them without spending much money.
In this guide, I’m sharing 16 DIY ring holder ideas for 2026, from quick clay cones and simple trays to padded boxes and decorative animal designs. I’ve also included practical tips on choosing safe materials, protecting delicate rings, and placing the holder where I’m most likely to use it.
Key Takeaways
- I prefer air-dry clay or polymer clay when I want a quick ring holder with very few supplies.
- A cone is useful for keeping rings upright, while a dish is better when I remove several pieces at once.
- For valuable or delicate jewelry, I use smooth, soft, non-abrasive surfaces rather than rough unfinished materials.
- The best location is usually the place where I naturally take my rings off, such as a nightstand, vanity, or dresser.
- I can make most of these ideas without advanced crafting skills or expensive equipment.
What is the Easiest DIY Ring Holder to Make at Home?
For me, the easiest DIY ring holder is a small clay cone or shallow ring dish. I only need a small amount of air-dry clay, and I can shape it by hand without measuring complicated pieces.
If I choose air-dry clay, I can form the holder, smooth the surface, and leave it to cure according to the manufacturer’s instructions. Polymer clay is another option, but it needs to be baked according to its package directions.
I like the cone design when I wear several rings because I can slide them onto the narrow top and see them easily. A dish is more convenient when I usually remove my rings all at once.
The main benefit is simple: I’m creating one obvious landing spot for my rings. The holder does not need to be complicated if it helps me build the habit of putting my jewelry in the same place.
Velvet Slot Tray
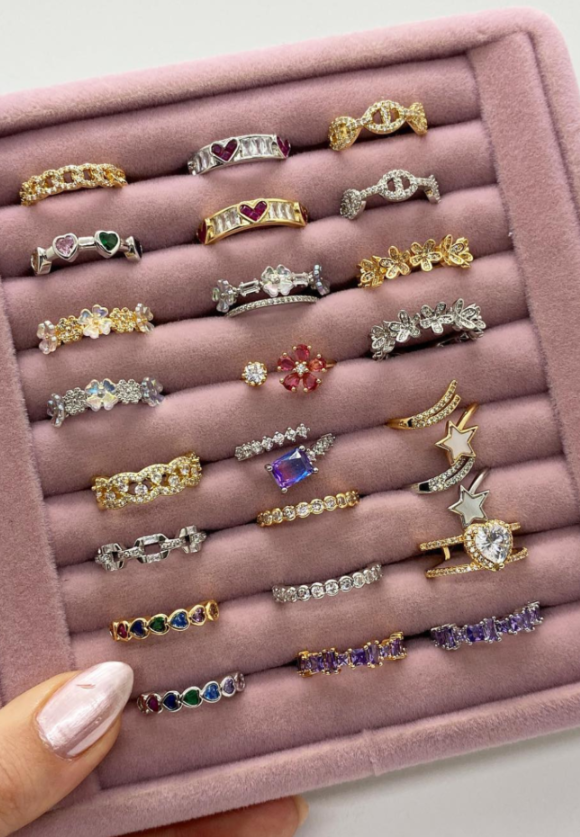
When I have several thin rings, I find that they can quickly become tangled or mixed together. A velvet slot tray gives each ring its own space and also makes the collection easier to see.
I can make one by cutting strips of foam or another suitable soft insert and covering them with velvet or a similar smooth fabric. I then place the pieces inside a shallow box, leaving narrow gaps for individual rings.
My main tip is to avoid making the slots so tight that I have to force the rings in or pull them out. The holder should grip the jewelry lightly while still allowing easy access.
Painted Ring Cones

Painted clay cones are one of the easiest ways I can turn basic ring storage into a small decorative piece. I can make several cones in different colors or keep the whole set in one simple shade.
I start by shaping small cones from air-dry clay or polymer clay. After the material has fully cured or been baked as required, I can add stripes, dots, blocks of color, or another simple pattern.
I prefer keeping the cone fairly smooth because rough clay can catch on jewelry. If I’m making several cones, I can also use different heights so the rings are easier to see.
Palmistry Hand Stand
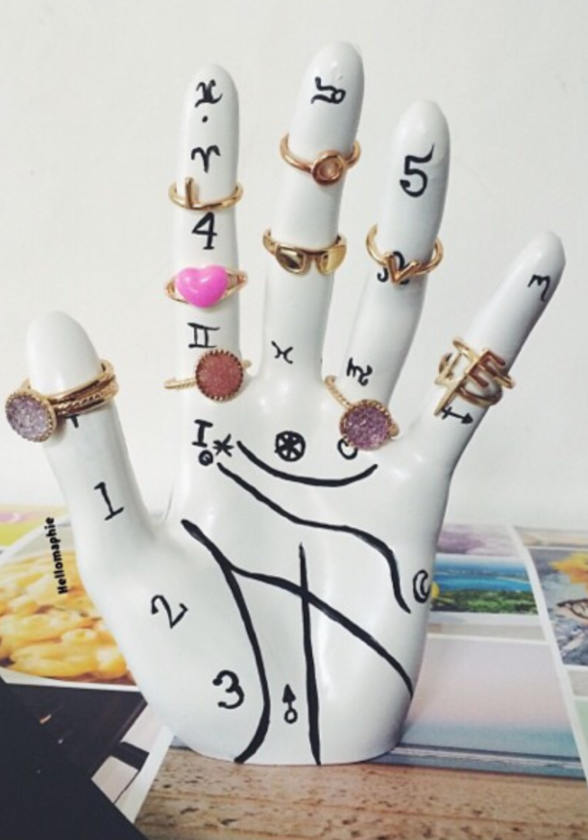
A hand-shaped ring holder gives me more than storage—it can also act as a display piece. I especially like this style when I want a statement ring to remain visible instead of being hidden inside a drawer.
I can create the hand from clay or use a suitable craft base and add simple palm lines with paint or a marker. The fingers can then act as individual places for rings.
If I’m making this from scratch, I’d make sure the base is wide enough to stop the holder from tipping. A beautiful ring stand is not useful if it falls over whenever I remove a ring.
Finger Dish Holder
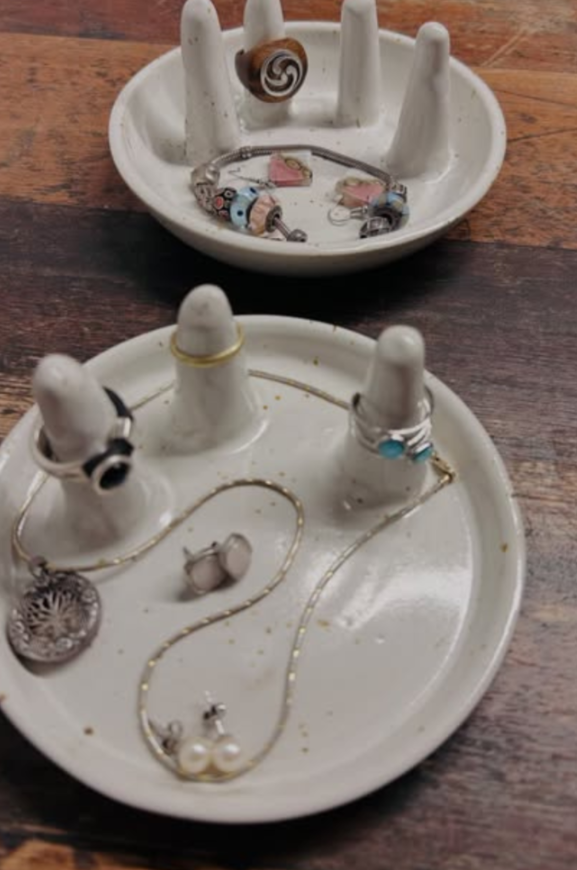
A finger dish combines two useful features: a small catchall surface and raised sections for holding rings. I find this practical when I remove jewelry near my bathroom sink or bedside table.
I can shape a shallow clay dish and add a few simple raised finger forms. The important part is keeping the inside smooth and giving the base enough weight to stay stable.
I would also keep the holder away from the edge of a sink. Even if the ring has its own place, one accidental knock can send both the holder and jewelry onto the floor.
Minimal Block Stands

When I want my jewelry storage to look clean and simple, small block stands are a good option. They take up little space and don’t compete with the rest of my room decor.
I can shape small rectangular or square pieces from clay and create a narrow groove across the top. The groove needs to be wide enough for the ring to sit securely without being forced into it.
I like making several blocks at once if I have rings in different sizes. I can keep everyday bands on one and larger rings on another.
Cactus Ring Bowl
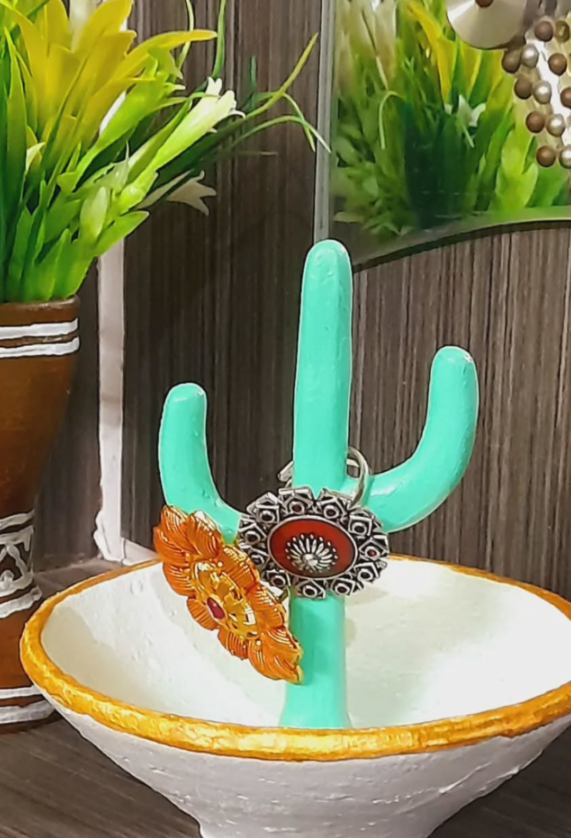
A cactus ring bowl adds a little personality while still giving me a practical place to store jewelry. The center cactus shape can hold rings, while the bowl catches smaller pieces such as earrings.
I can make the bowl and cactus from clay and join the pieces while the material is still workable. Once everything is finished, I can paint the cactus green or use any color that matches my space.
One thing I would not skip is smoothing the cactus edges. Decorative spikes should look pointed without creating sharp surfaces that can scratch jewelry or catch fabric.
Cat Paw Catchall
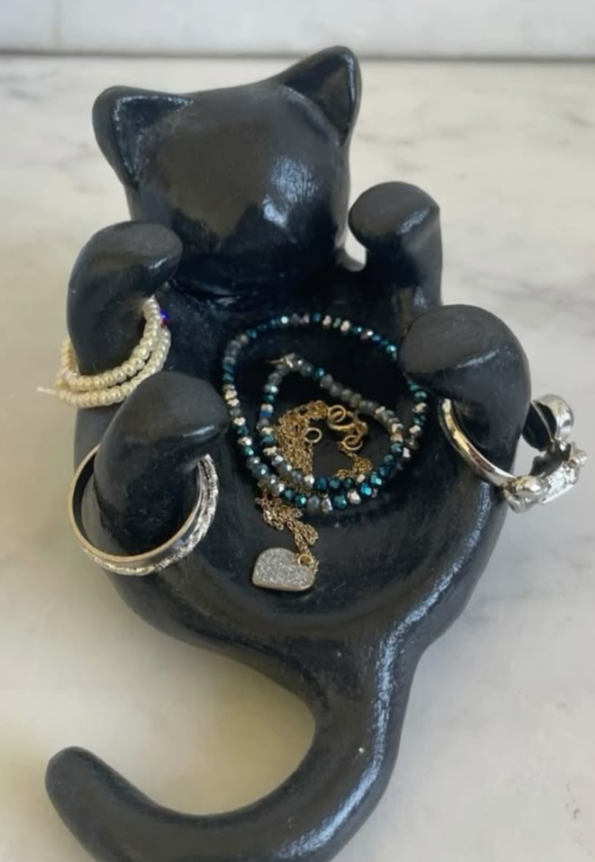
A cat paw catchall is a fun choice if I want something less traditional than a plain ring dish. The raised paw area can hold rings while the main dish catches other small items.
I can sculpt a simple cat shape from clay rather than trying to create a detailed figure. Keeping the design simple makes the project faster and reduces the chance of weak, thin parts breaking.
I also prefer giving the base a broad footprint. A holder that stays firmly on a nightstand is much more useful than one that looks good but tips whenever I reach for a ring.
Wooden Keepsake Box
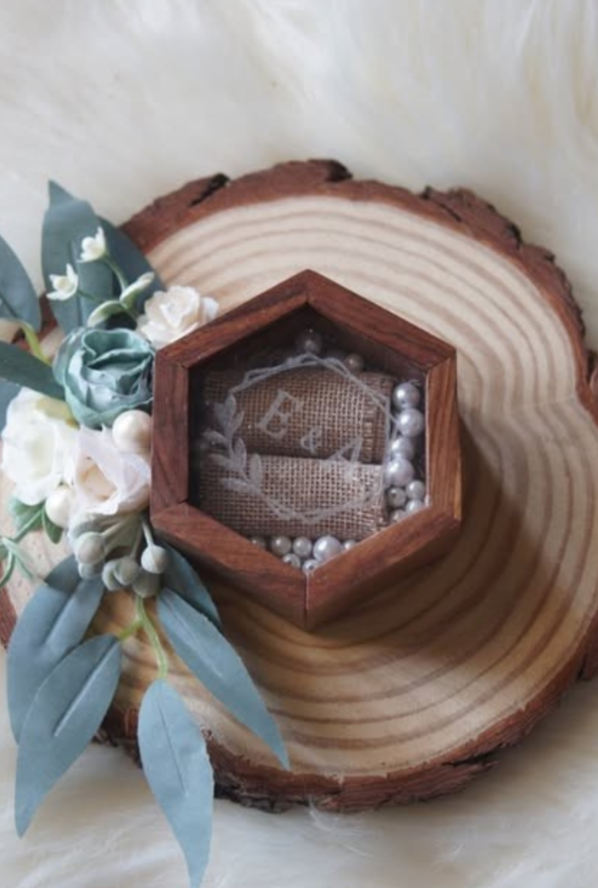
For sentimental jewelry, I prefer a small wooden box because it keeps the rings covered when I’m not wearing them. This can be especially useful for an engagement ring, wedding band, or another piece I do not want sitting in the open.
I can add a soft fabric, felt, or other jewelry-friendly lining inside the box. For rings, I can create small padded rolls or sections so the pieces do not slide around freely.
My pro tip is to check the inside edges before using the box. Unfinished wood, splinters, or rough corners should be sanded and properly finished so they cannot catch on the ring or fabric.
Floral Ring Display
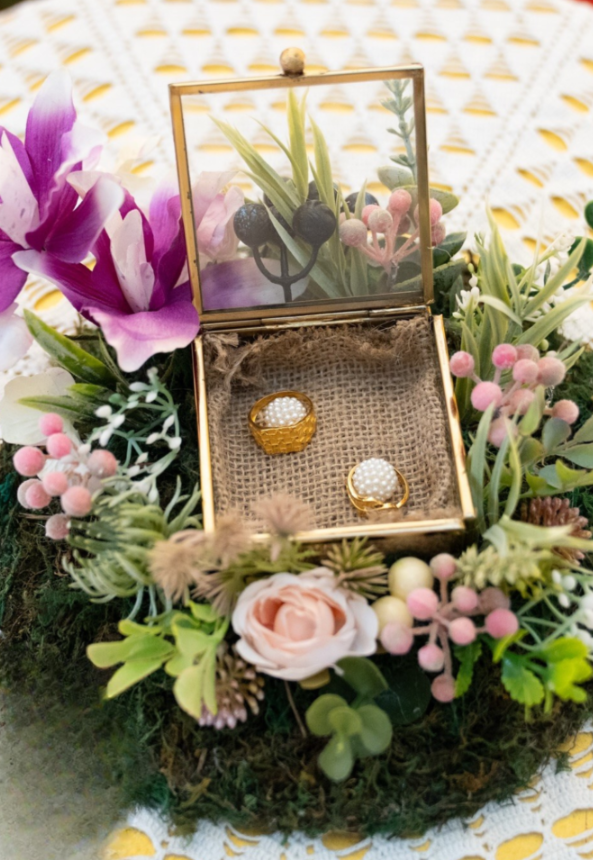
A floral ring display works well when I want the jewelry holder to become part of a gift or special occasion setup. I can use artificial greenery, dried flowers, or another stable decorative base.
I can place a small ring box or holder in the center and arrange the flowers around it. The decoration should support the ring rather than cover it.
For an engagement or wedding presentation, I would keep loose petals, soil, moisture, and other debris away from the jewelry. Decorative materials are attractive, but the ring itself should remain easy to access and inspect.
Cute Animal Stand
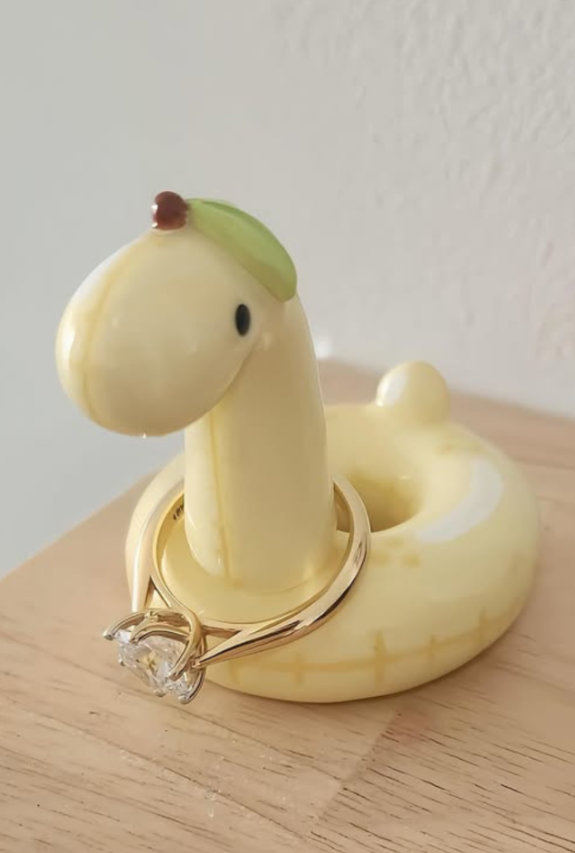
Animal-shaped holders let me make ring storage more personal. I can choose a cat, bear, rabbit, bird, or another simple shape based on the style I like.
I usually find it easier to create the body first and then add one part that acts as the ring support. For example, a long neck, raised tail, or upright ear can provide a place to slide a ring.
The support should be thick enough to stay strong after the clay dries. Thin decorative parts can break more easily, especially when I’m taking rings on and off several times a day.
Stacked Cone Set
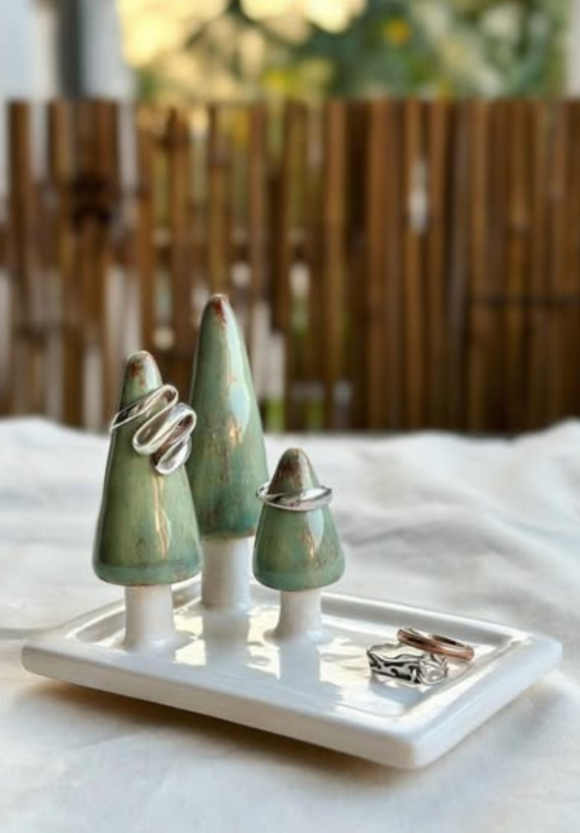
A stacked cone set is useful when I own several rings and want to separate them by style or daily use. Instead of putting everything into one dish, I can give each group its own cone.
I can make cones in different heights and attach them to a stable base. Before the clay dries, I make sure each cone stands straight and has enough room around it for the rings.
I’d use the taller cones for larger rings only if they remain stable. A top-heavy holder can easily fall over, so the base should be wider and heavier than the cones sitting on it.
Cat Dish Stand
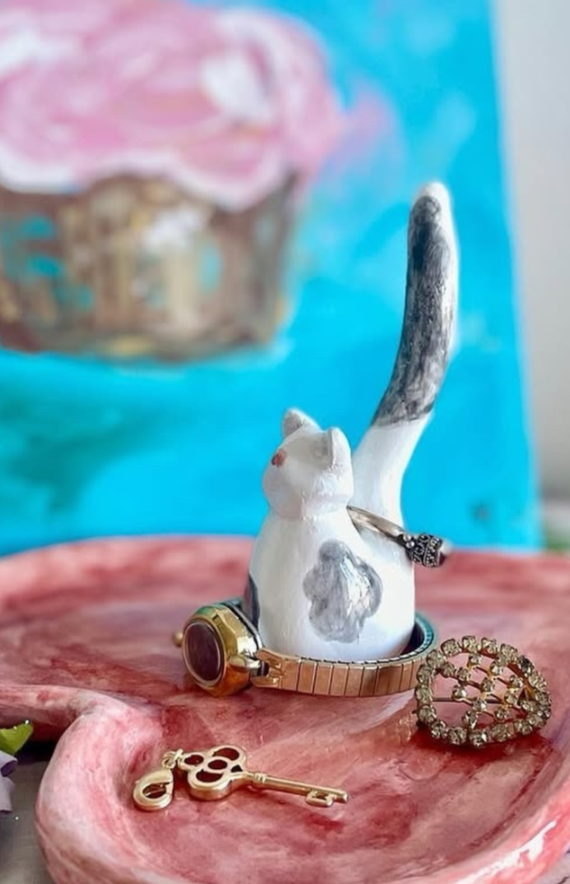
A cat dish stand gives me a shallow area for small jewelry plus a raised decorative element for rings. I find this more useful than a deep bowl because small rings are easier to spot.
I can make the dish from clay and add a simple cat figure or raised tail in the middle. There is no need to sculpt every detail—the basic silhouette can provide the same function.
I would keep the dish relatively shallow and the center feature secure. That makes it easier to pick up a ring without accidentally knocking other jewelry out of the dish.
Padded Ring Box
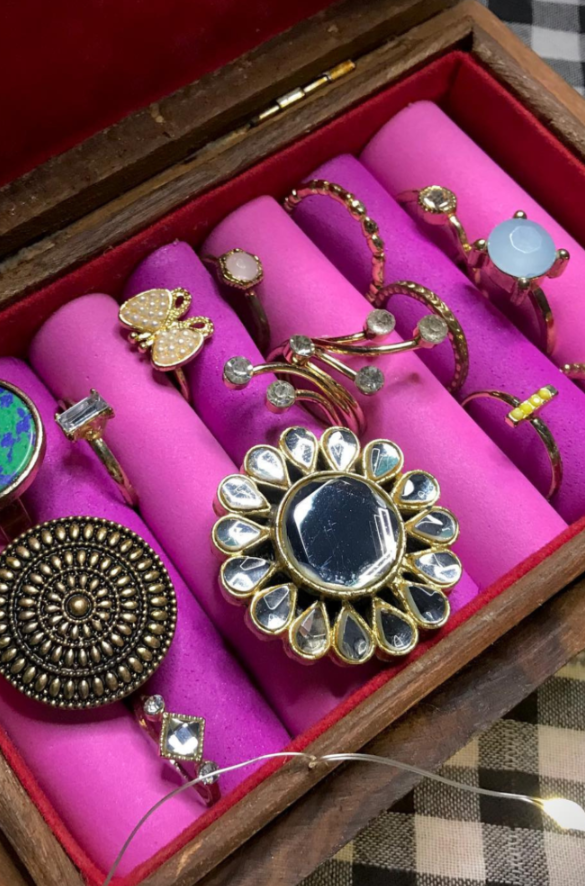
A padded ring box is the option I would choose when I have several valuable or larger rings that I want to keep separated. Padding reduces movement and gives each piece its own place.
I can start with a small wooden or sturdy cardboard box and add fabric-covered foam rolls inside. The rolls should hold the rings without squeezing them tightly.
I would also avoid placing rings with very different shapes directly against one another. Large settings, sharp edges, or loose pieces can rub against neighboring jewelry when everything is packed together.
Mushroom Ring Cones
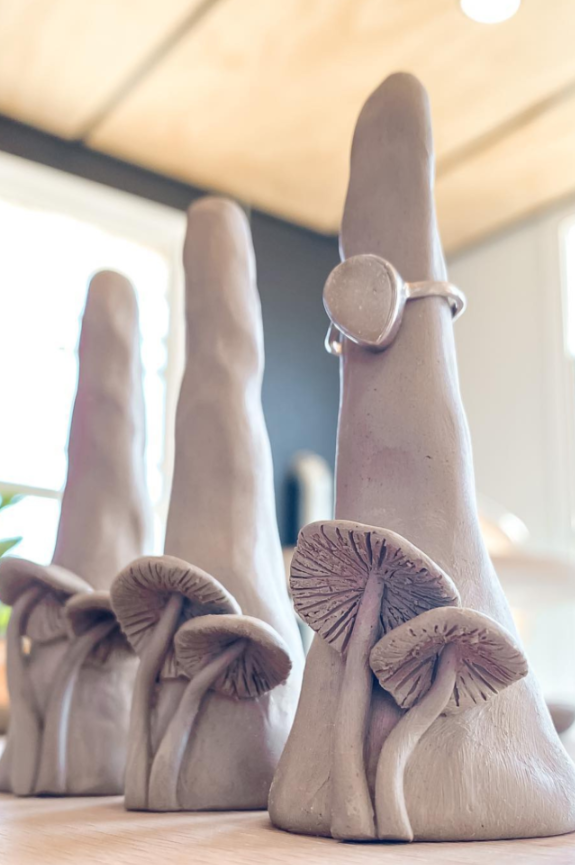
Mushroom-shaped cones give a simple ring holder a more decorative look. I can use the mushroom caps as visual details while keeping the stems functional as ring supports.
I can shape the cones and mushroom parts separately and join them while the clay is workable. Once dry, I can paint the caps, add small spots, or leave the surface plain.
For everyday use, I would keep the ring-contact areas smooth. Decorative texture is fine around the base, but the parts touching the jewelry should not have rough ridges or sharp points.
Cone Dish Combo

A cone-and-dish design gives me two storage options in one piece. I can slide rings onto the center cone while using the surrounding dish for earrings, bracelets, or rings I remove temporarily.
This is especially useful on a bedside table because I can put everything in one place before sleeping. I can shape the dish first and then position a short cone in the center.
I’d make the cone firmly attached to the base so it cannot loosen with regular use. I’d also leave enough space around it for my fingers to reach the rings comfortably.
Color Block Tray
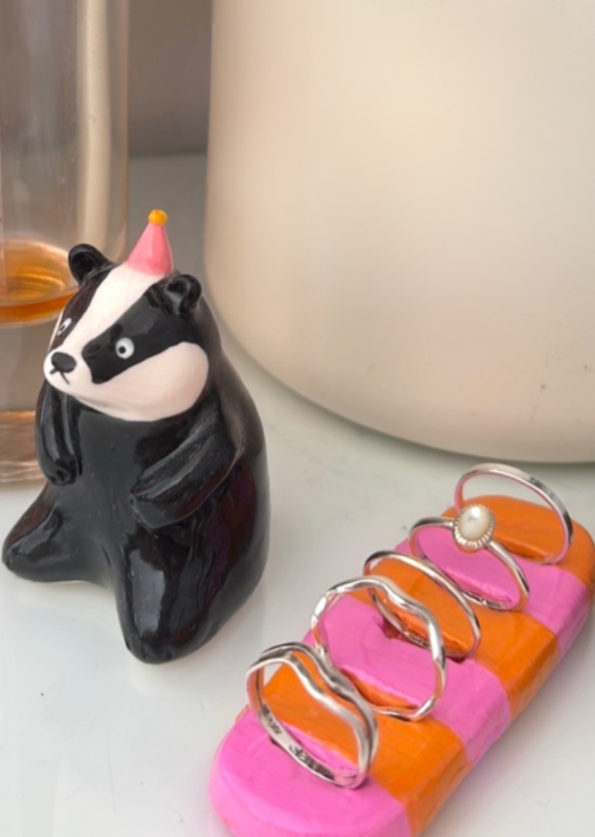
A color-block tray is a good choice when I want jewelry storage to add some color to a plain vanity or shelf. The tray itself can remain simple while the paint does most of the decorative work.
I can shape a low clay tray, allow it to cure completely, and then divide the surface into a few large color sections. Painter’s tape can help me create cleaner boundaries if the material and paint allow it.
I prefer a low rim because it makes rings easier to grab. If I’m storing small pieces such as studs in the same tray, I can make the rim slightly higher to stop them from rolling away.
FAQs
Can a DIY ring holder damage rings?
Yes, it can if I use the wrong material or leave the surface rough. A ring holder should have smooth contact points, especially when I’m storing jewelry with polished metal or delicate finishes.
I avoid sharp edges, exposed wire, coarse fabric, and unfinished wood where they can directly touch the ring. Soft fabric, properly finished wood, and smooth craft surfaces are generally better choices.
For valuable jewelry, I would also check the holder regularly. If the surface develops a crack, rough spot, loose decoration, or exposed material, I would repair or replace it rather than continuing to use it.
Where should a DIY ring holder be placed for daily use?
I place my ring holder where I naturally take my rings off. For many people, that means beside the bed, on a vanity, near a dressing area, or in another regular part of their routine.
I would not put it somewhere that is inconvenient just because it looks good there. If I have to walk across the room every time I remove a ring, I’m more likely to leave the jewelry somewhere else.
The best setup is one that is visible, stable, easy to reach, and away from places where the holder can easily be knocked over. Once I consistently use the same spot, finding my rings becomes much easier.
Conclusion
I don’t think a good ring holder needs to be expensive or complicated. With a few basic materials, I can make a holder that fits my space, matches my style, and gives my rings one reliable place to stay.
From simple clay cones and dishes to padded boxes and decorative animal stands, the right choice depends on how I use my rings every day. I always focus on a smooth surface, a stable base, and easy access.
The biggest benefit is building a simple habit. When I put my rings in the same holder every time I take them off, I’m much less likely to misplace them. So, I’d choose the DIY idea that fits my routine and start with something simple enough to use every day.