8 Easy Bathroom Undersink Changes That Make a Huge Difference
How to Organize Bathroom Under-Sink Cabinets: 8 Simple Steps
Bathroom under-sink organization can be tricky because pipes take up space, cabinets are often deep, and small products quickly turn into clutter. I find that the easiest way to manage this area is to remove unnecessary items, measure the available space, group products by use, and choose organizers that fit around the plumbing.
In this guide, I explain eight practical steps for organizing a bathroom sink cabinet, from sorting toiletries and choosing affordable storage bins to using cabinet doors, protecting against moisture, and maintaining the setup with a quick monthly reset. Whether you have a small vanity or a large double-sink cabinet, these ideas can help you make better use of the space without spending too much money.
Key Takeaways
- Empty the cabinet and remove expired, broken, or unused products before organizing.
- Measure the usable width, depth, and height before purchasing storage containers.
- Group everyday toiletries, cleaning supplies, and backup products into separate zones.
- Use pull-out drawers, stackable bins, and door-mounted organizers to maximize space.
- Protect the cabinet from leaks and moisture with a suitable waterproof liner.
- Spend five minutes each month checking supplies and returning items to their proper places.
Why Under-Sink Cabinets Always Turn into Chaos
The space beneath a bathroom sink is not always easy to organize. Plumbing pipes take up valuable room, the cabinet can be difficult to reach into, and the low height makes it harder to store taller bottles or bulky supplies.
I often find that the biggest problem is not a lack of storage products but a lack of a clear system. When everything gets placed in the cabinet without a plan, everyday toiletries end up mixed with cleaning products, spare toilet paper, hair tools, and half-used bottles.
Over time, smaller items disappear behind larger containers, products get forgotten, and it becomes difficult to see what needs replacing. A few well-planned storage zones can make a noticeable difference because every item has a specific place to return to after use.
How to Organize Bathroom Under Sink?
To organize a bathroom under-sink cabinet, I recommend starting with a clean slate and working with the space you already have. Measure around the plumbing, decide which items belong there, and select organizers that make everyday products easy to reach.
You do not need an expensive makeover to get started. A few affordable bins, stackable containers, and simple labels can help you create a system that works for your bathroom and your budget.
Here are the eight steps I would follow to make the most of this often-overlooked storage area.
Step 1: Clear Everything Out the Smart Way
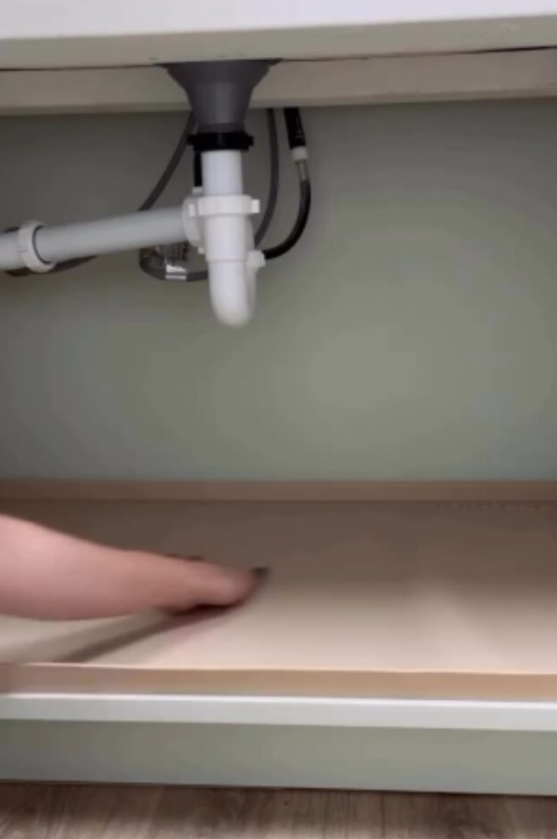
Before buying storage containers, remove everything from beneath the sink. Place the products on a clean surface so you can see what you own and identify anything that no longer needs to stay.
Sort everything into three groups:
- Keep: Toiletries, hair products, and other supplies you use regularly.
- Discard: Empty containers, broken accessories, and expired products that should no longer be used.
- Relocate: Items that belong in another room, along with excess supplies that would fit better in a separate storage area.
Check product labels and expiration guidance before deciding what to discard. For cosmetics and personal care products, follow the manufacturer’s instructions, especially if the product has changed in smell, color, or texture.
I would also avoid keeping several nearly identical products in the cabinet if you rarely use them. Removing unnecessary items first means you will need fewer organizers and have more room for the things you actually need.
Step 2: Measure and Understand Your Cabinet Type
Once the cabinet is empty, measure the available storage space before shopping for bins or drawers. Record the usable width, depth, and height, taking the pipes, drain, water lines, and cabinet hinges into account.
The full cabinet dimensions can be misleading because an organizer may fit the outer measurements but still block access to the plumbing. Measure the clear spaces around pipes and leave enough room to remove containers without knocking over nearby items.
Your cabinet style also affects how you should arrange everything:
- Single-sink cabinets: Plan storage around the drainpipe and water lines, which may limit the available space.
- Double-sink vanities: Divide the cabinet into separate zones when the plumbing layout allows it.
- Wall-mounted or pedestal sinks: Use a nearby storage cabinet or freestanding unit if there is little enclosed space.
- Deep or tall cabinets: Consider pull-out drawers, stackable bins, or low risers to make items easier to reach.
My main tip is to measure each usable section separately rather than assuming the cabinet is one large, open box. This small step can prevent wasted money on organizers that do not fit.
Step 3: Create Zones Based on How You Use Things
After sorting and measuring, decide where each category should go. Grouping similar products together makes the cabinet easier to use and helps prevent clutter from returning.
I would divide the available space into three main zones:
- Everyday essentials: Keep frequently used items, such as face wash, moisturizer, deodorant, and razors, near the front.
- Cleaning supplies: Place bathroom cleaners, spare sponges, and cleaning cloths in a separate caddy, away from personal care products.
- Backup supplies: Store extra shampoo, toothpaste, soap, and other unopened products in labeled bins toward the back or in another suitable storage area.
Keep heavier containers on the cabinet floor or a stable lower shelf, and place lighter items in upper drawers or bins. Avoid storing products where you must move several other things just to reach one bottle.
One useful trick is to keep a small amount of each frequently used product accessible and store unopened replacements separately. This makes it easier to check what is running low without filling the cabinet with duplicate supplies.
Step 4: Use the Right Bins, Drawers, and Risers
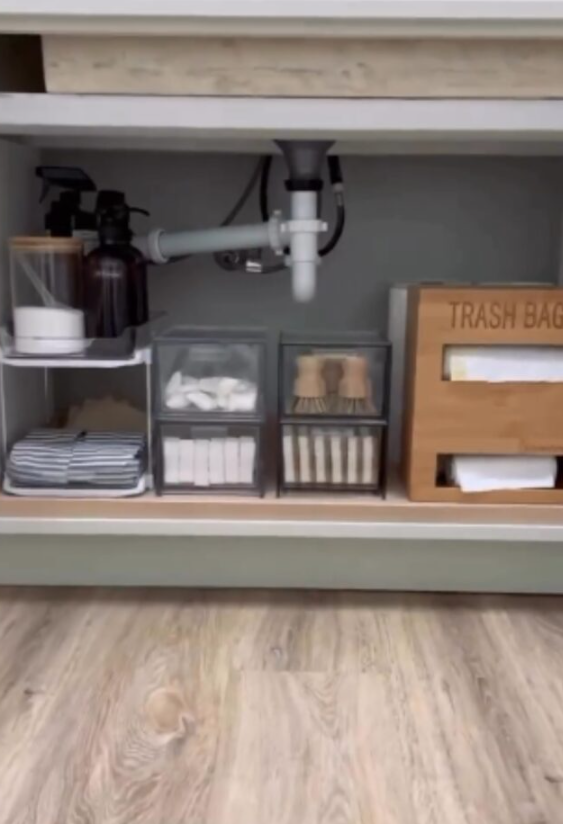
The right organizers can turn a crowded cabinet into useful storage, but they need to match your measurements and daily routine. Before buying anything, decide which categories need open bins, which items would benefit from drawers, and whether you have enough clearance for stacking.
I prefer containers that are easy to wipe clean and simple to pull forward. Clear organizers can help you see what is inside, while opaque bins can create a more uniform appearance when you want a coordinated look.
Choose from these options according to your budget.
1. Affordable Options
Budget-friendly plastic bins, small baskets, and reusable containers are useful for organizing cotton pads, skincare products, spare toiletries, and cleaning cloths.
Measure the containers before purchasing them, and choose low-sided bins for items you need to reach frequently. Non-slip shelf liners can help keep containers from sliding when you pull them out.
You can also reuse clean containers you already own, provided they are suitable for the items being stored. Avoid placing cardboard organizers or unprotected paper containers in areas where leaks or dampness are possible.
2. Mid-Range Options
Stackable drawers, sturdy baskets, and metal or plastic risers can make better use of a cabinet with limited floor space. Look for organizers designed for under-sink storage, especially models with cutouts or adjustable sections for plumbing.
Brands such as Brightroom and mDesign offer storage products in different sizes and styles. Compare the dimensions and materials before buying rather than choosing a product based on its appearance alone.
A two-tier pull-out organizer can be particularly useful for smaller bottles and toiletries. Just make sure the upper tier does not collide with the pipes or leave too little clearance for taller products.
3. Premium Options
If you want a more finished storage system, consider clear pull-out drawers, adjustable under-sink organizers, or custom-fit units. Some designs use a U-shaped frame that leaves room for the drainpipe while making better use of the surrounding space.
Premium organizers can be useful in awkward cabinets, but a higher price does not automatically mean a better fit. Check the measurements, weight limits, drawer clearance, and cleaning instructions before committing to a purchase.
I would prioritize accessibility over appearance. A simple organizer that slides out smoothly and fits your plumbing is more useful than an expensive set that blocks the back of the cabinet.
If your cabinet has extra vertical space, a stable riser or two-tier drawer can help separate smaller products. Keep the overall arrangement easy to reach, and avoid stacking so high that containers become difficult to remove.
Step 5: Use Door Space, Rods, and Wall Surfaces
The inside of a cabinet door and the unused vertical areas can provide extra storage without taking up much floor space. Before adding accessories, check that the doors close properly and that nothing interferes with the pipes.
Here are a few practical ways to use these areas:
- Adhesive door bins: Store lightweight items such as cotton pads, floss, or makeup wipes in small containers attached to the inside of the cabinet door. Follow the adhesive’s weight limits and installation instructions.
- Tension rods: A properly fitted tension rod can hold lightweight spray bottles by their triggers. Check the rod’s load limit and keep it clear of plumbing connections.
- Command hooks: Use suitable hooks for lightweight cleaning gloves, brushes, or hair accessories. Make sure the surface is compatible with the adhesive.
- Magnetic strips: A securely mounted strip can hold suitable small metal grooming tools. Keep sharp items safely positioned and away from children.
- Hanging pouches: A small washable pouch can hold flat items or lightweight accessories when there is enough room behind the cabinet door.
Before attaching anything, check the cabinet material and the manufacturer’s installation guidance. Adhesive products may not hold well on damp, textured, or peeling surfaces.
I would start with one or two additions instead of filling every available surface. Too many door organizers can make the cabinet crowded and prevent it from closing smoothly.
Step 6: Make It Pretty with a Matching Aesthetic

A bathroom cabinet does not need to look like a professionally styled space to feel organized. A few matching containers, clear labels, and a simple arrangement can make the storage easier to maintain.
Choose one main color scheme, such as white and clear, beige and white, or neutral baskets with transparent drawers. Using similar containers creates a consistent look and helps reduce the visual clutter caused by too many shapes and colors.
Labels are also useful when several bins look alike. You can label them according to their contents, such as skincare, oral care, hair products, cleaning supplies, or refills. Keep the wording short so you can identify each category at a glance.
I recommend keeping frequently used products in accessible containers and placing backup supplies in separate bins. Leave a little open space rather than filling every corner; this makes it easier to remove items, wipe the cabinet, and return products to their proper places.
The best-looking setup is one that remains practical during everyday use. If you have to move multiple bins to reach your face wash or toothpaste, adjust the layout until the arrangement feels natural.
Step 7: Protect Against Moisture and Mess
Because the bathroom is exposed to water and humidity, protecting the cabinet is an important part of keeping it organized. A leak can damage stored products, ruin the cabinet base, and create conditions that encourage mold growth.
Use these precautions to help keep the area in good condition:
- Add a waterproof liner: Choose a liner that fits the cabinet base and can be removed for cleaning. It should not cover plumbing access points.
- Choose washable containers: Plastic bins and other moisture-resistant materials are generally easier to wipe down than cardboard or untreated fabric.
- Check for leaks: Look beneath the pipes and around the drain periodically for dampness, stains, or unusual odors.
- Keep items off wet surfaces: Use suitable raised organizers where needed, but make sure they remain stable and do not block access to plumbing.
- Clean spills promptly: Wipe up water or product residue and allow the area to dry before putting items back.
A moisture absorber may help in some situations, but it cannot fix a plumbing leak or replace proper ventilation. If you notice persistent dampness, mold, or a recurring musty smell, identify and address the underlying cause rather than simply covering it up.
I would also keep cleaning chemicals in their original, labeled containers and follow their storage instructions. Keep them separate from toiletries and out of reach of children and pets.
Step 8: Do a 5-Minute Monthly Reset
Even a well-organized cabinet can become cluttered when products are used and replaced. A short monthly check helps you catch small problems before the space becomes difficult to manage again.
Set aside five minutes to complete these tasks:
- Remove empty bottles, packaging, and items that no longer belong in the cabinet.
- Check products for expiration dates, damage, or changes that make them unsuitable for use.
- Wipe the cabinet base, organizers, and shelf liner if needed, then allow damp surfaces to dry.
- Return products to their assigned zones and move everyday essentials back to the front.
- Check whether any bins are overcrowded or whether a category needs a different storage location.
Use the reset to review your supplies before buying replacements. You may discover that you already have enough shampoo, soap, or cleaning products for several weeks.
If one part of the setup keeps becoming messy, change the system instead of repeatedly forcing everything back into place. A larger bin, a different location, or a smaller number of stored items may solve the problem.
The goal is not to keep the cabinet perfect at all times. It is to make the space easy to use and simple to restore whenever clutter starts to build up.
Conclusion
Organizing the space beneath your bathroom sink can make your daily routine easier without requiring a full bathroom makeover. Once you remove unused products, measure the cabinet, and give each category a specific place, it becomes much simpler to find what you need.
I recommend starting with the supplies you already own before investing in new organizers. A few well-fitting bins, a practical layout, and a waterproof liner can make a big difference, even in a small cabinet.
Keep everyday essentials near the front, store backups separately, and check for moisture regularly. With a quick five-minute reset each month, you can maintain a tidy cabinet that works for your space, budget, and daily routine.