25 Canned Food Storage Ideas for 2026
How Can You Build a Simple Canned Food Storage System at Home?
I believe organizing canned food starts with having a clear place for everything. Whether you have a large walk-in pantry or a small kitchen cabinet, the right storage system can help you save space, find ingredients faster, and avoid buying cans you already have. Simple solutions such as tiered racks, clear bins, drawer dividers, and pull-out baskets can make a big difference without requiring a complete kitchen makeover.
In this guide, I’ll cover practical canned food storage ideas for different kitchen layouts, including ways to use empty corners, cabinet doors, deep drawers, and unused wall space. I’ll also explain how to arrange cans by category, keep older products easy to reach, and choose organizers that suit your available space and budget.
Key Takeaways
- Choose one main storage area: I recommend keeping most canned goods together so you can check your supplies at a glance.
- Make every label visible: Tiered shelves, shelf risers, and clear bins help prevent cans from getting forgotten behind other items.
- Use vertical space: Stackable racks and wall shelves can increase storage capacity without taking up more floor space.
- Rotate your cans regularly: Move older cans to the front and place newly purchased ones behind them.
- Match organizers to your kitchen: Pull-out baskets work well in deep cabinets, while door racks and compact shelves can help in smaller kitchens.
Gravity Feed
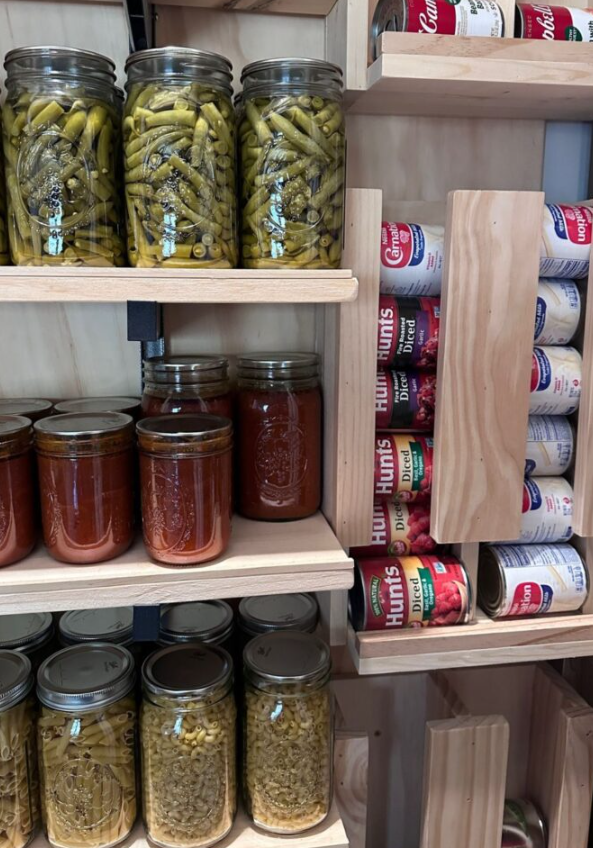
I recommend a gravity-feed rack if you want a storage system that helps move older cans forward automatically. These racks use slightly angled tracks so cans can roll toward the front as space becomes available.
You can build a simple version with a sturdy wooden frame and angled rails sized to fit the cans you regularly buy. Before building it, check the dimensions of your cans and make sure the rails keep them stable without allowing them to roll out.
This design works particularly well in pantry corners and cupboards where you want to store several cans in a compact area. I would also make sure the front opening is easy to reach and that the rack can support the combined weight of the cans.
For the best results, load newer cans from the back and use the cans at the front first. This helps keep your stock organized and reduces the chance of older products being overlooked.
Tiered Racks

I find tiered racks especially useful for cabinets where cans are arranged in several rows. Instead of placing every can at the same height, these organizers raise the back row so you can read the labels without moving everything in front.
You can use them for soups, beans, vegetables, sauces, and other canned foods. Small metal or plastic racks are often suitable for kitchen cupboards because they create extra levels without requiring permanent changes to the cabinet.
When arranging the cans, place heavier items on sturdy lower levels and lighter items higher up when the rack design allows it. Check the organizer’s weight limit before filling it, particularly if you plan to store large cans.
I would choose tiered racks for deep cupboards where cans frequently disappear behind one another. They make it easier to see what you have, find ingredients while cooking, and identify which products need replacing during your next grocery trip.
Floor Racks
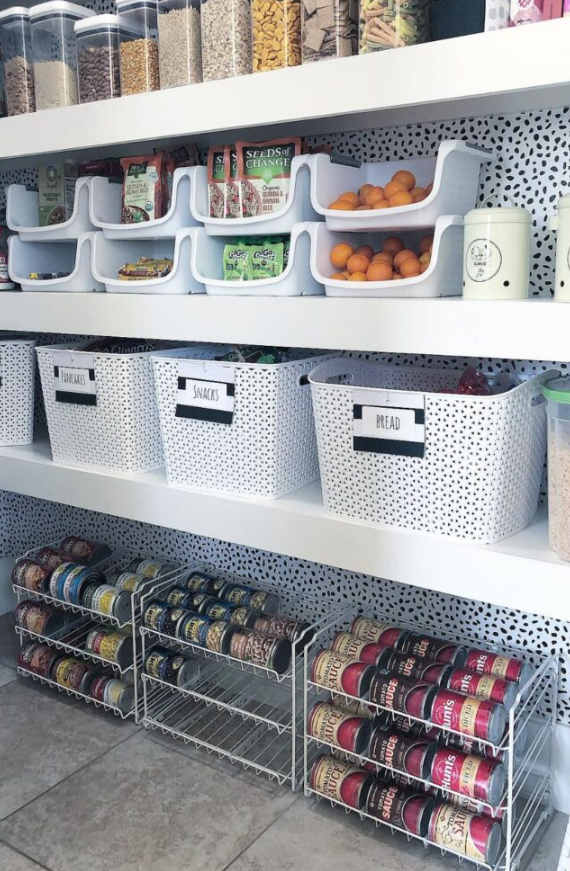
If you have a pantry with unused floor space, I recommend considering a low storage rack. This can provide room for extra canned goods without overcrowding the shelves above.
Wire racks are useful because their open construction makes it easier to see stored items. Some designs also include angled shelves that bring cans toward the front as you remove products.
I would reserve the lower levels for heavier cans, such as tomatoes, soups, and vegetables, provided the rack is designed to support their weight. Keep frequently used products within easy reach and avoid placing the rack where it blocks a doorway or creates a tripping hazard.
For a larger pantry, you can place multiple racks beside each other to create separate sections for different food categories. Before buying one, measure the available floor area and leave enough room to walk comfortably and reach the cans.
Corner Pantry
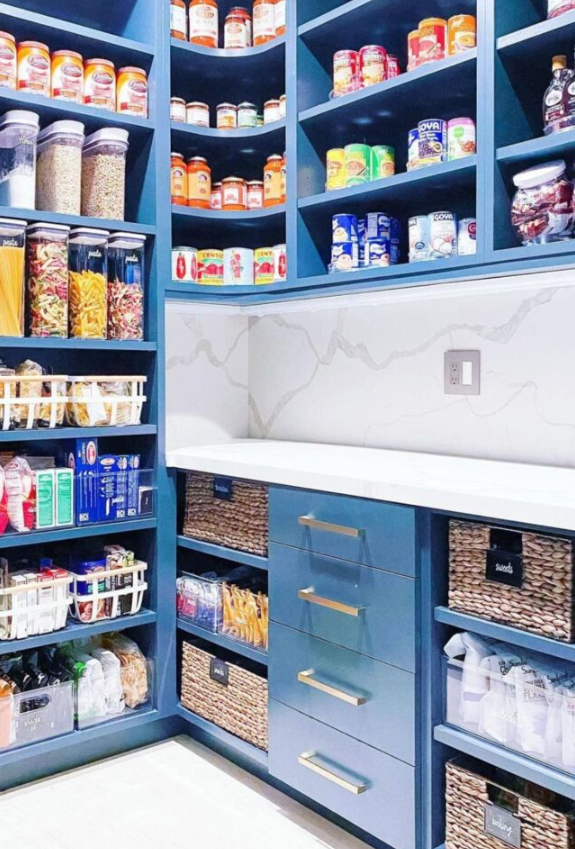
I think unused corners offer a useful opportunity to increase canned food storage without spreading items across the entire kitchen. Instead of pushing cans into a dark corner, you can use curved shelves or corner organizers to keep them visible and accessible.
Rounded shelves allow cans to follow the shape of the cabinet, making better use of awkward spaces. You can arrange soups, vegetables, beans, and sauces in separate groups so that each type has a clear place.
If your existing cabinets do not have suitable corner shelves, consider adding adjustable inserts or custom-built shelving. Measure the space carefully before installing anything, and make sure the shelves can safely support the weight of your stored food.
For easier stock rotation, keep older cans toward the front and place newer ones behind them. I would also avoid filling the corner so tightly that you cannot remove a can without shifting several others.
Can Zones
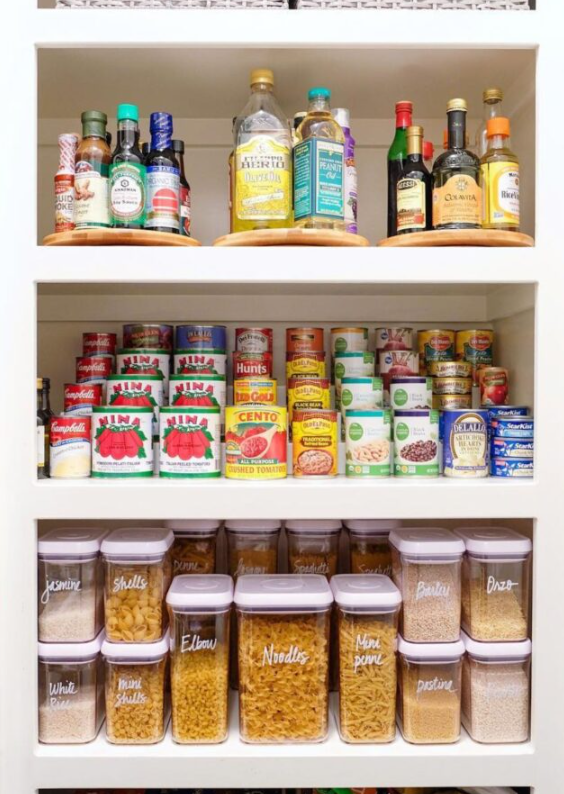
I recommend creating dedicated can zones if your pantry contains a mixture of different foods. This is one of the simplest ways to make canned food storage easier without purchasing expensive organizers.
Start by choosing a shelf or cabinet for your cans. Then group similar products together, such as beans in one section, soups in another, and vegetables or sauces in separate rows.
You can make the system even more useful by dividing each category into smaller groups. For example, keep canned tomatoes together rather than mixing them with every other vegetable. This makes it easier to check your supply before preparing a shopping list.
Leave enough room to move cans without disturbing the entire shelf. When you bring home groceries, place newer products behind the older ones and return each can to its assigned section. A consistent system makes it easier to maintain order over time.
Drawer Dividers
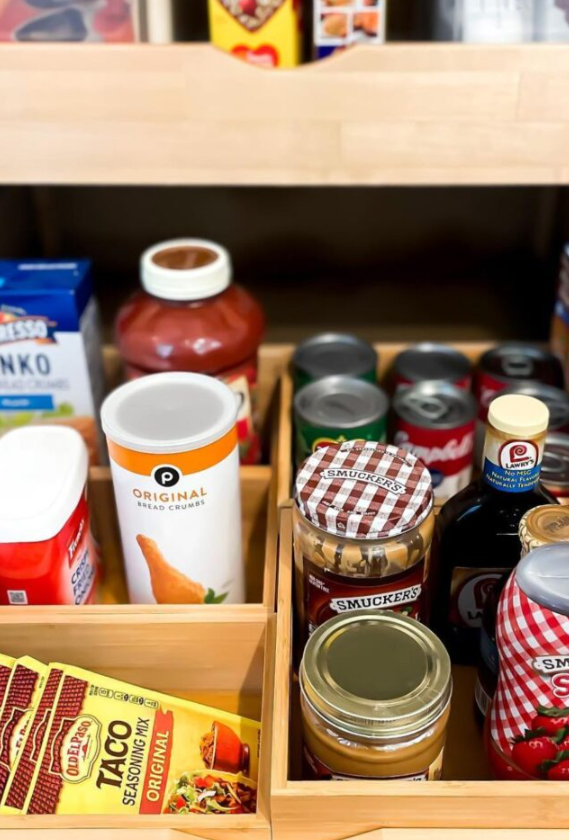
Deep kitchen drawers can be useful for canned food, but without a clear arrangement, cans may roll around and become difficult to find. I would use adjustable or wooden dividers to create separate compartments for different products.
For example, one section can hold soups, another can store sauces, and a smaller compartment can accommodate tins of similar sizes. Dividers prevent items from mixing together whenever you open or close the drawer.
The main advantage is visibility. When you pull the drawer out, you can inspect the contents without reaching into the back of a cabinet or moving several cans to find the one you need.
Before setting up this system, check the drawer’s depth, width, and weight capacity. Canned food can become heavy when stored in large quantities, so make sure the drawer runners and cabinet construction can handle the load.
I find this approach particularly suitable for lower cabinets with full-extension drawers. It gives each product a defined place and makes restocking more straightforward.
Clear Bins
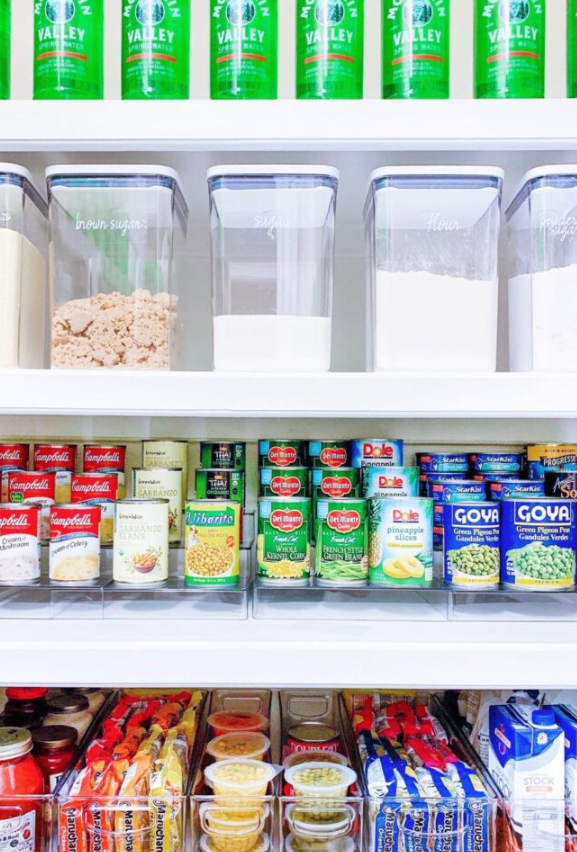
Clear storage bins are a practical option for deep pantry shelves where cans tend to disappear behind other products. Because the containers are transparent, you can identify their contents without opening every bin.
I would use separate bins for soups, vegetables, beans, fruit, or other canned goods you regularly keep in stock. Choose containers that fit the shelf depth and allow you to slide them forward comfortably.
Acrylic and clear plastic organizers can also help prevent cans from spreading across the shelf. However, check their dimensions and weight limits before loading them with heavy products.
To keep everything organized, place older cans toward the front and newer purchases behind them. You can also add simple labels to the outside of each bin so family members know where items belong.
For long pantry shelves, several smaller bins may work better than one oversized container. They let you organize food by category while making it easier to remove only the group you need.
Shelf Glides
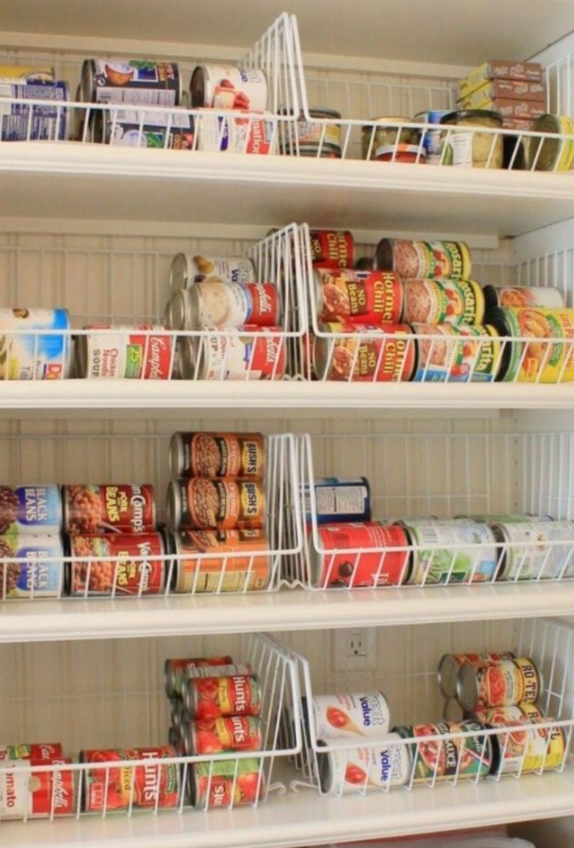
I recommend shelf glides when you want to keep cans arranged in straight rows rather than scattered across a cupboard. These guides create separate lanes that help prevent cans from rolling into neighboring groups.
You can use one lane for beans, another for soups, and additional lanes for vegetables or sauces. This arrangement makes it easier to check your supply because each row has a clear purpose.
Wire or plastic guides can be installed on suitable pantry shelves, depending on the design. Before buying them, measure the shelf width and the diameter of your cans to make sure the lanes will fit.
For a useful stock rotation system, load new cans at the back and remove older ones from the front. I would also leave enough space to lift cans out without catching them on the dividers.
Shelf glides are especially helpful on wider shelves where several categories need to share the same area. They provide structure without requiring you to install additional cabinets.
Pantry Wall
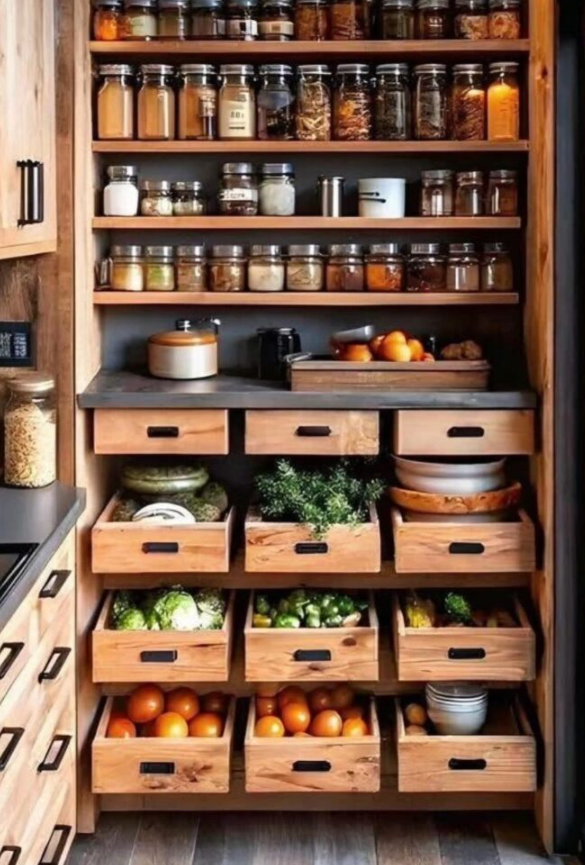
If your kitchen has an unused wall, I would consider turning it into a dedicated pantry area. Open shelves can hold canned goods, jars, dry ingredients, and other everyday cooking supplies while keeping everything visible.
Start by deciding how much of the wall you can use without interfering with doors, walkways, or kitchen activities. Then plan the shelf heights according to the products you want to store.
I would place heavier canned foods on lower, securely supported shelves and use upper shelves for lighter items. Mason jars and dry goods can be arranged in separate sections to keep the display organized.
Choose shelves and mounting hardware that can support the total weight of the food you plan to store. Properly securing shelves to suitable wall supports is particularly important when storing multiple rows of cans.
This approach can work well in narrow kitchens and pantry corners where adding another cabinet would take up too much floor space. With clear categories and visible labels, an unused wall can become a practical storage station.
U-Pantry

A U-shaped pantry can make good use of available wall space by placing shelves along three sides of the room. I would consider this layout if you have a small walk-in pantry and want to keep different food categories within easy reach.
You can dedicate one wall to canned vegetables, another to soups and sauces, and the remaining wall to dry goods or other pantry essentials. Drawers and lower cabinets can hold smaller products that are easier to manage in enclosed storage.
The key is to organize the shelves according to how you use your food. Keep frequently used cans at convenient heights and reserve less accessible areas for items you use less often.
I would avoid making the shelves so deep that cans at the back become difficult to reach. Leave enough central floor space to move comfortably, open drawers, and access each section without squeezing between storage units.
For homes with a walk-in pantry, this arrangement can provide a clear structure for canned goods while making use of wall space that might otherwise remain empty.
Door Shelves
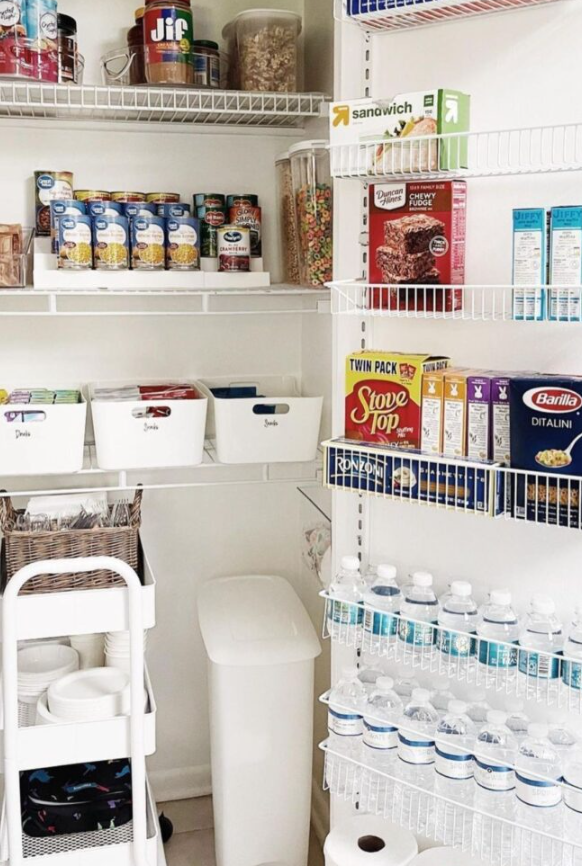
The inside of a pantry door can provide extra storage when cabinet shelves are already full. I recommend door-mounted racks for smaller, lighter pantry products that do not require much depth.
Depending on the rack design, you may be able to store small cans, jars, seasoning packets, and boxed meals. Use each basket or shelf for a specific category so that items remain easy to locate.
Before installing a rack, check the door’s construction, the mounting instructions, and the available clearance. The shelves must not prevent the door from closing properly or interfere with nearby cabinets.
I would also avoid loading the door with too many heavy cans. Extra weight can strain hinges and mounting points, particularly if the rack was designed for lightweight items.
For a small pantry, door shelving can free up valuable shelf space for larger cans and bulkier food packages. It is a useful option when you want to add storage without making permanent changes to the kitchen layout.
Lazy Turntable
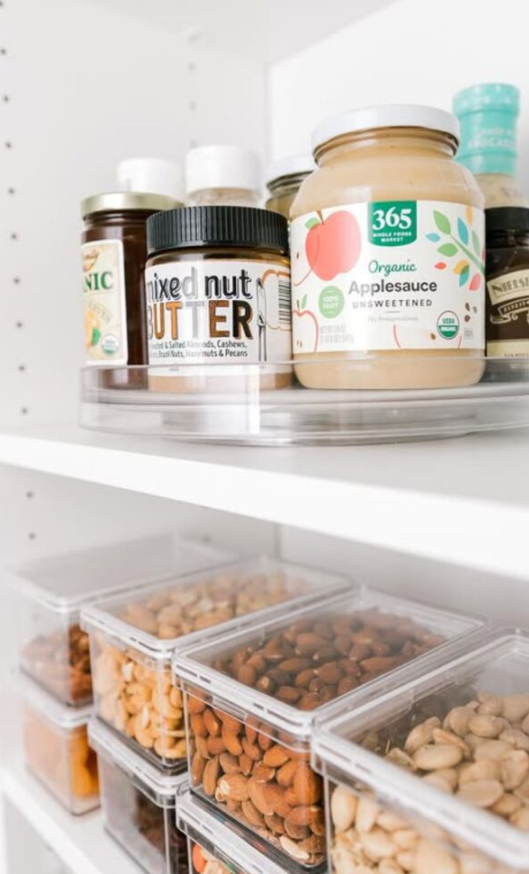
A lazy turntable can make awkward corners and crowded shelves easier to use. Instead of reaching behind jars or moving several products, you simply rotate the tray to bring the item you want toward the front.
I would use a turntable for smaller pantry items such as sauces, spreads, condiment jars, and compact containers. It can also work for selected canned products if the tray is wide enough and rated to support their weight.
Measure the shelf before choosing a turntable. A tray that is too large may hit cabinet walls, while one that is too small may not provide enough useful storage.
Clear plastic and acrylic models make it easy to identify products, and smooth surfaces are generally simple to wipe clean. I would choose a design with a stable base and a raised edge to help prevent items from slipping off during rotation.
This organizer works best when you avoid overcrowding it. Keep similar products together and position frequently used items where you can reach them easily.
Jar Wall
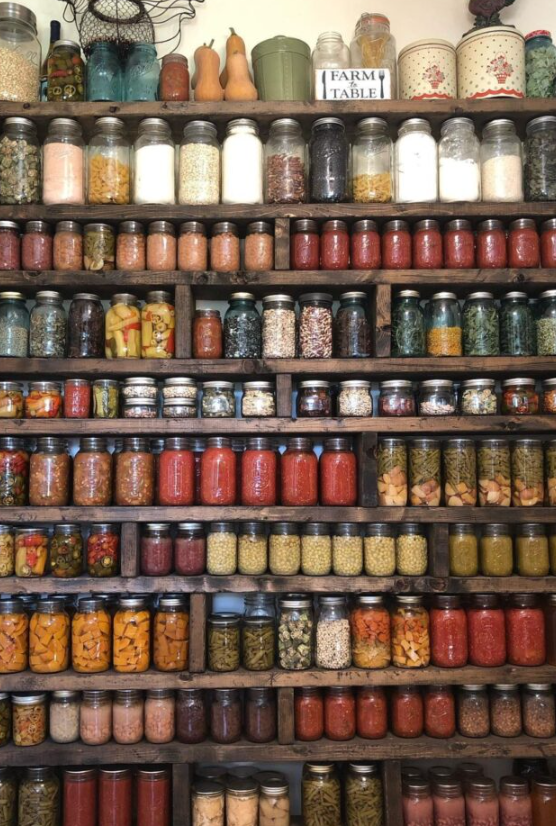
A jar wall can provide organized storage for home-canned foods, dry ingredients, and other pantry staples. I would consider this option if you have an unused wall and need more room than your existing cabinets can offer.
Long shelves allow jars to sit in visible rows, making it easier to identify ingredients and check your supply. You can arrange similar items together, with separate areas for preserved foods, dry goods, and other kitchen essentials.
Choose sturdy shelves and appropriate mounting hardware because full jars can be considerably heavier than empty ones. Check the weight capacity before loading the shelves, and make sure the installation is secure.
For home-canned food, use properly prepared jars with suitable lids and follow tested canning instructions for the specific food. Shelf organization cannot make improperly processed or unsafe home-canned food safe to eat.
I would also leave enough room to remove individual jars without knocking against neighboring containers. Place newer items behind older ones when appropriate, and label preserved foods with their contents and preparation date.
This setup can turn an empty wall into useful pantry storage while keeping ingredients easy to see and manage.
Pull Cabinets
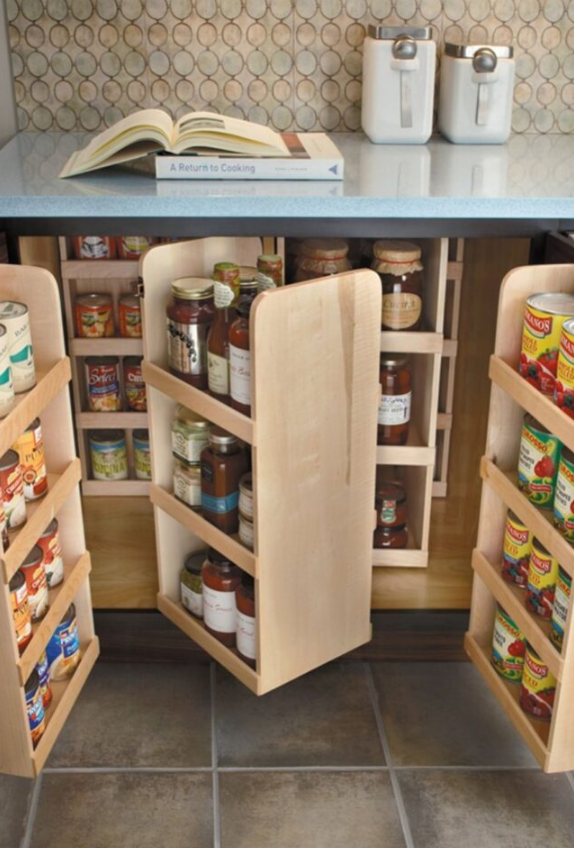
Pull-out pantry cabinets are useful when standard cupboards have deep spaces that are difficult to reach. Instead of searching at the back of a fixed shelf, you can slide the storage unit forward and access its contents more easily.
Depending on the cabinet design, narrow shelves can hold canned goods, sauces, jars, and other pantry products. You can assign each shelf or side section to a different category to prevent items from becoming mixed together.
I would measure the cabinet opening, interior depth, and available clearance before choosing a pull-out unit. The hardware must fit the cabinet correctly, and the completed system should move smoothly without becoming unstable.
Weight capacity is another important consideration. Canned goods can add substantial weight, so check the specifications for the cabinet slides and the storage frame before loading them.
For kitchens with limited pantry space, a well-planned pull-out cabinet can make existing storage more accessible. It also reduces the need to bend down or reach into dark corners whenever you need a particular ingredient.
Pantry Lighting
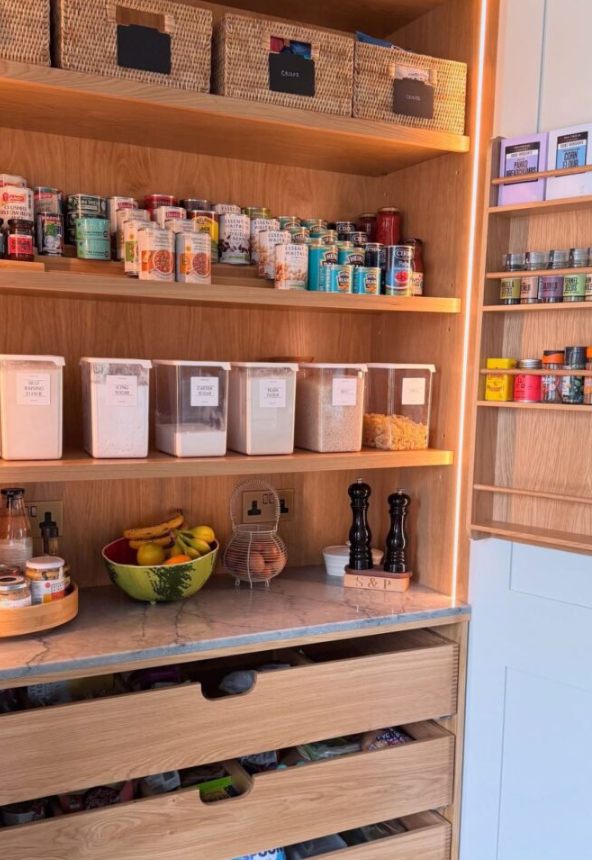
Good lighting makes it easier to find canned food and keep track of what you have. I would add lighting if deep shelves or tall cabinets make labels difficult to read.
LED strip lights can illuminate the edges of shelves, while small motion-activated lights may be useful in cabinets that are opened frequently. Choose a suitable product for the location and follow its installation instructions.
Before adding lights, consider where the power source will be located and whether the fixtures could be exposed to moisture or heat. Avoid placing lighting equipment where it could interfere with stored food or create an electrical hazard.
I would position the light so that it illuminates the labels rather than shining directly into your eyes. A simple arrangement can make it much easier to identify soups, vegetables, sauces, and other canned products.
Lighting works particularly well in tall pantries and deep cupboards where the back rows are often hidden in shadows. Combined with tiered shelves or clear bins, it helps make the entire storage system easier to use.
Can Drawer

A dedicated can drawer provides a straightforward way to organize canned food in lower kitchen cabinets. Instead of keeping cans behind other products, you can arrange them in rows and see the contents when the drawer opens.
I would use adjustable dividers or sturdy trays to separate different types of food. For example, canned tomatoes can occupy one section, beans another, and smaller tins a separate compartment.
Choose organizers that fit the drawer without leaving excessive gaps. The aim is to keep cans from rolling around while still allowing you to remove individual products easily.
Before filling the drawer, check the weight limit and make sure the runners can handle the load. A drawer filled with multiple cans can be much heavier than it appears when empty.
For an affordable setup, you can use suitable acrylic trays or adjustable dividers rather than replacing the entire cabinet. Keep older cans toward the front and place new purchases behind them to make stock rotation easier.
Sliding Baskets
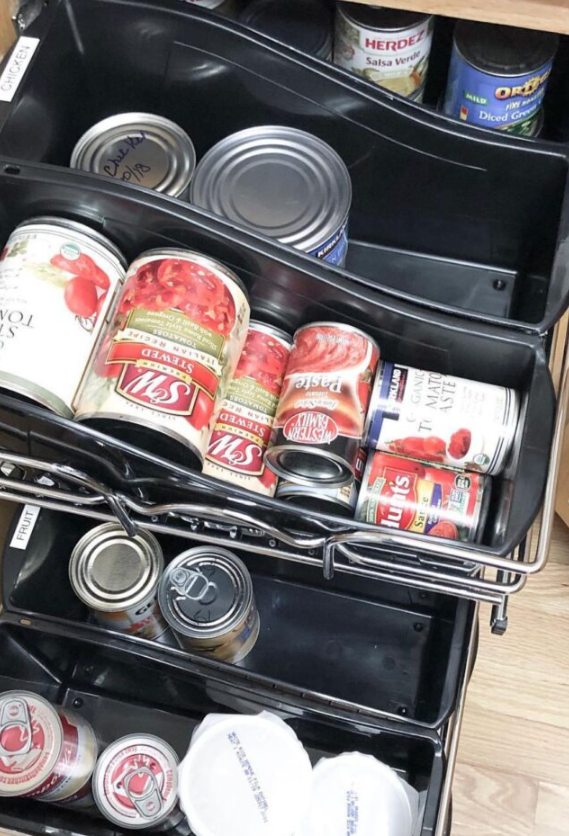
Deep cabinets can hide canned food when items are pushed toward the back. I recommend sliding baskets if you want to bring the entire storage area forward without removing products from the shelf.
Each basket acts like a separate compartment, making it easier to organize soups, tomatoes, beans, fruit, and other pantry staples. Pulling the basket out gives you a clearer view of its contents and reduces the need to reach around other cans.
Wire baskets are useful because their open sides allow you to see the stored products. You can also label each basket so everyone in the household knows where different items belong.
Before installing a sliding basket system, measure the cabinet’s interior dimensions and check the mounting requirements. Make sure the rails and frame can safely support the combined weight of the baskets and their contents.
I would use this arrangement in lower cabinets where fixed shelves make the back difficult to reach. With separate categories and a consistent restocking routine, sliding baskets can make everyday food storage much easier to maintain.
Slat Shelves
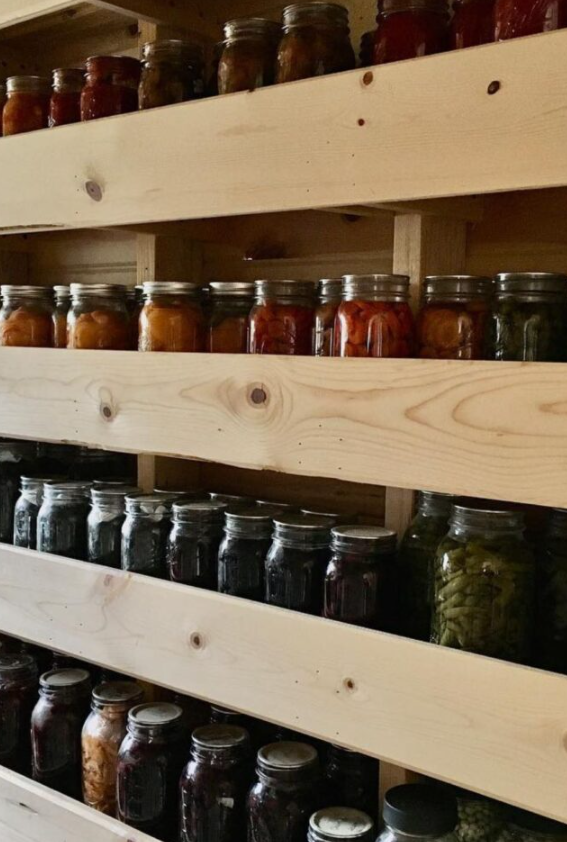
Slat shelves can provide a practical storage solution for jars and home-canned foods in larger pantries, garages, and suitable storage rooms. The design uses horizontal wooden boards or slats to create organized rows along a wall.
I would choose this approach when ordinary cabinets do not provide enough room for a growing collection of preserved food. The shelves can be arranged at different heights to accommodate jars of various sizes.
Use strong, properly supported materials and check the load capacity before storing full jars. The weight of glass containers and their contents can add up quickly, especially when several rows are placed on one shelf.
Spacing between the slats should suit the containers you plan to store. The jars must sit securely without slipping through gaps or becoming unstable when you remove a neighboring item.
For home-canned foods, I would also keep labels visible and arrange products so that older jars are easy to identify. Follow safe food-preservation guidance and check jars for signs of damage or spoilage before use.
A well-planned slat shelving system can make good use of vertical space while keeping a large collection organized and accessible.
Pantry Display
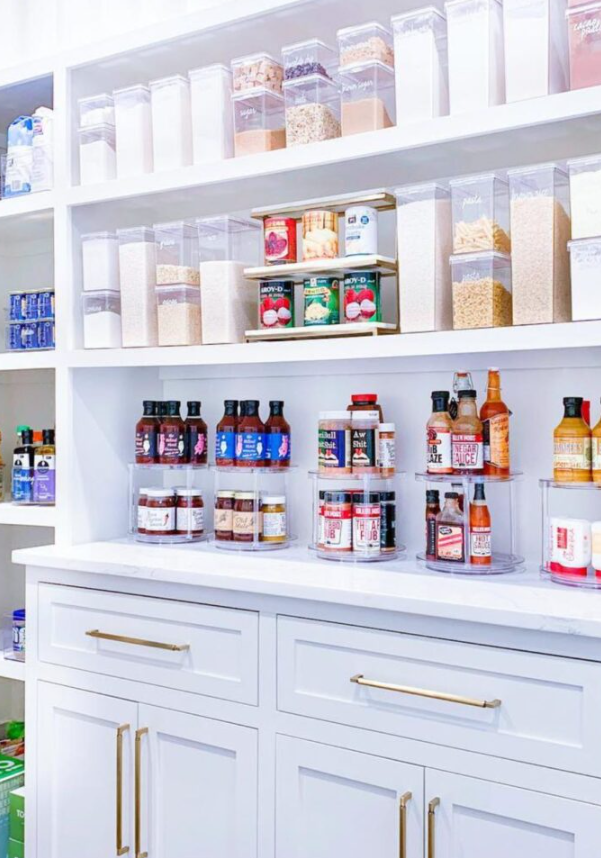
Open pantry shelving can make canned food storage easier when products are arranged in clear, visible rows. I recommend this style if you want to see your supplies quickly without opening several cabinets or moving containers around.
Start by grouping cans according to their contents. Keep vegetables together, place soups in a separate section, and give sauces or other frequently used products their own space.
You can use nearby clear containers for dry goods such as rice, pasta, and flour. Keeping dry ingredients separate from canned foods helps prevent the shelves from becoming overcrowded and makes each category easier to manage.
I would avoid stacking cans too high or arranging them so tightly that labels become hidden. Leave enough room to remove individual products safely and return them to the correct section.
Open shelving works particularly well in walk-in pantries, where there is enough space to spread items across several levels. A simple labeling system and regular restocking routine can keep the display useful rather than merely decorative.
Shelf Risers
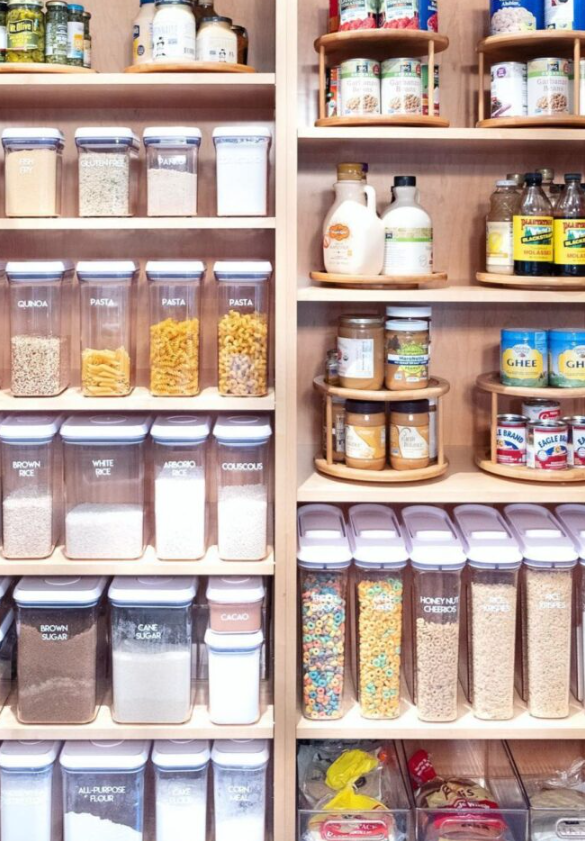
Shelf risers are a simple way to create an extra visible level inside a crowded pantry cabinet. They lift the back row of cans so that you can read the labels without moving the products in front.
I would use them for soups, beans, vegetables, sauces, and other canned foods that fit comfortably on the raised platform. Smaller products may work well on the upper level, while larger cans can remain on the lower shelf if the riser design allows it.
Measure the available shelf height before buying a riser. You need enough room above the upper level to remove cans easily, and the organizer must sit securely on the existing shelf.
Wooden, metal, and acrylic risers are available in different sizes. Choose a model with a suitable weight capacity and a stable surface, particularly if you plan to store several heavy cans together.
For narrow pantry cabinets, shelf risers can improve visibility without requiring permanent installation. I would combine them with category-based organization so each level remains easy to scan and restock.
Category Shelves

Category shelves help prevent canned food from becoming a mixture of unrelated products. I recommend assigning a specific shelf or section to each major food group so you can locate ingredients without searching through the entire pantry.
For example, one shelf can hold beans, another can hold soups, and a third can store vegetables or sauces. If you buy several varieties of the same product, keep them together so you can compare labels and check quantities easily.
This arrangement can also help with grocery planning. When similar products are stored side by side, it becomes easier to notice when supplies are running low or when you already have enough of a particular item.
I would label shelves or use small dividers if several people share the kitchen. That way, everyone can return cans to the right section instead of creating a new mess after each use.
When restocking, place newer cans behind older ones and keep labels facing outward whenever possible. A consistent system makes it easier to manage your pantry and reduces the risk of overlooking products.
Stack Towers

Vertical stacking can help you store more canned food when shelf width is limited. I would consider this option for cabinets with strong shelves and enough headroom to accommodate stable stacks.
The basic idea is to arrange compatible cans in neat vertical groups rather than spreading them across the entire shelf. However, the stack must remain stable, and you should follow any storage limits or safety recommendations provided by the can manufacturer.
Avoid creating tall, unstable towers or placing heavy stacks where they could fall when you remove a can. Use suitable stacking organizers when needed, and keep frequently used products within comfortable reach.
I would also group cans by size and category instead of mixing different shapes in the same stack. Similar containers are generally easier to arrange neatly and retrieve without disturbing the rest.
This method can work in cupboards where there is plenty of vertical space but limited shelf width. If the shelves are weak or the available height makes stacking unsafe, tiered racks or shelf risers are better alternatives.
Cubby Storage
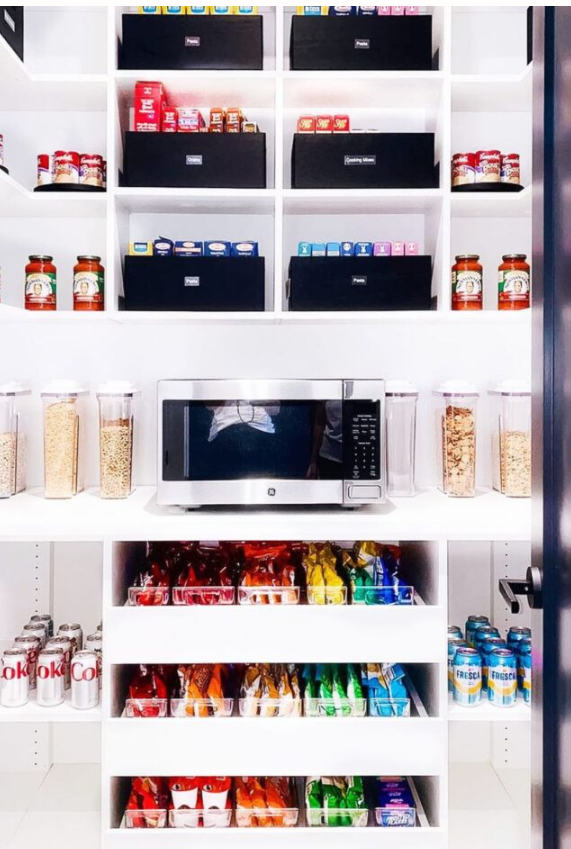
Cubby storage divides a large pantry into smaller compartments, giving each group of canned food its own space. I recommend this approach if you have a tall cabinet or pantry wall and want a clear, permanent organization system.
You can dedicate one cubby to soups, another to vegetables, and separate compartments for beans, sauces, or other canned goods. Smaller containers or dividers can help keep each group together when a compartment is wider than necessary.
The size of each cubby should match the products you plan to store. Make sure there is enough room to remove cans easily and that the shelves are strong enough to support the weight of the contents.
I would keep frequently used categories at convenient heights and place less commonly used products in other sections. Labels can also help family members return items to their correct compartments.
For easier stock rotation, arrange older cans toward the front and newer purchases behind them. This makes it simpler to check your supplies, plan meals, and keep the pantry organized as your collection grows.
FAQs
How do you organize canned food so nothing expires in the back?
I recommend using the first-in, first-out method. When you bring home new cans, move the older ones toward the front and place the newer products behind them.
Group cans by category so you can see what you have without searching through unrelated items. Tiered racks, clear bins, pull-out drawers, and shelf risers can all help keep labels visible.
Check product labels regularly and use foods within the manufacturer’s recommended time frames. Remember that best-before or best-quality dates are not always the same as safety dates, and damaged, leaking, bulging, or badly rusted cans should not be used.
For home-canned foods, follow tested preservation guidance and check that jars were processed and stored correctly. If a jar shows signs of spoilage, do not taste its contents to check whether they are safe.
What is the best place to store canned food in a kitchen?
I recommend a cool, dry cupboard or pantry away from direct sunlight, ovens, dishwashers, and other sources of heat. A stable storage environment helps protect can quality and reduces unnecessary temperature changes.
A commonly recommended storage range for shelf-stable canned foods is around 50°F to 70°F (10°C to 21°C), although you should follow the manufacturer’s instructions for the specific product. Avoid damp locations that could encourage corrosion on metal cans.
Choose a storage area that allows you to see labels and reach products without moving heavy stacks. Tiered racks, clear bins, and pull-out drawers can make even a small cupboard easier to manage.
Finally, keep cans in good condition, rotate your stock, and inspect containers before use. The best storage location is one that stays suitable for food storage and allows you to keep your supplies clean, visible, and organized.